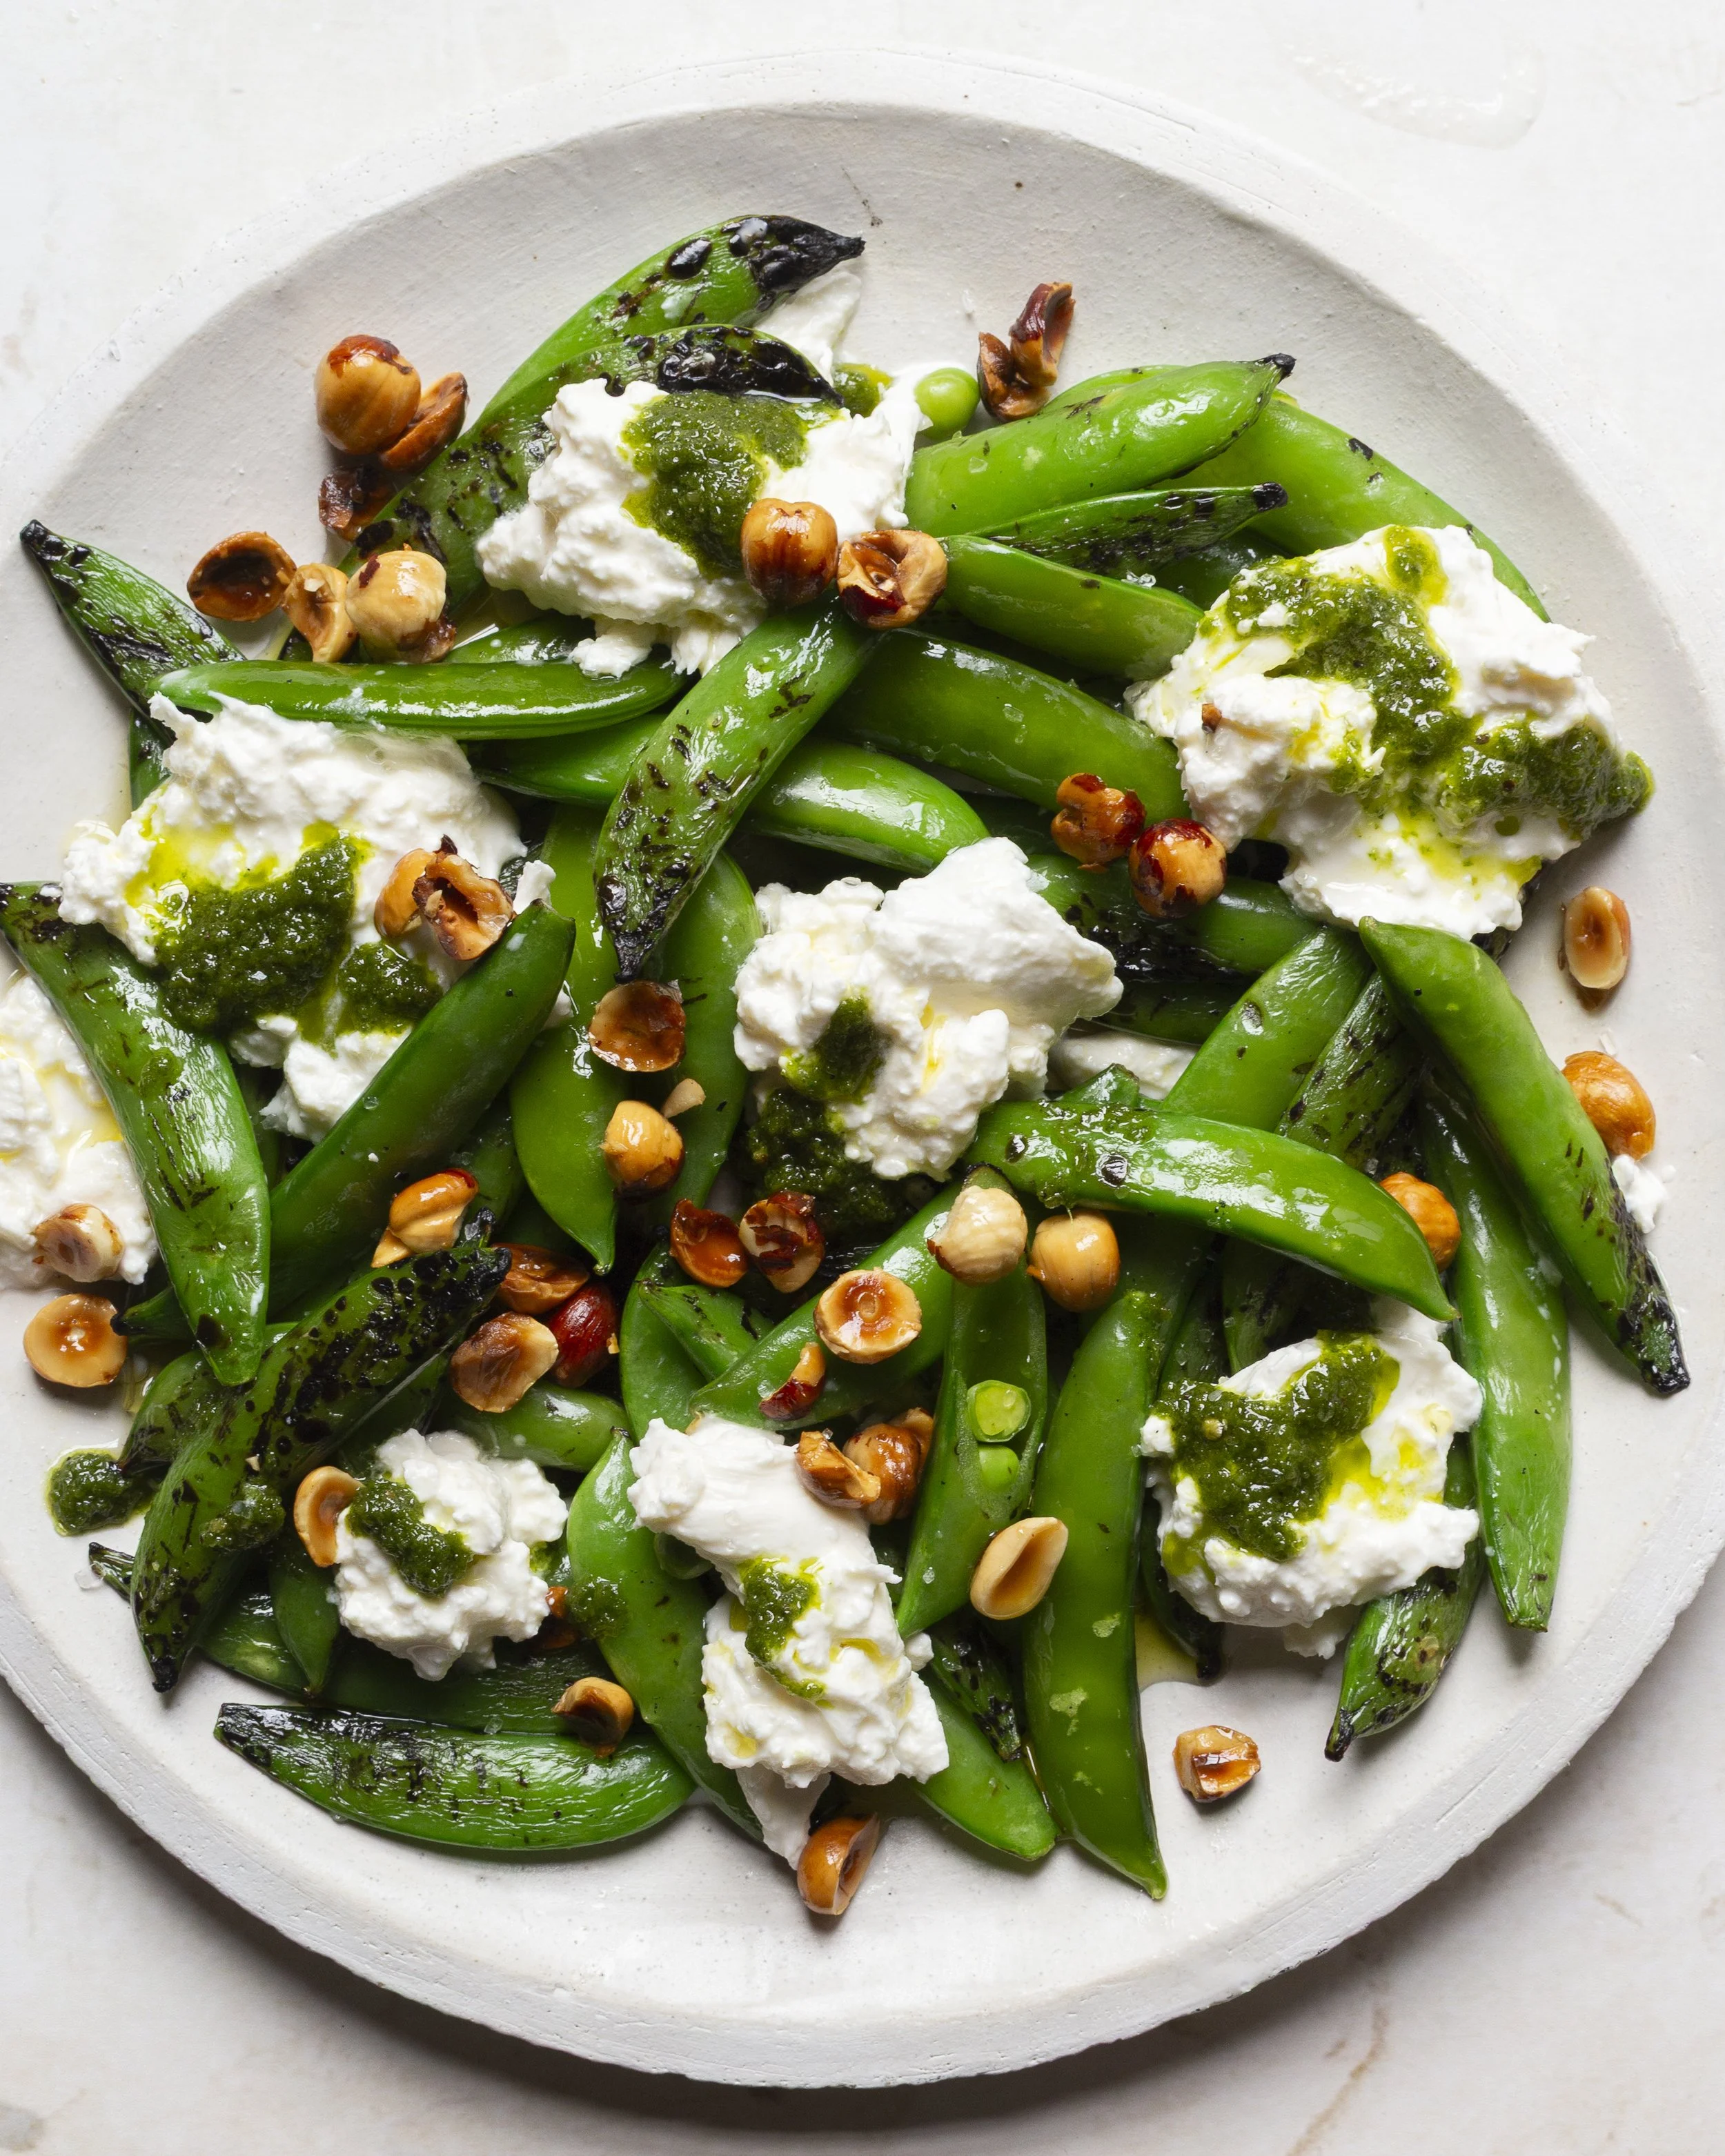
Sugar Snaps with Burrata, Zhug & Toasted Hazelnuts
I deeply regret not adding this recipe to my cookbook. It’s an incredible side or appetizer, an eclectic mix of flavors on a plate that has everyone delighted when they taste it. It all started with an excess amount of sugar snaps from the garden. I wondered how to make this otherwise dull vegetable shine. Usually I’m one to keep tender vegetable preparation extremely simple for their flavors to stand alone, but I had some zhug in the refrigerator and well, the rest is history. Bright, grassy sugar snap peas paired well with creamy burrata cheese and the addition of zhug just woke it up. When I considered texture I realized it would be a little one-note as-is, so off to the pantry I went in search of a nut or seed that could stand up to these flavors. Toasted hazelnuts seemed to bring their own charm to the plate and so it was. A refreshing spring or anytime vegetarian main, side dish, and one of my favorite things to present at parties was born.

Photo by Michelle Tresemer on Unsplash
What is Zhug?
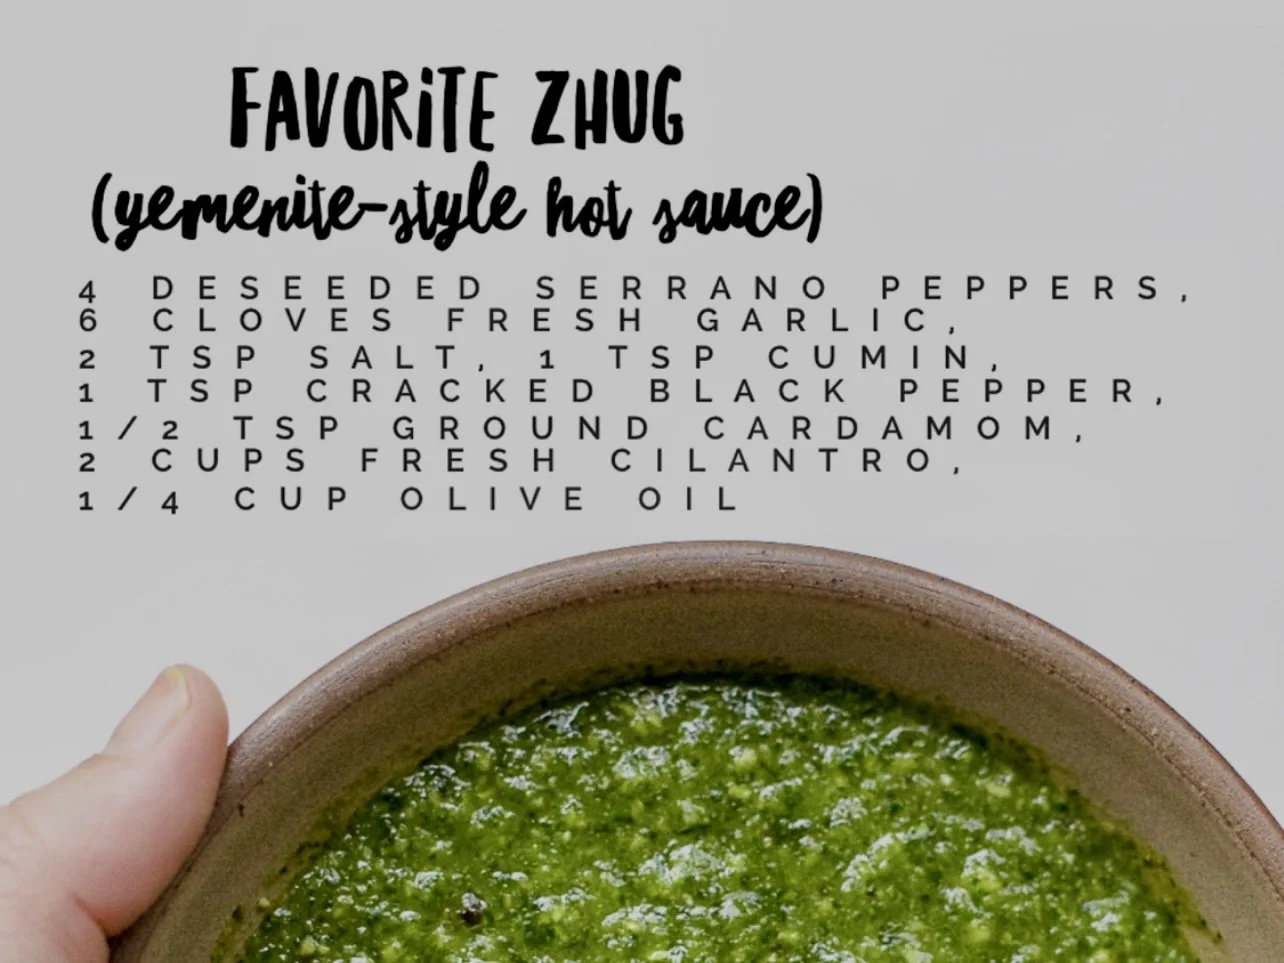
Zhug (also spelled skhug, or schug, pronounced ZOOG) is a vibrant, fiery green herb sauce originating from Yemen. It is a staple in Middle Eastern and Mediterranean cuisines, particularly in Israel, and is frequently described as a "Middle Eastern pesto" due to its texture and fresh, herbaceous flavor.
Flavor Profile: It is spicy, garlicky, citrusy, and deeply aromatic, featuring a unique warmth from cardamom. This is very important.
Ingredients: The main ingredients are fresh cilantro (often with parsley), spicy green chili peppers (like jalapeños or serranos), garlic, olive oil, and spices—usually cumin, coriander, and cardamom. Some variations include lemon juice for acidity or mint for extra freshness.
Preparation: Traditionally, it is made by pounding ingredients with two stones, but I prepare mine in a blender or food processor.
Common Uses: It is commonly used as a condiment for falafel, grilled meats (like chicken shawarma), roasted vegetables (especially cauliflower), eggs, soups, stews, and mixed into hummus or yogurt. I have a roast chicken with zhug recipe that my family absolutely adores.
Sugar Snap Peas with Burrata, Zhug & Toasted Hazelnuts Recipe
This recipe does come with a little prep but I promise you, it’s worth it. These amounts serve 4 as a side or as an appetizer. Crusty bread is always a great pairing, and a crisp glass of Sauvignon Blanc.
Make the Zhug:
2 packed cups fresh cilantro, washed and roughly chopped (2 small bunches)
1/4 cup extra-virgin olive oil (Use a robust olive oil here to stand up to the bold flavors)
6 garlic cloves
4 deseeded serrano peppers (Substitute with 2 medium jalapeño peppers for less heat)
2 teaspoons kosher salt
1 teaspoon freshly cracked black pepper
1 teaspoon ground cumin (Fresh is best!)
1/2 teaspoon ground cardamom
Place all of the above ingredients in the bowl of a food processor and pulse until bright green. 1 minute is all it takes. It’s OK to keep some texture if you prefer. Transfer to an airtight container and refrigerate for 30 minutes before using, up to 1 week. The sauce will lose vibrancy after a day or two, so that’s something to consider when hosting.
Toast the Hazelnuts and Grill the Snap Peas:
2 tablespoons extra virgin olive oil, divided
1/2 cup hazelnuts
1 lb sugar snap peas
2 (8 -ounce) balls of burrata cheese
1/4 lemon, for squeezing
Heat 1 tablespoon of the olive oil in a small skillet over medium heat. Add the hazelnuts and toast, stirring often, until lightly golden and fragrant, 1 to 2 minutes. Transfer the nuts to a bowl and set aside.
Preheat your grill or grill pan to medium-high (375 to 450 ºF / 190 to 230 ºC). I find a grill basket to be particularly useful when cooking snap peas or green beans outside on the grill. They have a tendency to fall through the cracks! Save yourself the frustration, or use a wire rack placed parallel to the grates to prevent slippage.
In a medium bowl, toss the sugar snap peas with the remaining 1 tablespoon of olive oil. Grill for 2 to 3 minutes until they are bright green, using silicone tongs or grill tongs to flip occasionally. Some charring is great, it adds a lot to the final flavor.
Plating:
Break the burrata cheese into pieces and arrange evenly on a large serving platter. Add the grilled snap peas all around, then drizzle a few tablespoons of your zhug over making sure to cover a lot of the cheese. I find burrata to be quite bland and in need of lots of salt to be palatable. Sprinkle the entire platter with your toasted hazelnuts, and squeeze over the juice of 1/4 lemon right before serving. You could have lemon wedges at the table for this in a separate bowl. The acid from the lemon does tend the dull the green of the grilled snap peas, that is why I leave it until the last minute.
If you like this recipe, you might enjoy the bold flavors of some other favorites here at The Daley Plate:
Honey Gochujang Trout
Roasted Chicken with Fennel & Peppers
Roasted Sausage, Tomato & Peach Supper with Parmesan Spaghetti Squash