The Daley Plate

  • Cookbook!
  • Index
  • Recipes
  • About
Butternut Squash Soup.JPG

Butternut Squash Soup

April 26, 2023 by Dale Gray in DINNER, HEALTHY, LUNCH, SOUP, SQUASH, THANKSGIVING, WINTER

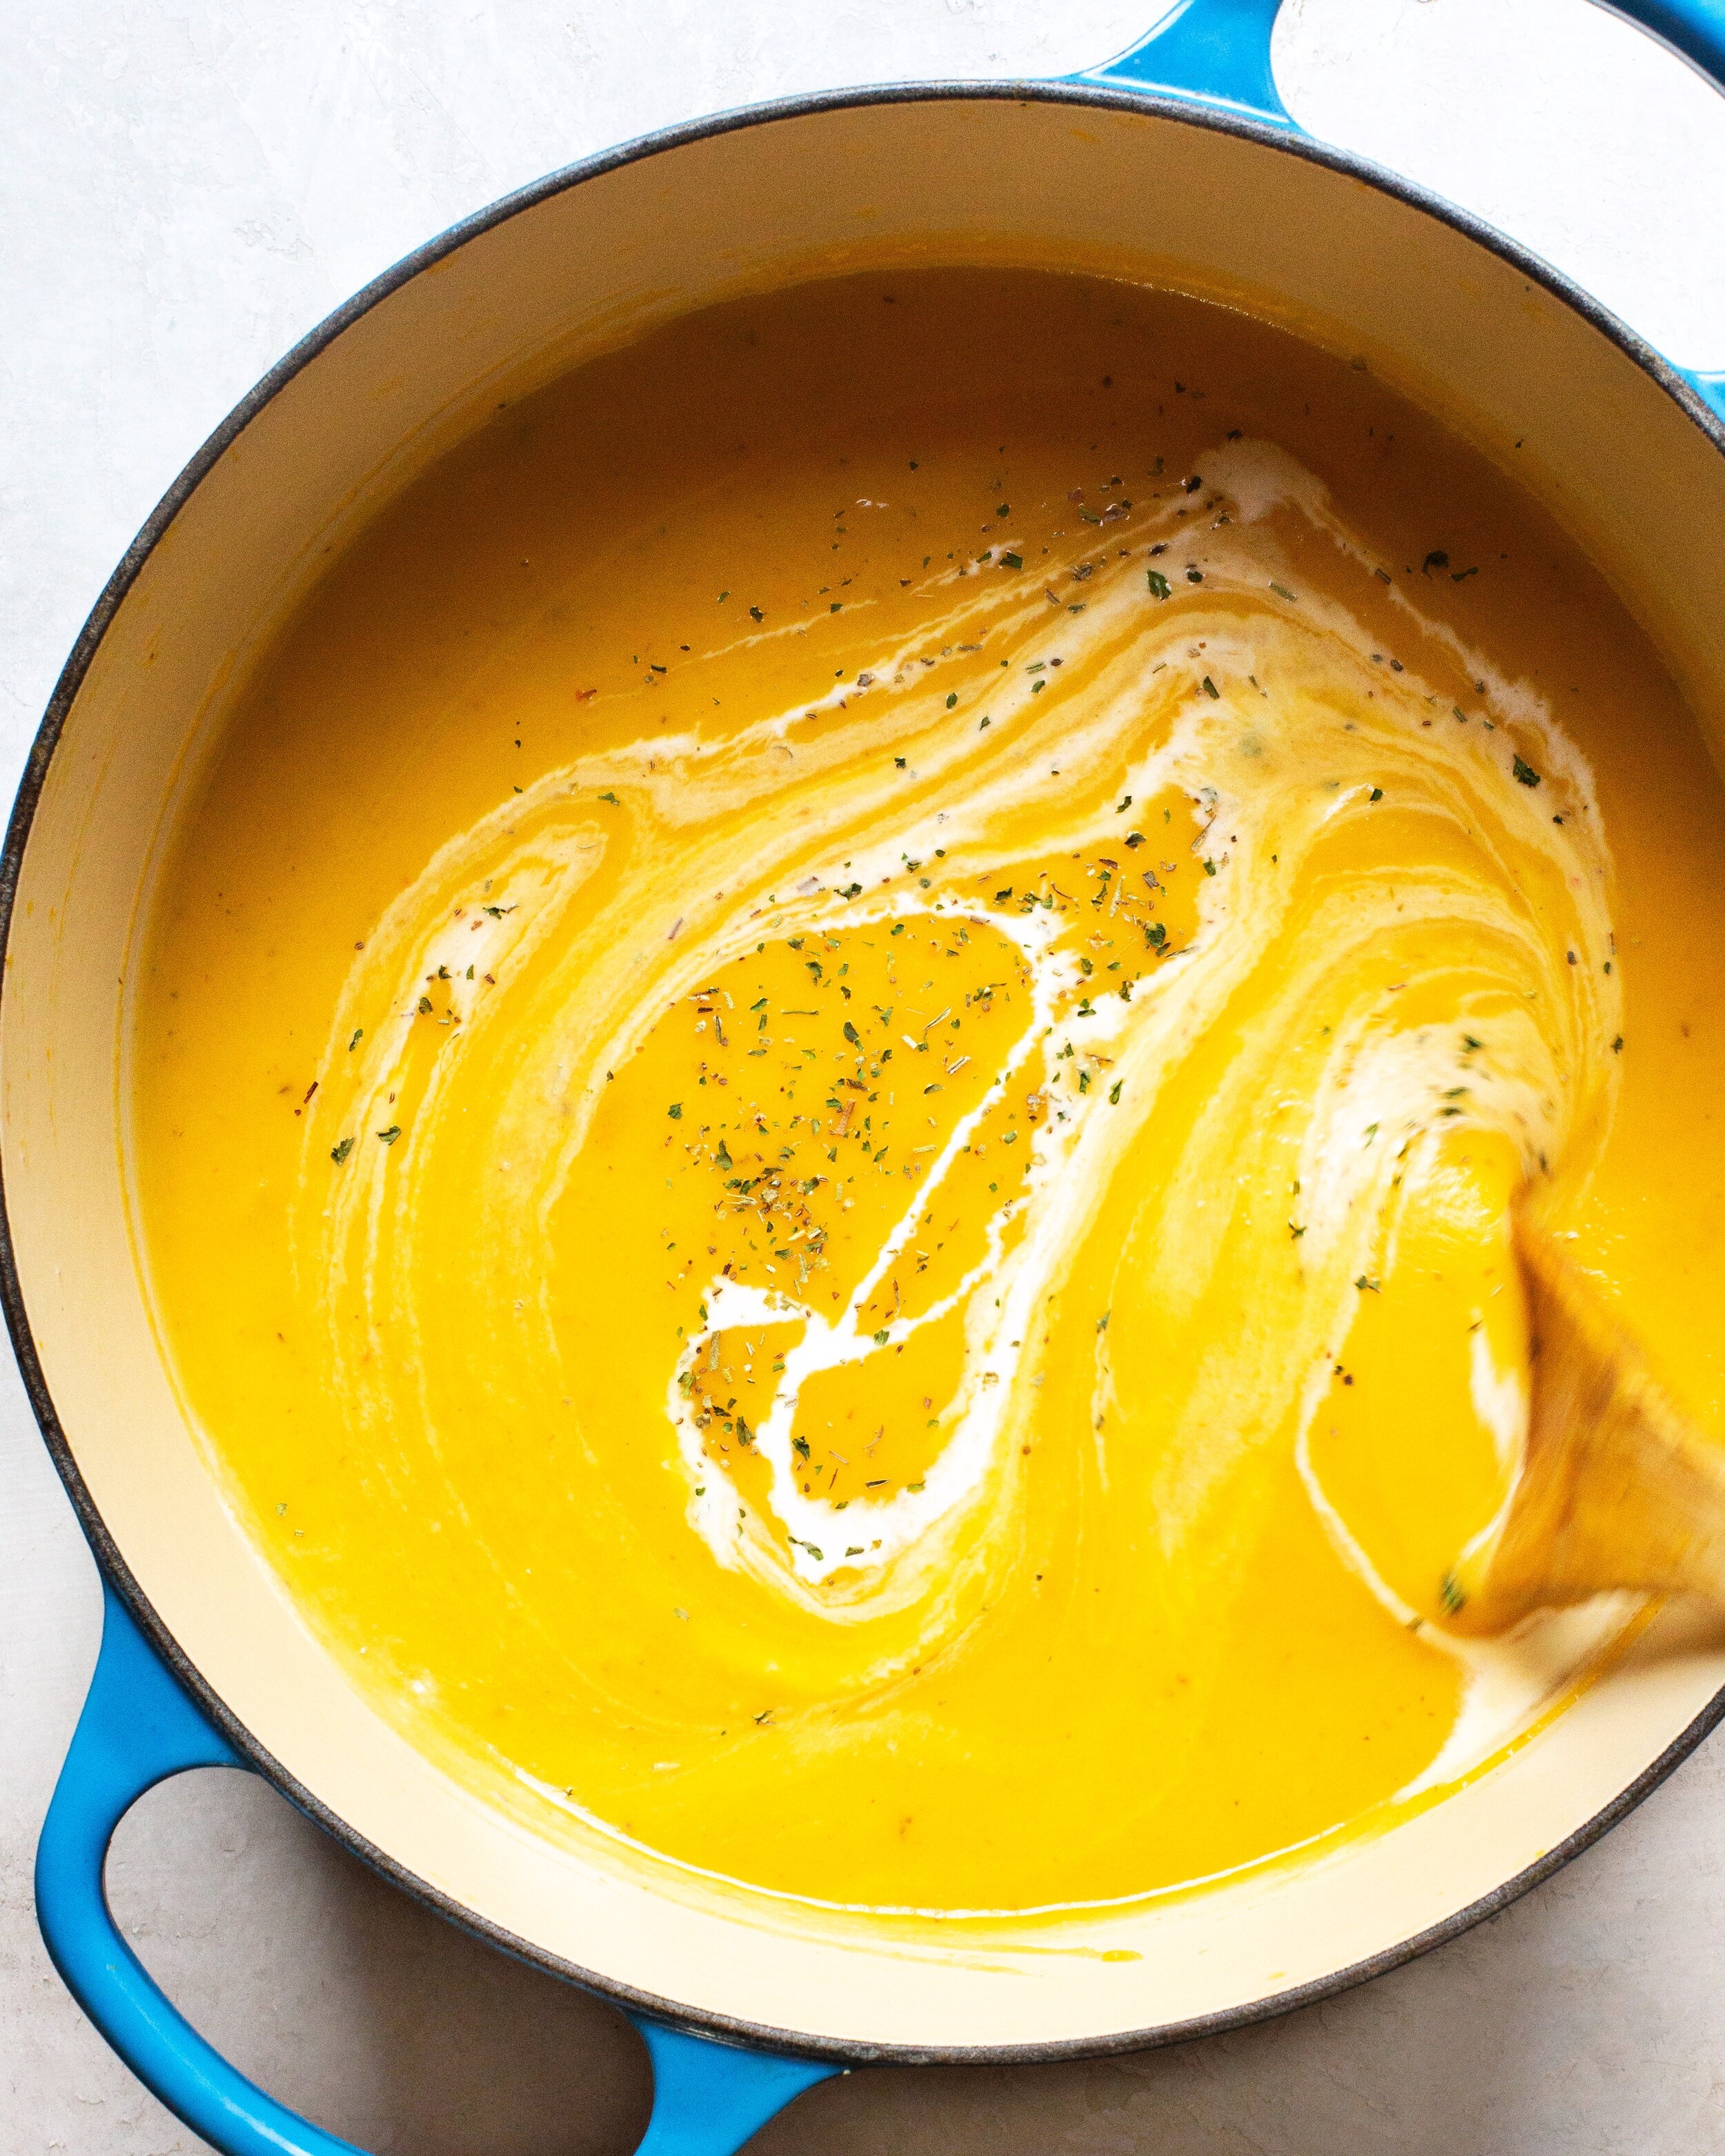
Butternut squash soup is like a golden pop of sunshine and comfort on a cold day. There’s a story behind it but I’m well aware of the fact that most people who visit blogs these days aren’t interested in the back story, and this has me feeling frustrated lately. As a hobby blogger and a home cook, the story behind a recipe is sometimes more important than SEO (Search Engine Optimization) or laying things out perfectly to make sure that the dots line up. To me, this soup is about my parents divorce and overcoming obstacles. It’s about creating something delicious with very few ingredients so that everyone can eat well, feel loved and can be forgiven.

My parents got divorced one Winter in my second year as a social work student at the University of Stellenbosch. It came at a time when my mother wasn’t always able to take care of everything by herself. As the eldest it became my responsibility to go grocery shopping and put dinner on the table, and having very little taught me to be resourceful by making meals that could “stretch.” This butternut squash soup quickly became a favorite supper, accompanied by toasted sourdough bread topped with grated gouda cheese. I made the exact same combination last week for the first time in years, and realized just how much has been overcome since I made it for my family in South Africa. I managed to graduate university by some miracle, despite not having any means to do so. Since leaving home there’s never been a day where I didn’t have anything to eat. Over time and with maturity we all managed to move past our feelings about my father. Those are big things. Really amazing things, all related to a pot of butternut squash soup.

Most of us can make soup without a recipe because it involves a few easy steps. Roast your vegetables, sauté aromatics, add stock and purée then season to taste and finish with toppings. Though it’s very simple, I hope you’ll try it with a thick slice of toasted sourdough and butter or grated smoked gouda (or both) and feel the love.

Some tips:

When choosing your butternut squash, always opt for those with a longer neck because they have more flesh.

You can roast your squash up to two days ahead of time and complete the recipe when you’re ready to enjoy it.

You can make this soup vegan by using olive oil to roast and a dairy-free milk alternative towards the end.

Add crispy pancetta crumbles or roasted squash seeds as a topping, but personally I prefer it plain.

The heavy cream is optional but makes it so deliciously creamy. When things were tight, I often added milk instead.

Butternut Squash Soup
Prep Time:
15 minutes | Cook Time: 1hr 20 minutes | Serves: 6

Ingredients:
2 medium butternut squash, peeled and cubed ( about 3 pounds)
4 tablespoons melted butter or olive oil
1 teaspoon dried thyme
1 teaspoon kosher salt
1 teaspoon cracked black pepper
2 tablespoons olive oil
1 medium yellow onion, finely diced
4 large cloves garlic, finely minced
1 small bay leaf
2-4 sprigs fresh thyme
1 quart chicken stock
1/2 cup heavy whipping cream, half n half, milk or dairy-free milk alternative

Special Equipment: Immersion blender OR blender, sheet pan

Method:
Preheat oven to 400F (200C). Place cubed butternut squash on a sheet pan or large roasting tray and drizzle with butter, then sprinkle with dried thyme, salt and pepper. Roast on the middle rack for 35-40 minutes or until very tender.

While the squash is roasting, heat olive oil in a large heavy-bottomed pot over medium heat. Add onion and garlic, sauté for 5 minutes until onion is translucent but not overly browned. Add bay leaf and thyme, followed by roasted squash and stock. Cook for 10 minutes with the lid on, then discard bay leaf and thyme sprigs and purée for 2-3 minutes using an immersion blender, or transfer to a standing blender in batches and blend for 1 minute each time until smooth. Return soup back to the pot and simmer for 10 minutes and remove from heat. Stir through heavy cream, season to taste (I love to add more herbs at this point) and serve.
April 26, 2023 /Dale Gray
lowcarb, soup, squash, butternut, winter, easy
DINNER, HEALTHY, LUNCH, SOUP, SQUASH, THANKSGIVING, WINTER
1 Comment
Chicken Soup.JPG

Spiced Up Chicken Soup

April 16, 2023 by Dale Gray in CHICKEN, DINNER, HEALTHY, KETO, LUNCH, SOUP, WINTER, THANKSGIVING

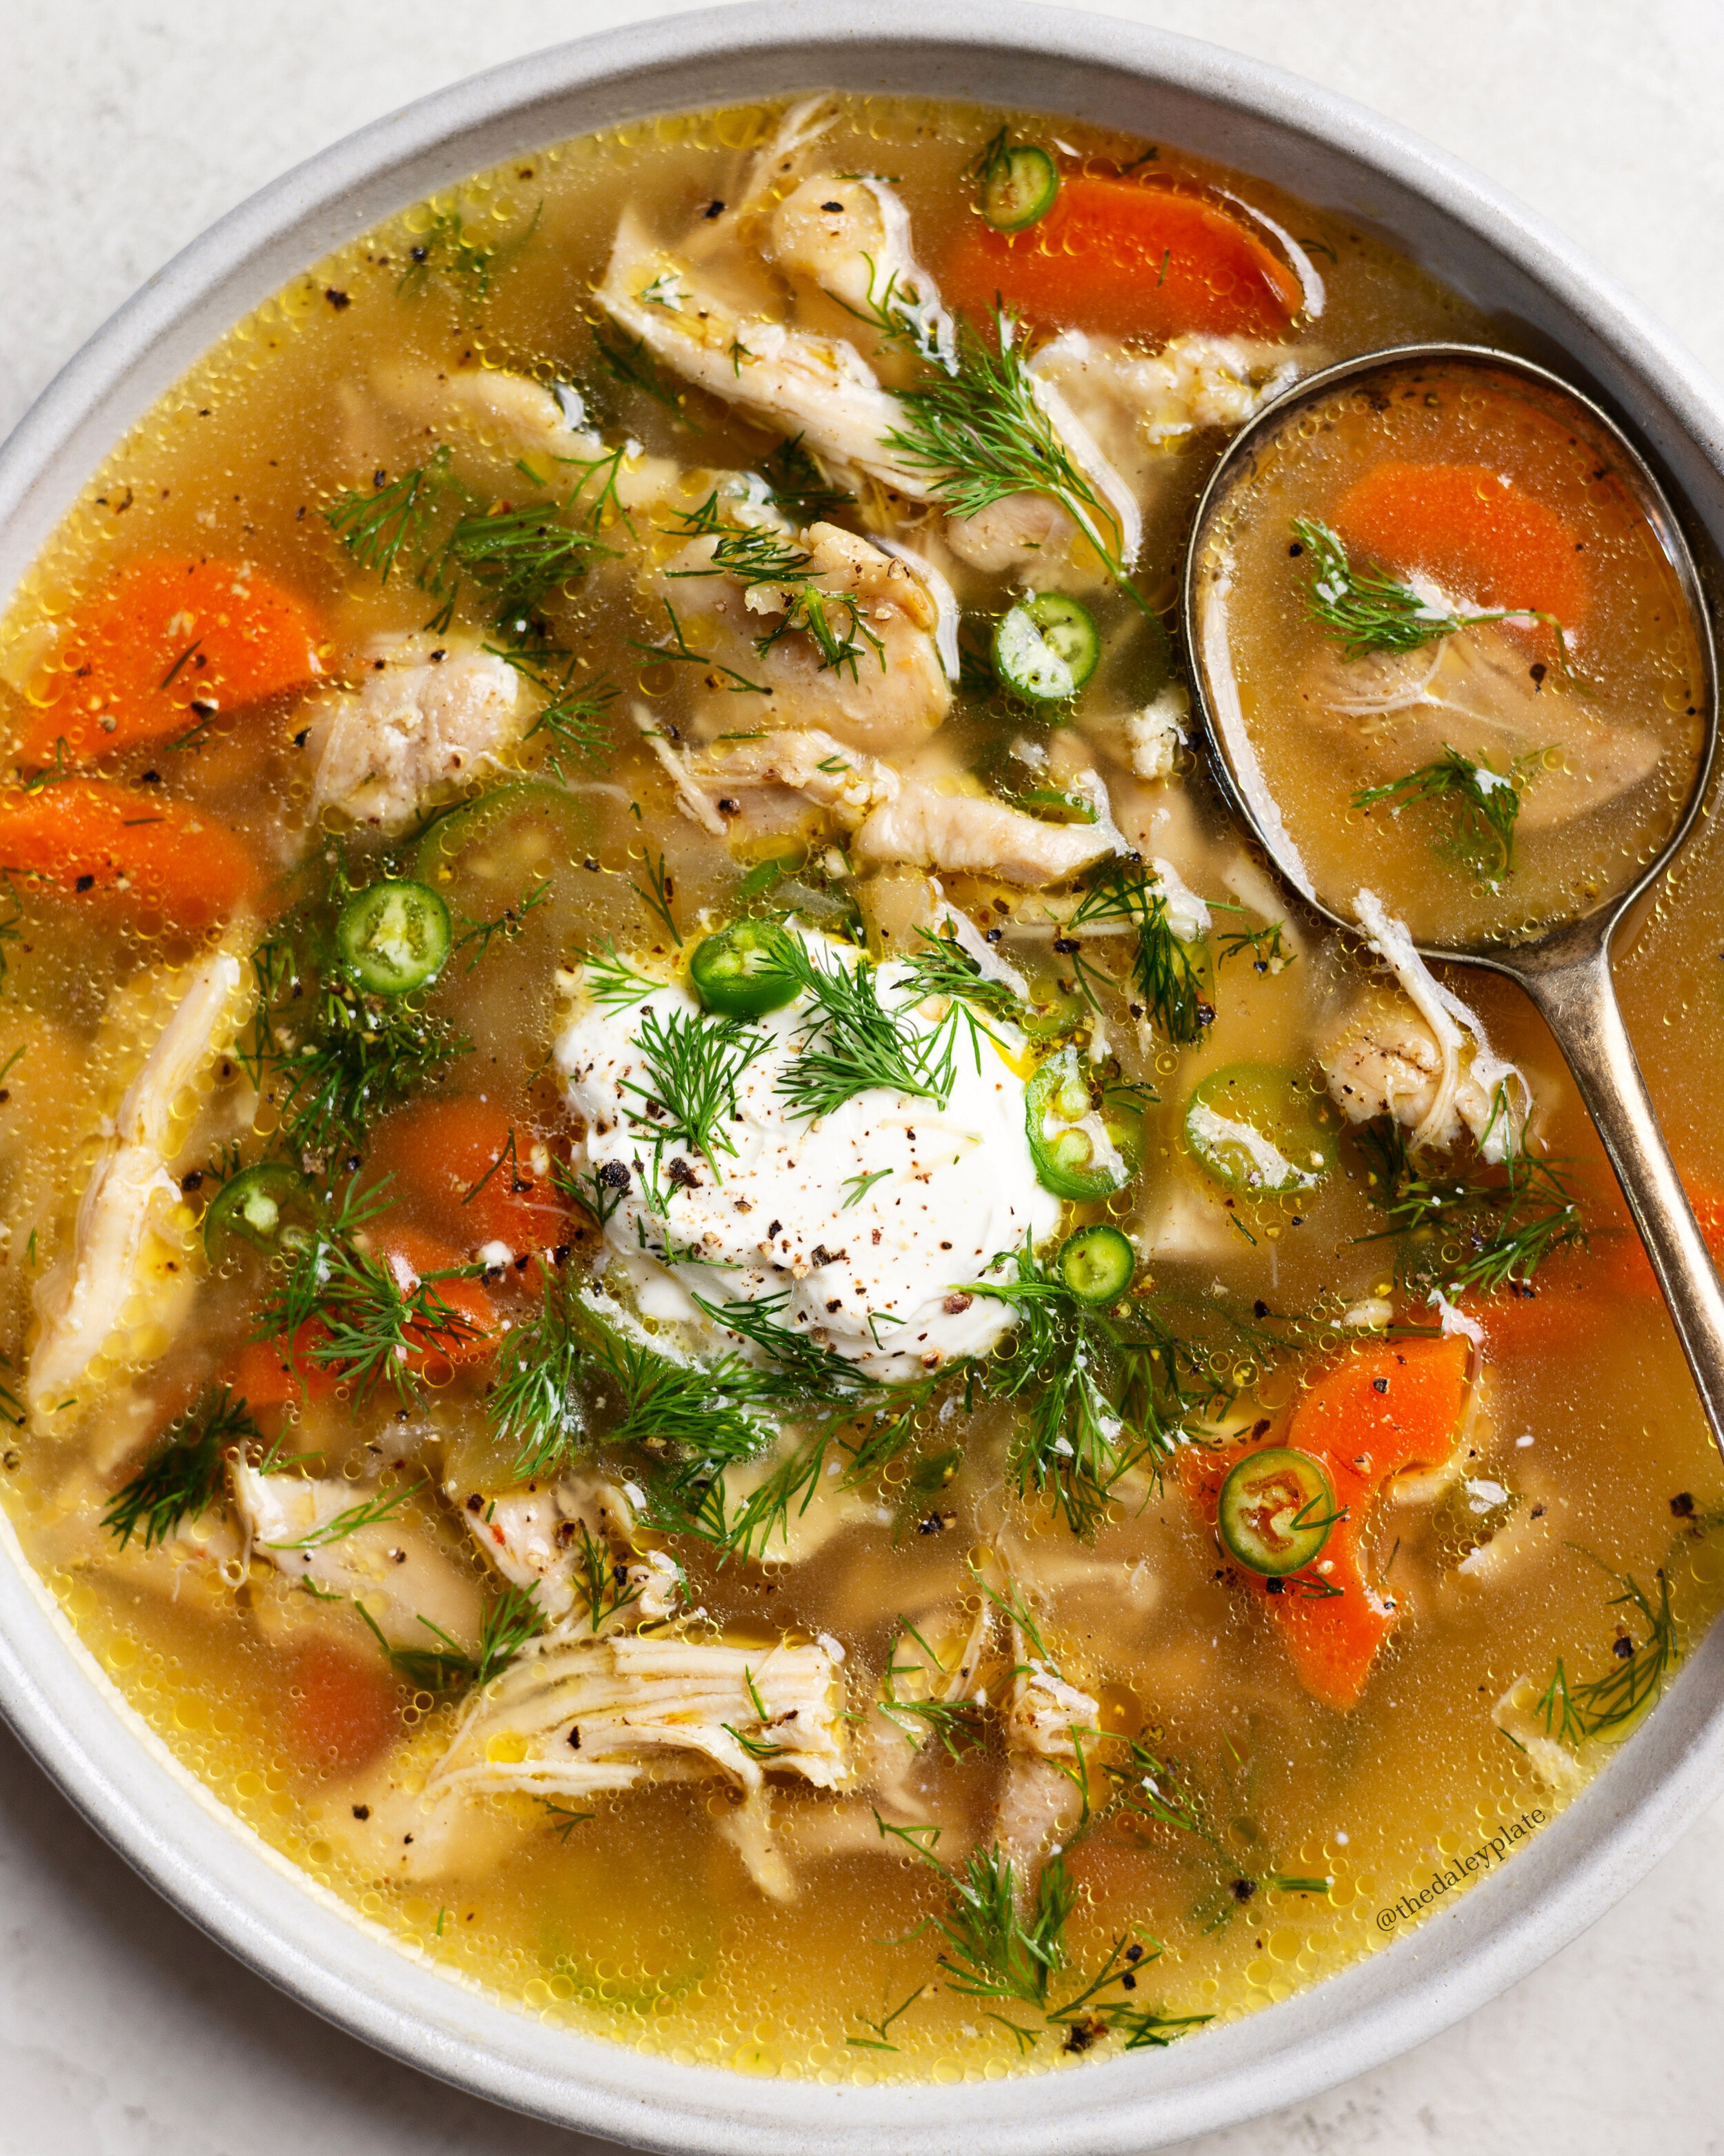
One thing that my mom always did, was cook things like soup ahead of time and freeze portions to take out later when she didn’t feel like cooking. Here, I make six quarts of flavorful blonde chicken stock and freeze six containers to take out and customize depending on what we feel like eating. I always find that during the Winter/Holiday months, after a rich meal we crave something spicy and simple. This chicken soup with serrano peppers is light yet flavorful at the same time, and the addition of dill adds a nice freshness. It’s made with the first two quarts of stock, plus the pulled chicken used. I use my Instant Pot to extract flavor quicker when I’m in a hurry, but will include stovetop directions as well. Squeeze some lemon in right before serving, or a dollop of sour cream/plain yogurt if you prefer to make it a little creamier. Please note, I’m a home cook and this is how my family prefers the soup. We are also a family of two, so if you have a big family you might find it better to freeze 3 containers of chicken stock in 32 ounce portions instead. This blog post should be used as a guide, please customize any ingredients that you feel would make a good substitute. This stock can be refrigerated for up to 3 days and frozen for a few months.

Blonde Chicken Stock Recipe:
Prep Time:
10 minutes | Cooking Time: 1 hour (Instant Pot)/2 hours (Stovetop) | Makes: 6 Quarts

3 lbs meaty chicken bones (wings, backs, necks and 2 bone-in thighs)
1 tablespoon salt
2 medium yellow onions, quartered
4-6 whole cloves fresh garlic
1 chopped celery stalk
1 bay leaf
2 sprigs fresh thyme
2 stems fresh parsley
1/2 teaspoon whole black peppercorns
6 quarts filtered water
Optional little luxury for both color and mild flavor: a pinch of saffron (I love SpiceTribe!) or 1/8 teaspoon turmeric powder (not enough turmeric to affect the flavor significantly, don’t worry!)

Special Equipment: 8 Quart Instant Pot or Stock Pot, Wooden Spoon

Instant Pot Guidelines:
Set your Instant Pot to sauté, add a teaspoon of olive oil, chicken bones/pieces and salt. Cook while stirring occasionally for 5-10 minutes until chicken starts to become golden. Add onions, garlic, celery, bay leaf, herbs, pepper and water. Scrape any sticky bits off the bottom of the Instant Pot with a wooden spoon then place the lid on and set to HIGH pressure for 1 hour. Allow pressure to release naturally for 15 minutes after cooking before opening the lid, then strain the stock, pulling any meat from the thighs and setting aside to make the chicken soup. You could strain the stock through a fine mesh sieve but I don’t mind any larger pieces of vegetable or garlic (smash that into a paste using your wooden spoon to add more flavor!) The stock will congeal and fat will rise to the top of the jars as it cools, you can either scoop it out or leave it for extra flavor.

Stovetop Directions:
Add a teaspoon of olive oil to your stock pot, add chicken and salt then sauté over medium heat for 5 minutes. Add onion and garlic, cook for 5 minutes until onions are translucent. Scrape the bottom of the pot with a wooden spoon, add remaining ingredients and bring to a rolling boil for 5 minutes. Reduce heat to medium-low (a very gentle simmer), cook without the lid for 2 hours while skimming any impurities away a few times. Strain the broth, pulling any chicken from the thighs and discard the bones.

Set 2 quarts of stock aside, freeze or store the remaining in airtight containers.

Spiced Up Chicken Soup

1 tablespoon olive oil or butter
1 small yellow onion, finely diced
4 cloves finely minced garlic (better yet, make a paste using the flat of your knife)
1 serrano chili pepper, thinly sliced (plus more for serving)
1/2 cup peeled, thinly sliced carrot
1/4 cup thinly sliced celery (I sometimes skip this)
2 quarts (32 ounces) chicken stock
2 cups cooked chicken (use the thigh meat from the broth)
Optional flavor booster: 1 teaspoon of this roasted garlic stock base adds so much more flavor, just don’t add extra salt if using.
salt and pepper to taste
a dollop of sour cream or plain yogurt, fresh dill and more thinly sliced serrano pepper to serve.

Heat a heavy bottomed pot over medium, add olive oil or butter, onion, garlic, serrano pepper, carrot and celery. Sauté for 10 minutes until vegetables are tender. Add chicken stock and simmer for 5 minutes, add shredded chicken, the optional roasted garlic base if using and season the soup to taste with salt and pepper. Divide into bowls, add a dollop of sour cream and lots of fresh dill plus extra serrano peppers for more spice if that’s your preference.

Here are some soups I make with the chicken stock:

I simmer 1 quart of the stock and add in some store-bought frozen chicken dumplings, then add a chopped green onion and some grated fresh ginger. Finish with a dash of soy sauce and serve.
I sauté a chopped onion, 4 cloves garlic and throw in 2 cups chopped potatoes and 1 quart of the stock. Simmer until the potatoes are tender, add 2 tablespoons chopped chives and 1/4 cup heavy cream. Ta-da potato soup.

I sip on the stock as is when I need a warm pick-me-up!

I simmer the stock and throw in any leftover cooked vegetables plus a teaspoon of Thai yellow curry paste, then finish with 1/4 cup coconut milk for a quick meal.

April 16, 2023 /Dale Gray
CHICKEN, DINNER, HEALTHY, KETO, LUNCH, SOUP, WINTER, THANKSGIVING
3 Comments
chicken skillet.jpg

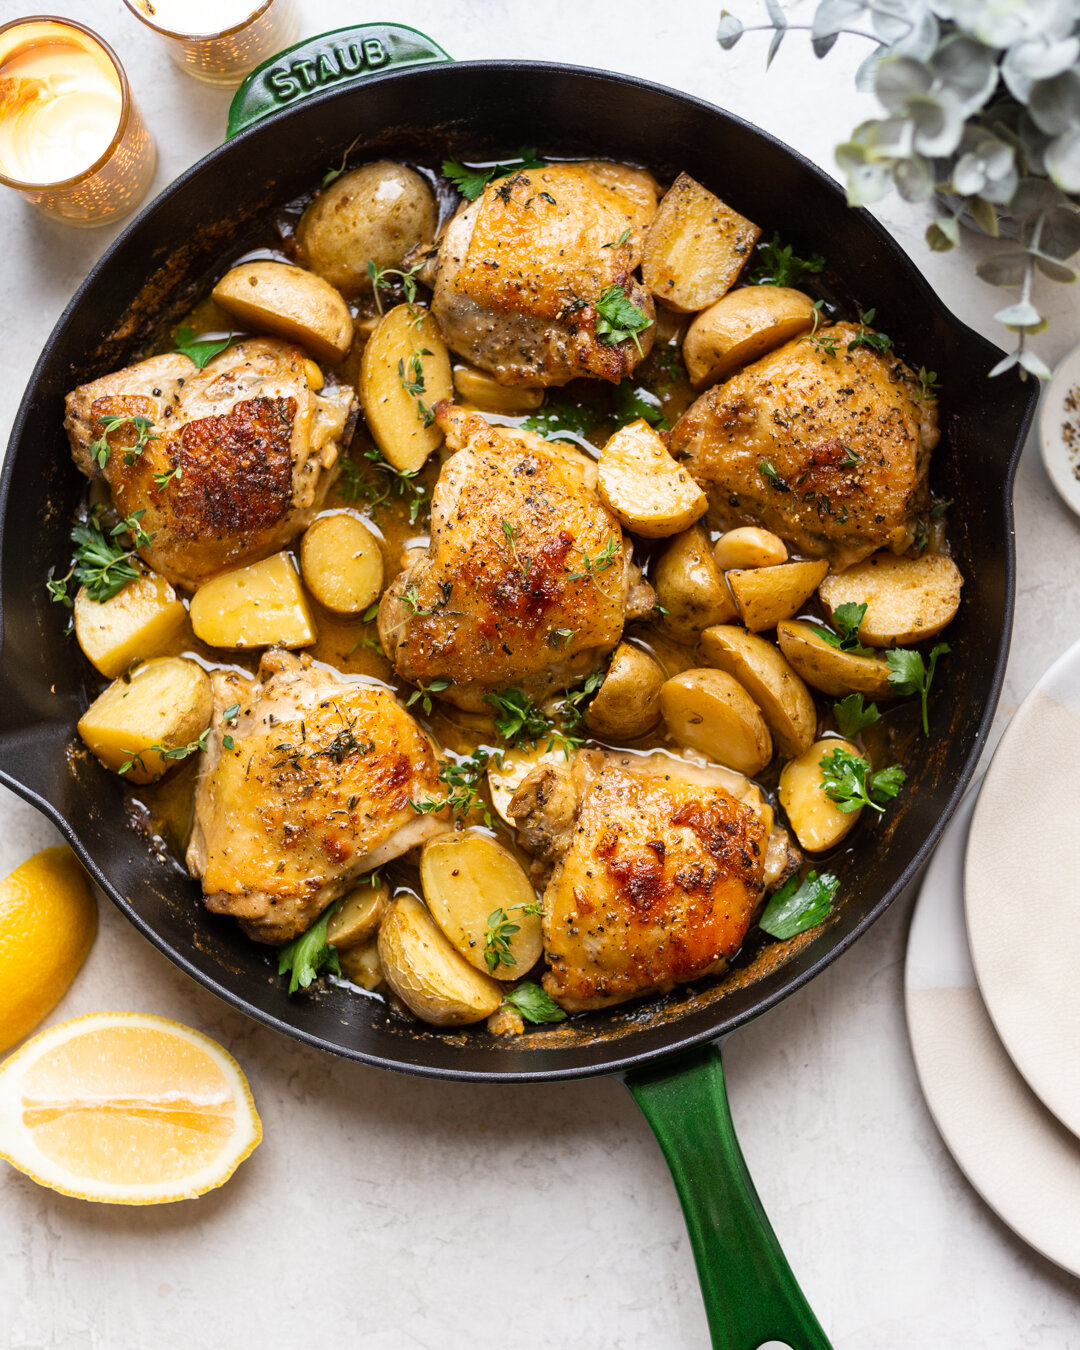
Lemon Herb Chicken and Potato Skillet Dinner

December 09, 2020 by Dale Gray in CHICKEN, DINNER, HEALTHY, LUNCH, WINTER, THANKSGIVING

Here’s a quick and easy dinner that you can either enjoy over rice, sauteed vegetables or even pasta. One skillet, a few basic ingredients…

chicken skillet (1 of 1)-2.jpg
chicken skillet (1 of 1)-3.jpg
chicken skillet (1 of 1)-4.jpg

Ingredients:

6 bone-in skin on chicken thighs
1 tablespoon Cavender’s Greek seasoning (You probably have it because you made the chicken patties hehe)
1/2 teaspoon kosher salt
1 teaspoon black pepper
1 lemon, zest and juice
3/4 cup low sodium chicken stock
4 tablespoons melted butter
1 tablespoon Dijon mustard
1 tablespoon fresh thyme leaves
10 cloves garlic
1 lb baby potatoes, sliced in half
fresh herbs to finish

Special Equipment: Cast iron skillet. It’s easy to transfer from stovetop to oven and makes a great gift!

Guidelines:

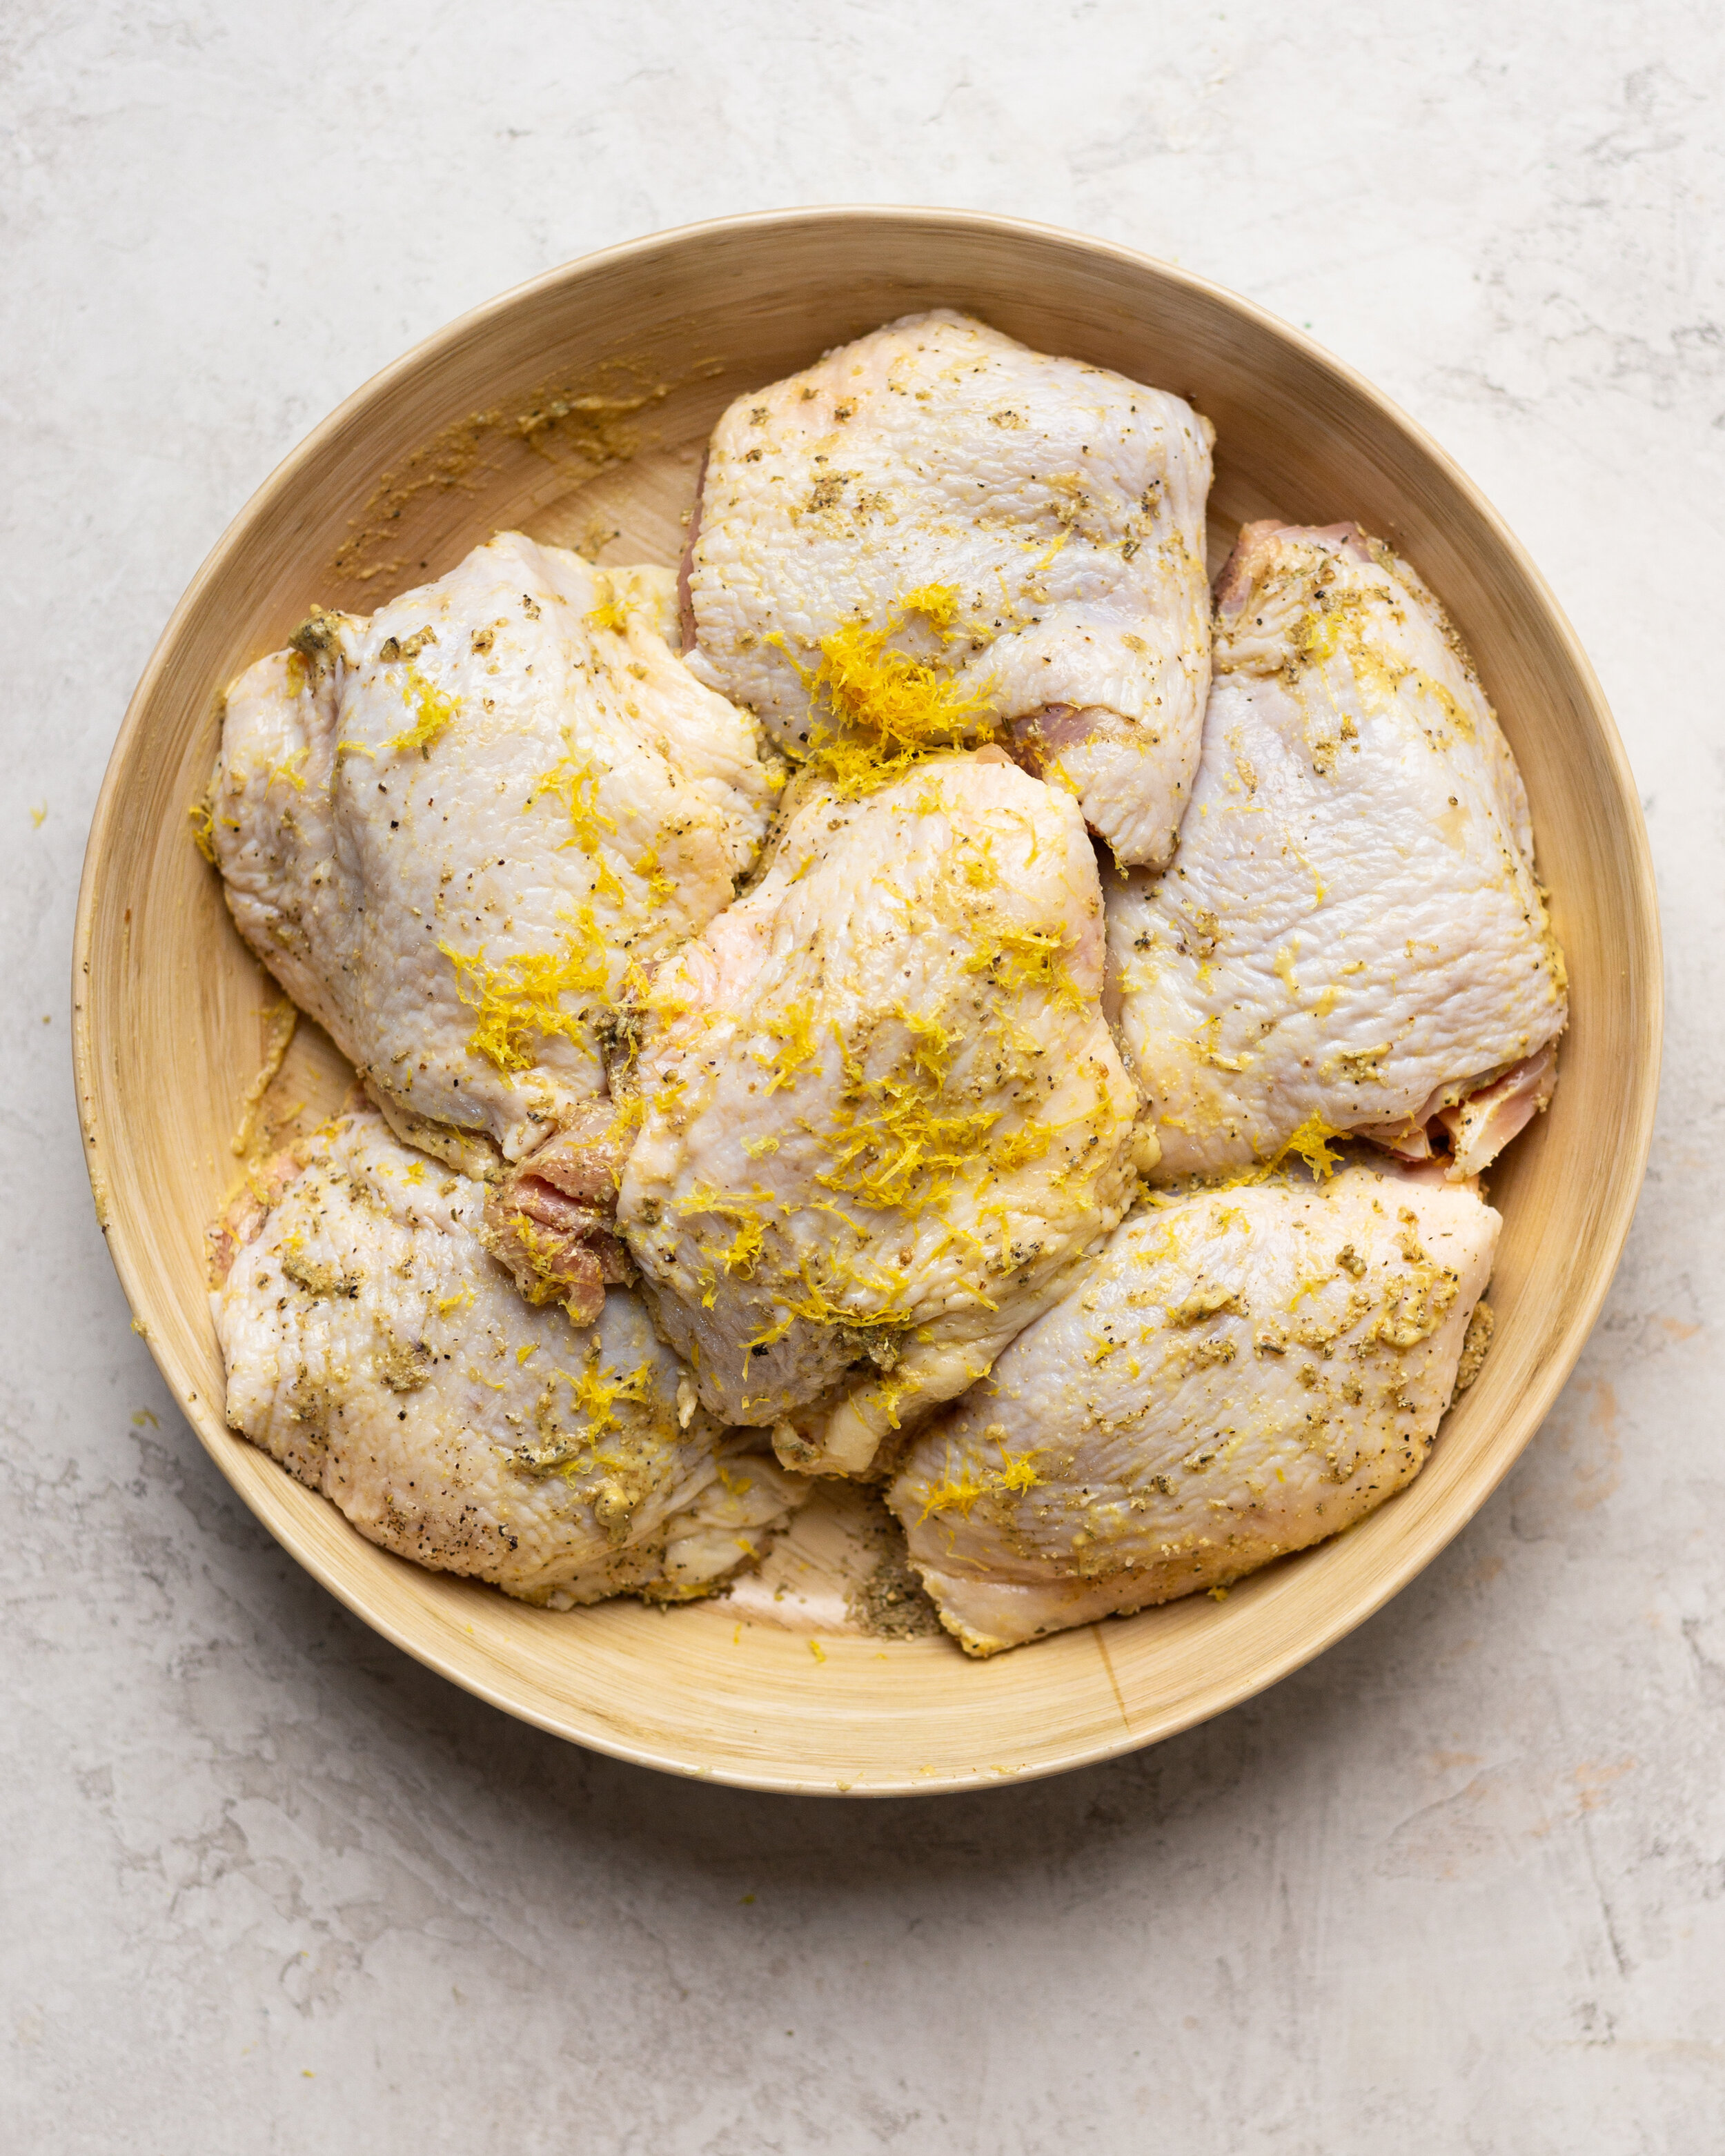
Season chicken thighs with Cavender’s, salt, pepper and lemon zest. Make sure it’s rubbed in all over, cover and refrigerate overnight or minimum 3 hours. Remove from refrigerator 1 hour before cooking for the chicken to come closer to room temperature. This will keep it juicy.

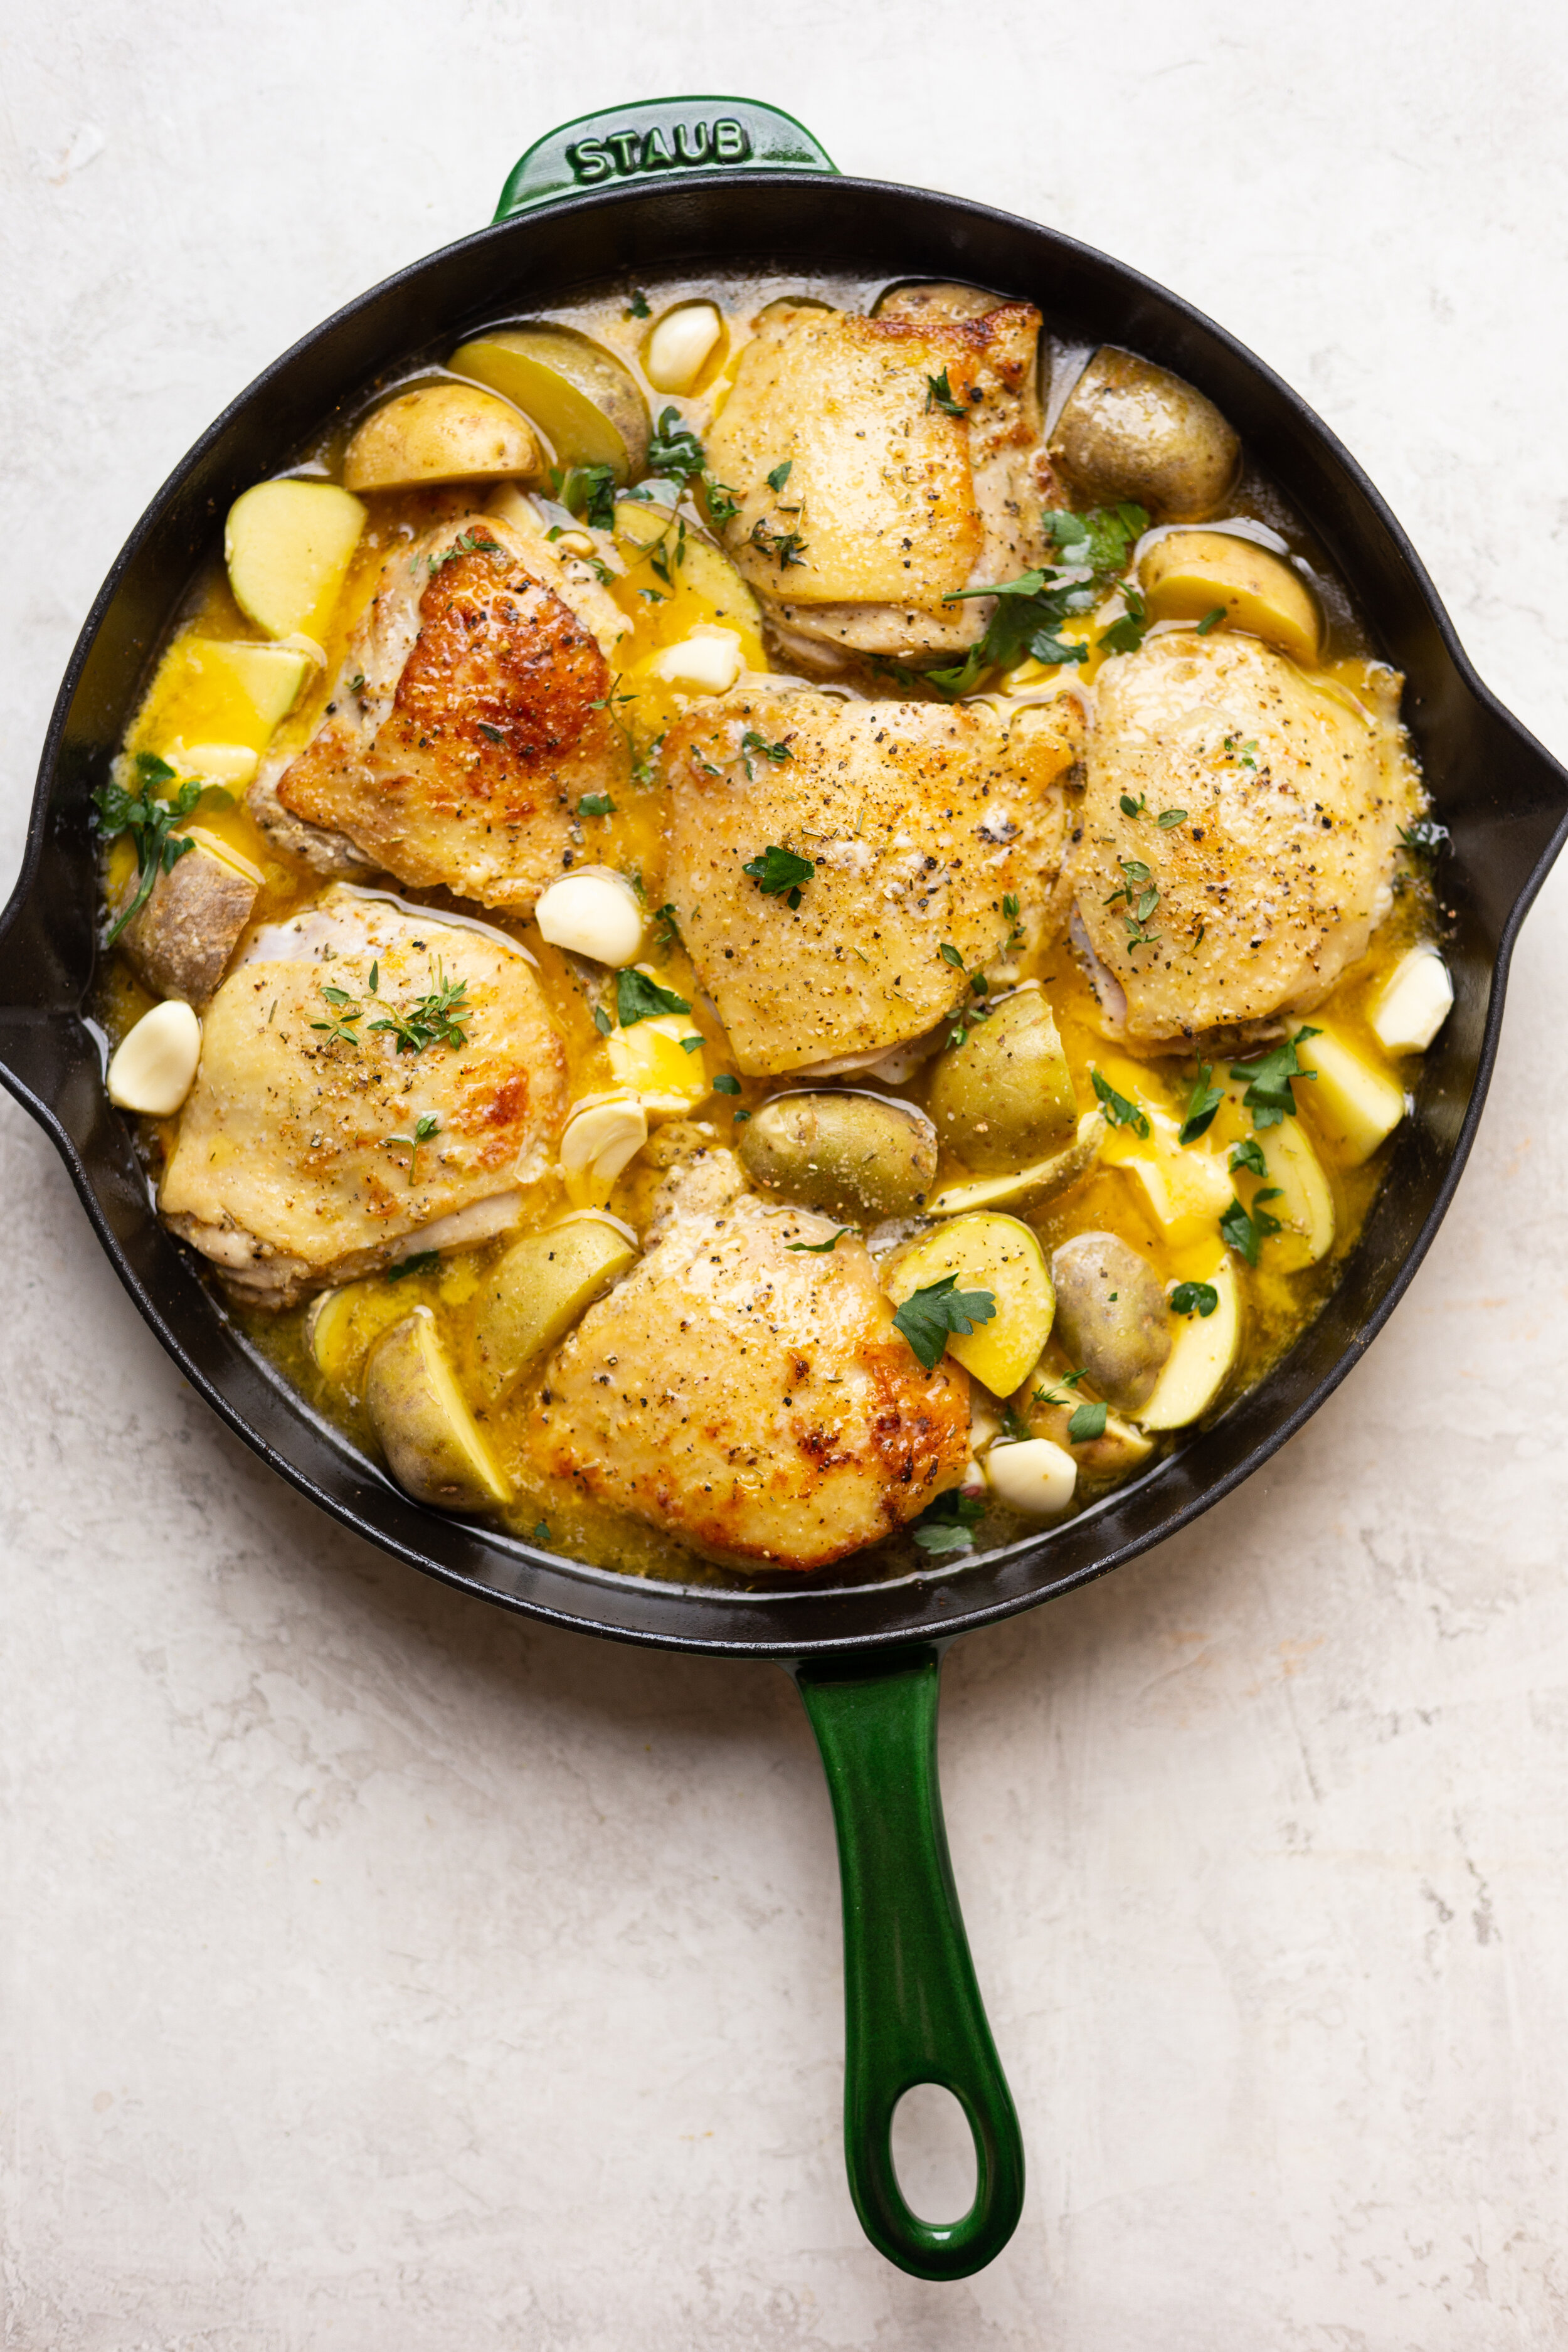
Preheat your oven to 375F (I use the roast setting). In a skillet over medium heat, sear chicken for 5 minutes per side until golden. Start with the skin side down and then flip. Whisk butter, chicken stock, the juice of your lemon, fresh thyme and mustard in a small bowl, pour into the skillet with chicken. Loosen any sticky bits from the bottom, that’s great flavor. Add your potatoes and whole garlic cloves. Roast for 30 minutes until potatoes are tender and chicken is golden. Remove from oven, smash the garlic cloves into the sauce and scatter with fresh herbs then serve!


December 09, 2020 /Dale Gray
CHICKEN, DINNER, HEALTHY, LUNCH, WINTER, THANKSGIVING
1 Comment
Braised American Lamb Shoulder.JPG

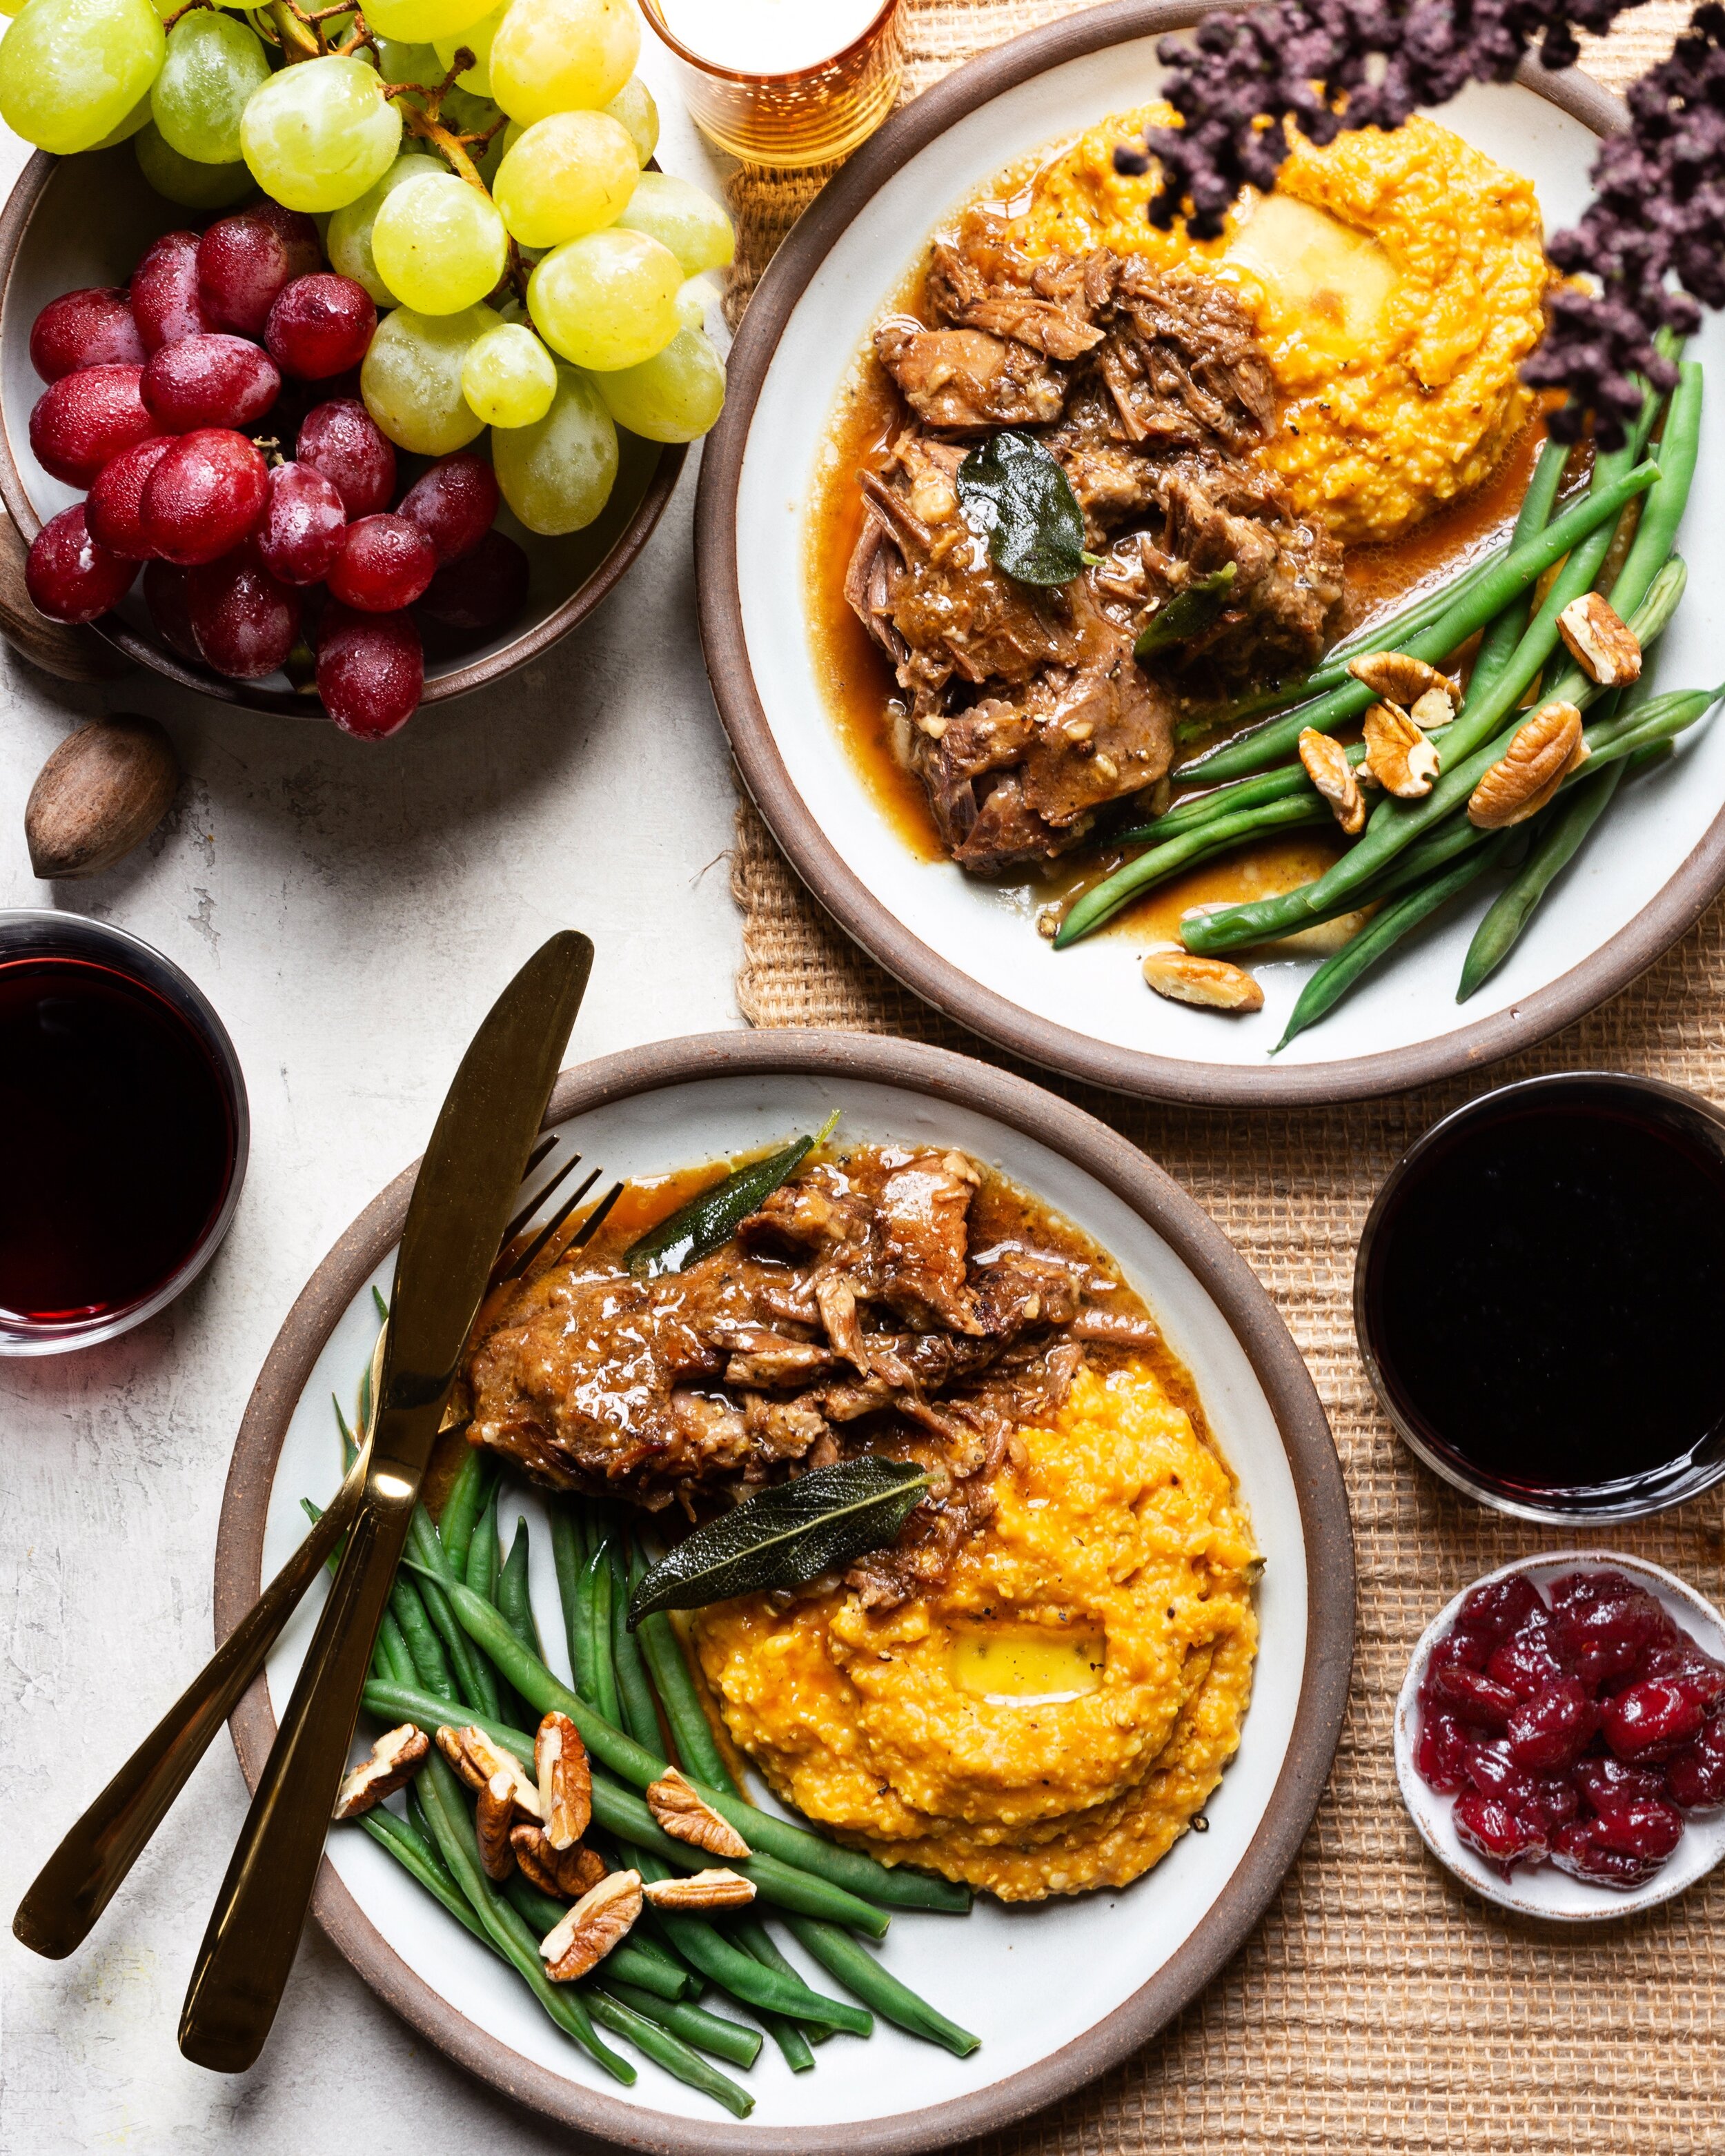
Braised American Lamb Shoulder with Pumpkin Smoked Gouda Grits

November 20, 2020 by Dale Gray in DINNER, HOLIDAY, LOUSIANA, SIDES, THANKSGIVING, WINTER

This recipe is brought to you in partnership with the American Lamb Board. I am proud to serve delicious American Lamb to my family, supporting American shepherds and their families in sustaining working farmland and farm communities.

When we were kids this kind of meal was called “huiskos” ~ The Afrikaans word for a weeknight meal. There was always pumpkin when it was in season, always some kind of green vegetable and most likely always lamb on the table. Whether it was braised in the Winter months or some chops seared during the Summer, lamb has always been a very traditional protein where I’m from. Naturally, I try to carry those traditions on now that I’m working and living here in the American South. Keeping those memories alive by adapting or recreating mom’s recipes with American Lamb and the ingredients that can be found here is truly a joy for me. This meal is home cooked and heartwarming, will feed your soul and warm you up on a chilly day. Serve it for Friendsgiving or Thanksgiving this year, maybe put it on your date-night menu for two and enjoy the tender lamb leftovers in a delicious grilled cheese the next day. Either way, it’s simple and flavorful and you can’t go wrong. 

With the holidays upon us, the American Lamb Board is spreading cheer by hosting a number of fun giveaways on both their Facebook and Instagram page. For #TheLambChallenge, comment on the giveaway posts with a lamb recipe you'll enjoy for the holidays and be entered to win great prizes! Find more information on the American Lamb website here.

Why American Lamb Shoulder?

Lamb shoulder is located at the top of the back, near the head. It’s a great cut for braising or slow cooking because it develops a lot of  flavor due to the amount of work that part of the animal gets. I always prefer to cook it with the bone in to increase that flavor even more. You can ask your butcher for this cut, or check out the American Lamb website to receive a customized list of grocers, butchers, restaurants and/or wholesale suppliers that sell homegrown lamb in your neck of the woods. I love the online butcher Porter Road for sourcing my American lamb, here’s $15 off your first order from them!

American Lamb (1 of 1)-6.jpg
American Lamb (1 of 1)-5.jpg American Lamb (1 of 1)-4.jpg American Lamb (1 of 1)-3.jpg

Some handy tips before you get started:

I used lamb shoulder in this recipe because it is great value for money. Other cuts that would work wonderfully are: Stew meat, bone-in or boneless leg.

You can absolutely cook this recipe on the stovetop in a dutch oven. Just place the lid on after adding the lamb shoulder and braise over medium heat for 2 ½ hours. Be sure to check it and add more liquid as necessary, since a lot of moisture will evaporate using this method. 

While canned pumpkin puree is great, homemade pumpkin or squash puree will give the grits a fresher flavor. To roast your own pumpkin, preheat the oven to 425F. Half a small pie pumpkin and remove seeds, then drizzle with olive oil and place on a baking sheet cut side down. Roast for 40 minutes and remove from the oven. Carefully peel off the skin while warm and use an immersion blender to make a puree. Use one cup in the recipe and store the remaining pumpkin in an airtight container for up to 3 days in the refrigerator. It’s handy to use in soups, pies or other desserts.

White miso paste is not mandatory here, but it’s a secret weapon when it comes to umami flavor! It seems unconventional but it will provide some wonderful depth. Find it at your local grocery store or even Amazon!

American Lamb (1 of 1)-7.jpg

Braised American Lamb Shoulder with Pumpkin Smoked Gouda Grits
Prep Time: 25 minutes | Cook Time: 1 hour 15 minutes | Serves: 6-8 people 

For the Lamb:

1 3 pound bone-in American Lamb shoulder
1 1/2 tablespoons Cajun seasoning
1 teaspoon freshly ground black pepper
1 teaspoon kosher salt (If your Cajun seasoning has salt, omit this)
1 tablespoon olive oil
1 large yellow onion, sliced
8 cloves garlic, finely minced
1 tablespoon fresh thyme leaves
1 fresh bay leaf
2 cups beef broth
1 1/2 tablespoons white miso paste
1 tablespoon brown gravy powder (I like to use Bisto, because I grew up eating it)

For the Grits:
3 ½  cups vegetable stock
4 tablespoons butter
2 cups grits or instant polenta 
1 cup pumpkin puree
½ cup heavy cream
8 ounces grated smoked gouda cheese 
To serve: Sage leaves crisped up in olive oil, steamed vegetables

Method:

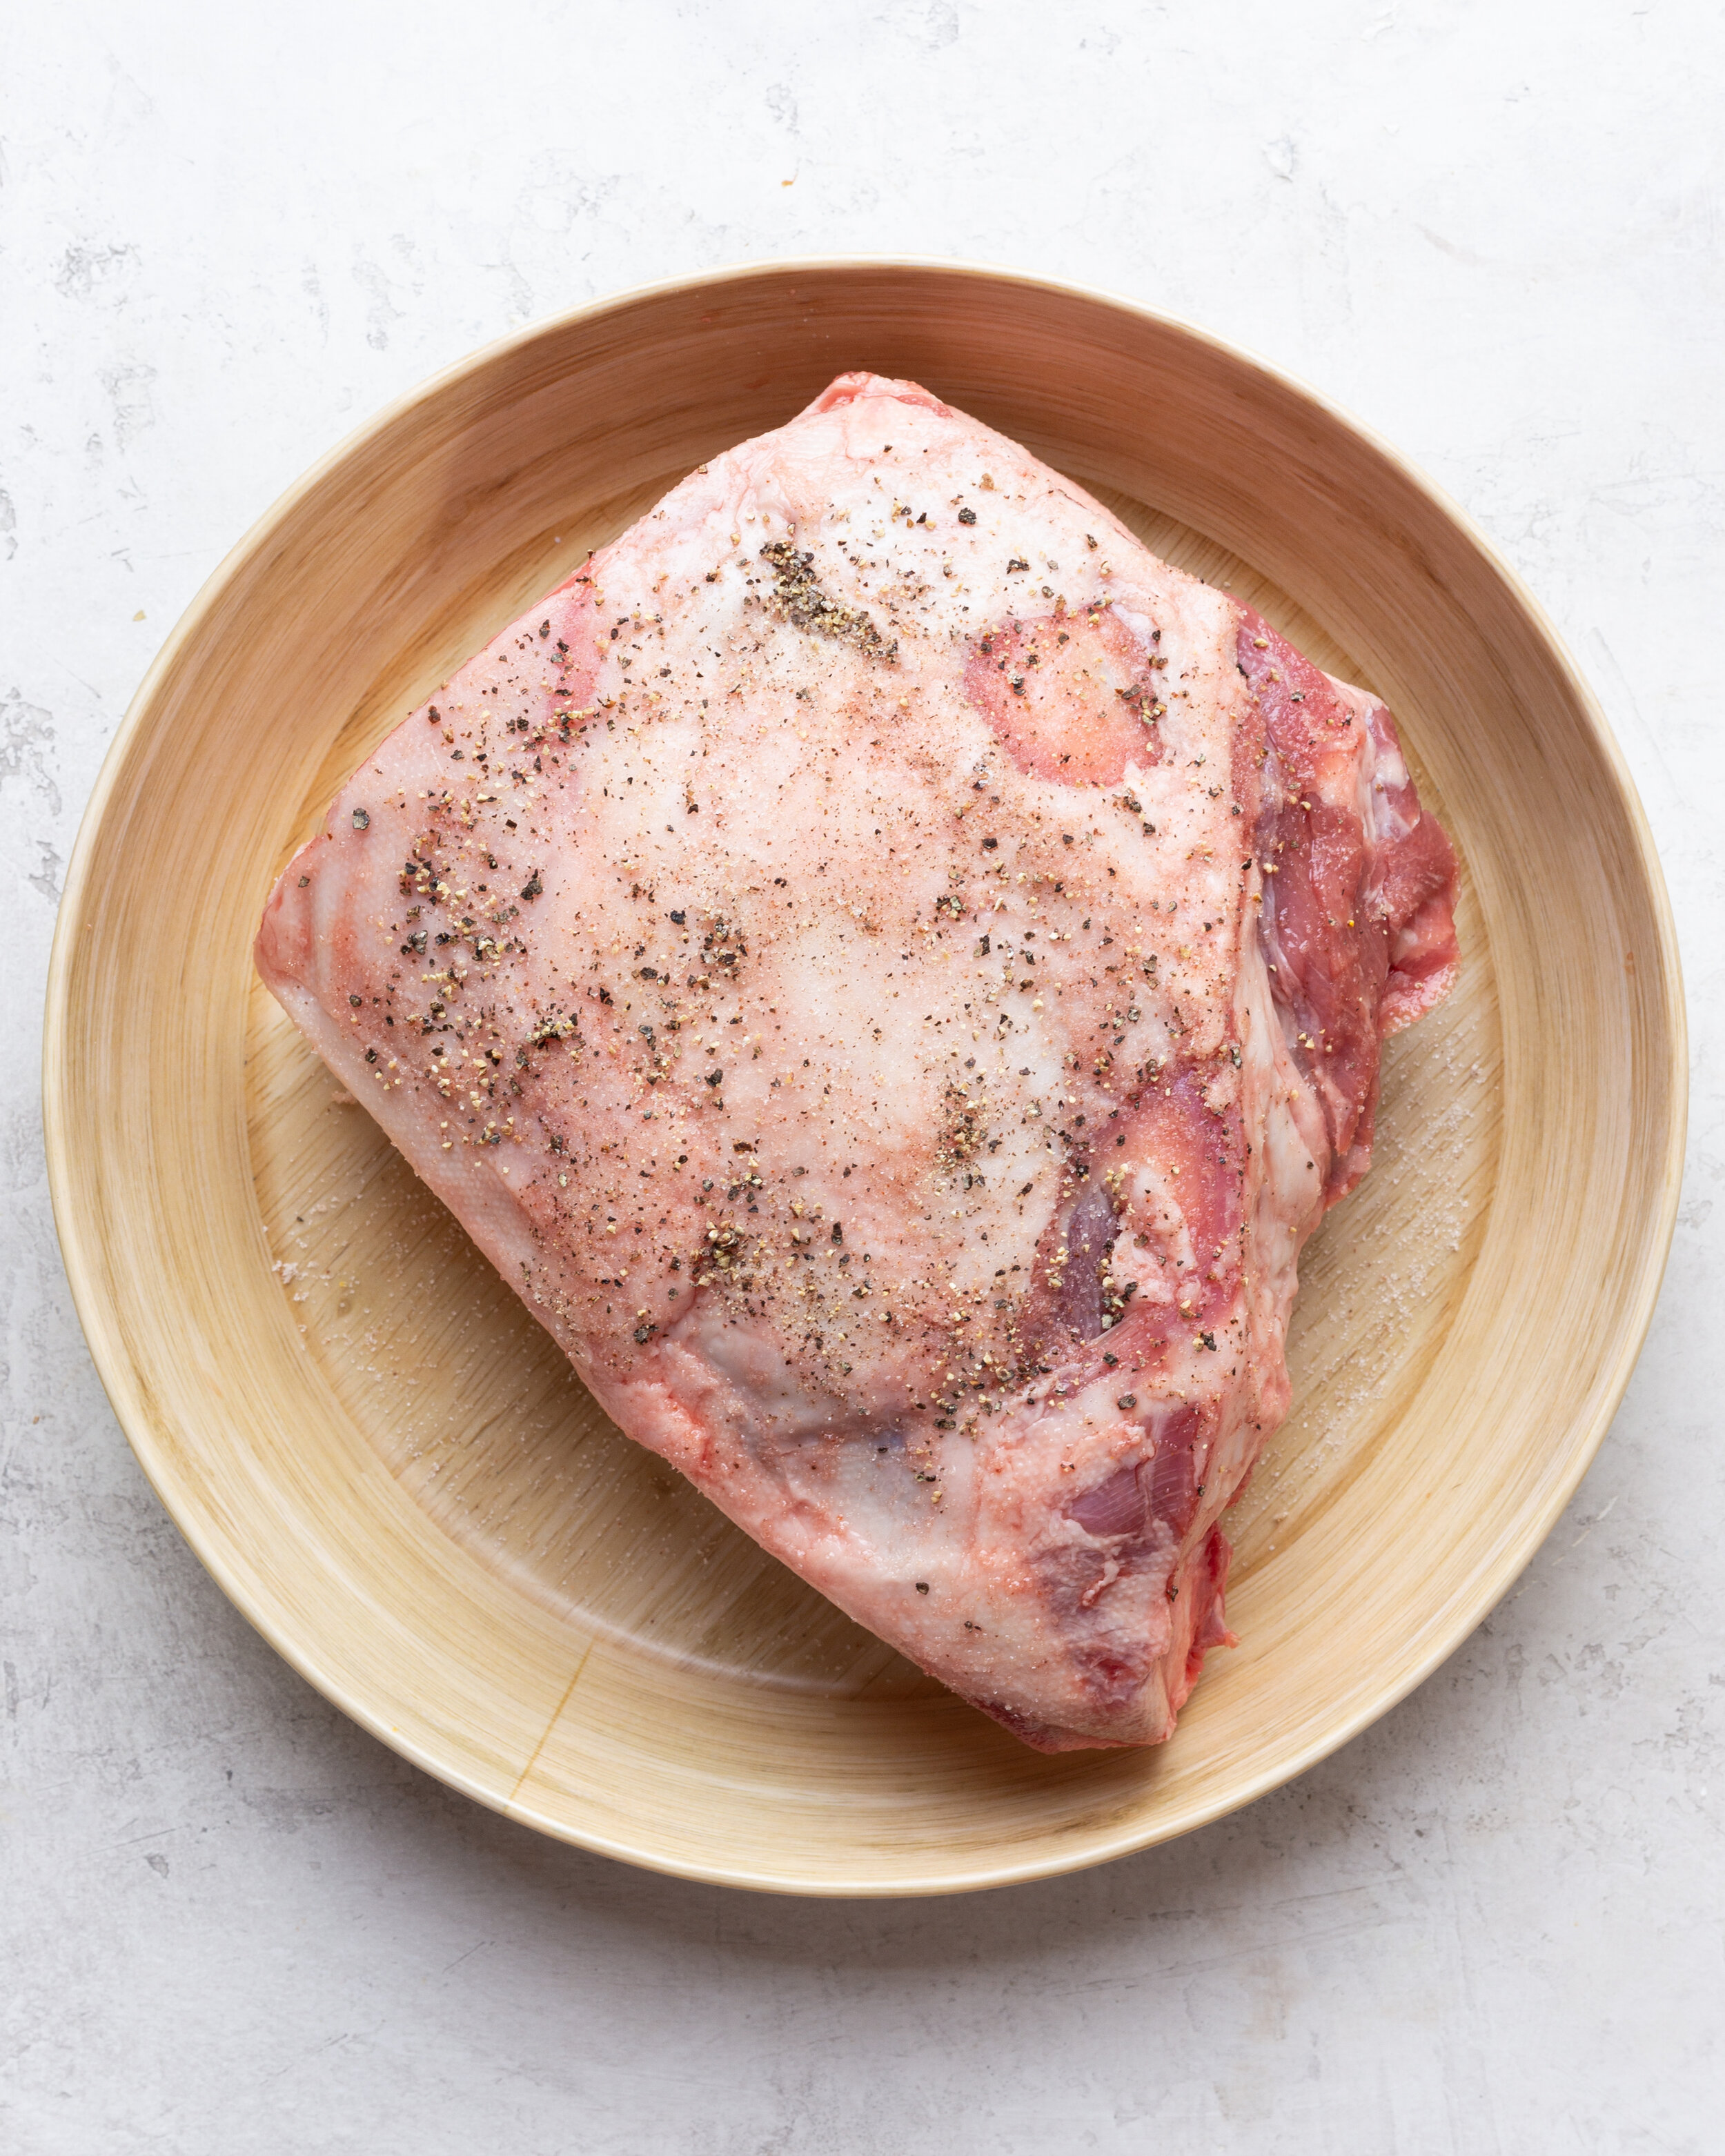
Season lamb shoulder with Cajun seasoning, black pepper and salt. Set Instant Pot to saute, add olive oil and sear lamb shoulder for 5 minutes per side or until golden. Remove and transfer to a separate plate until ready to braise. 

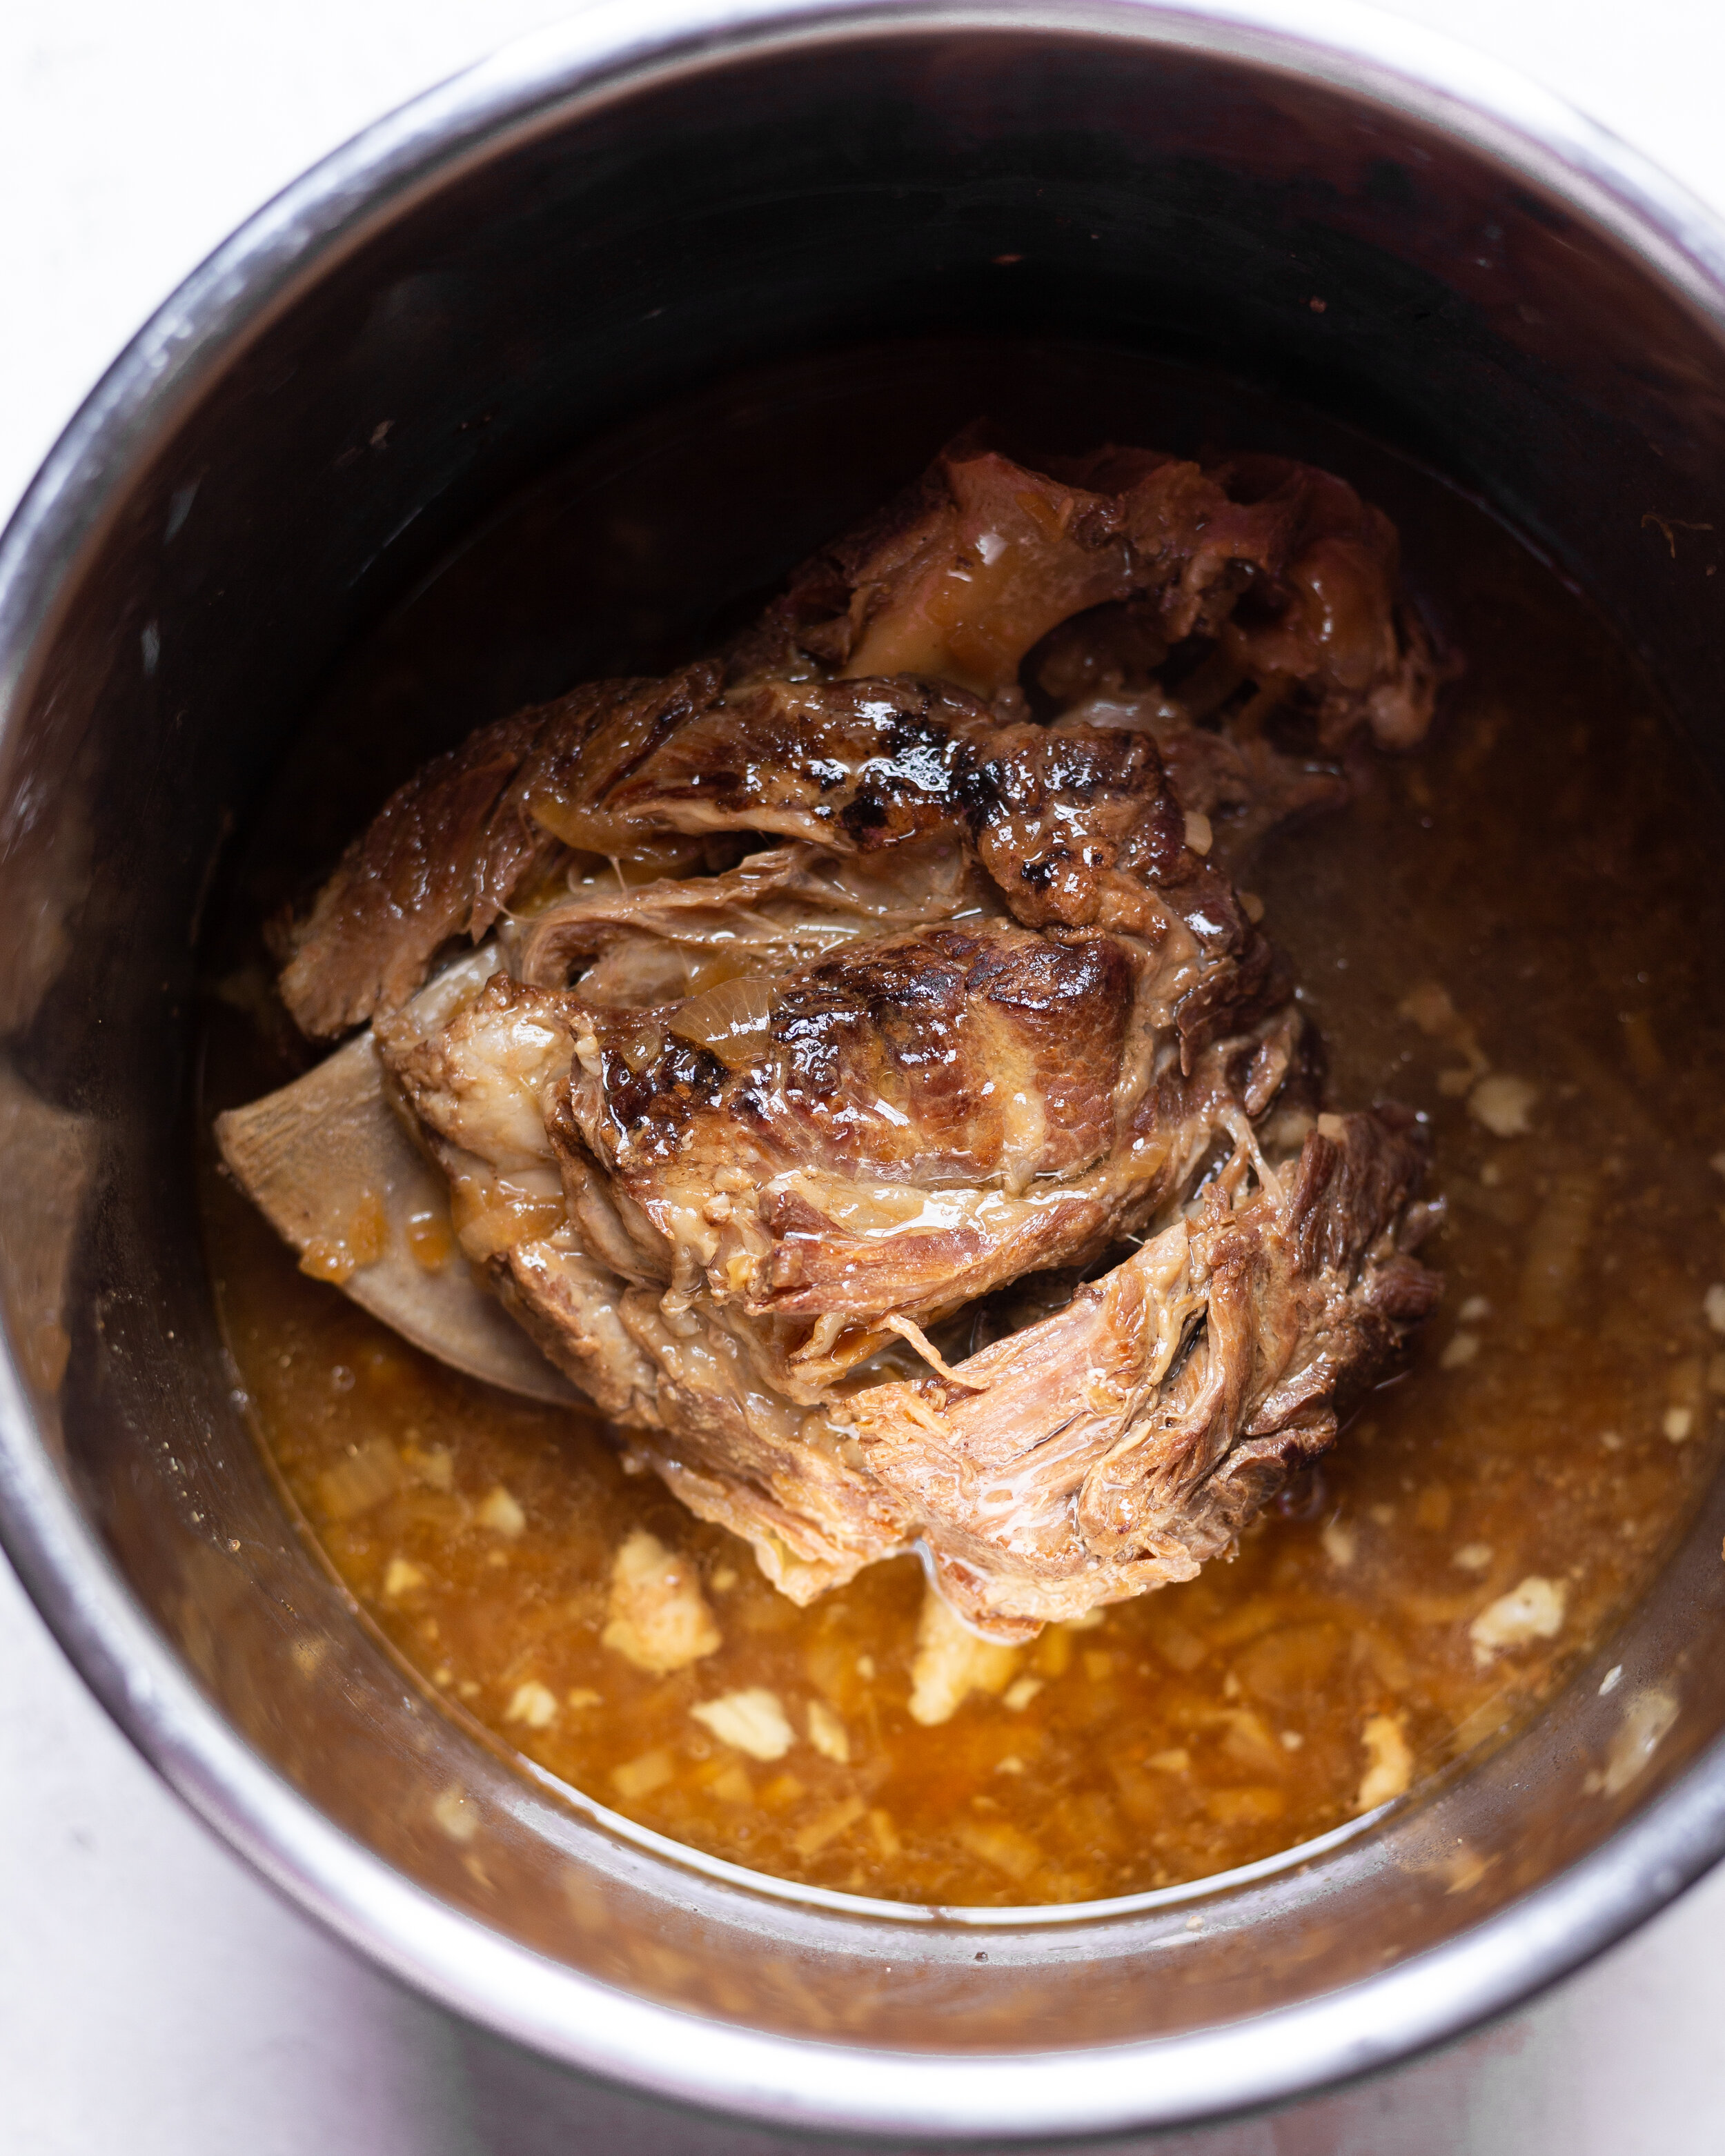
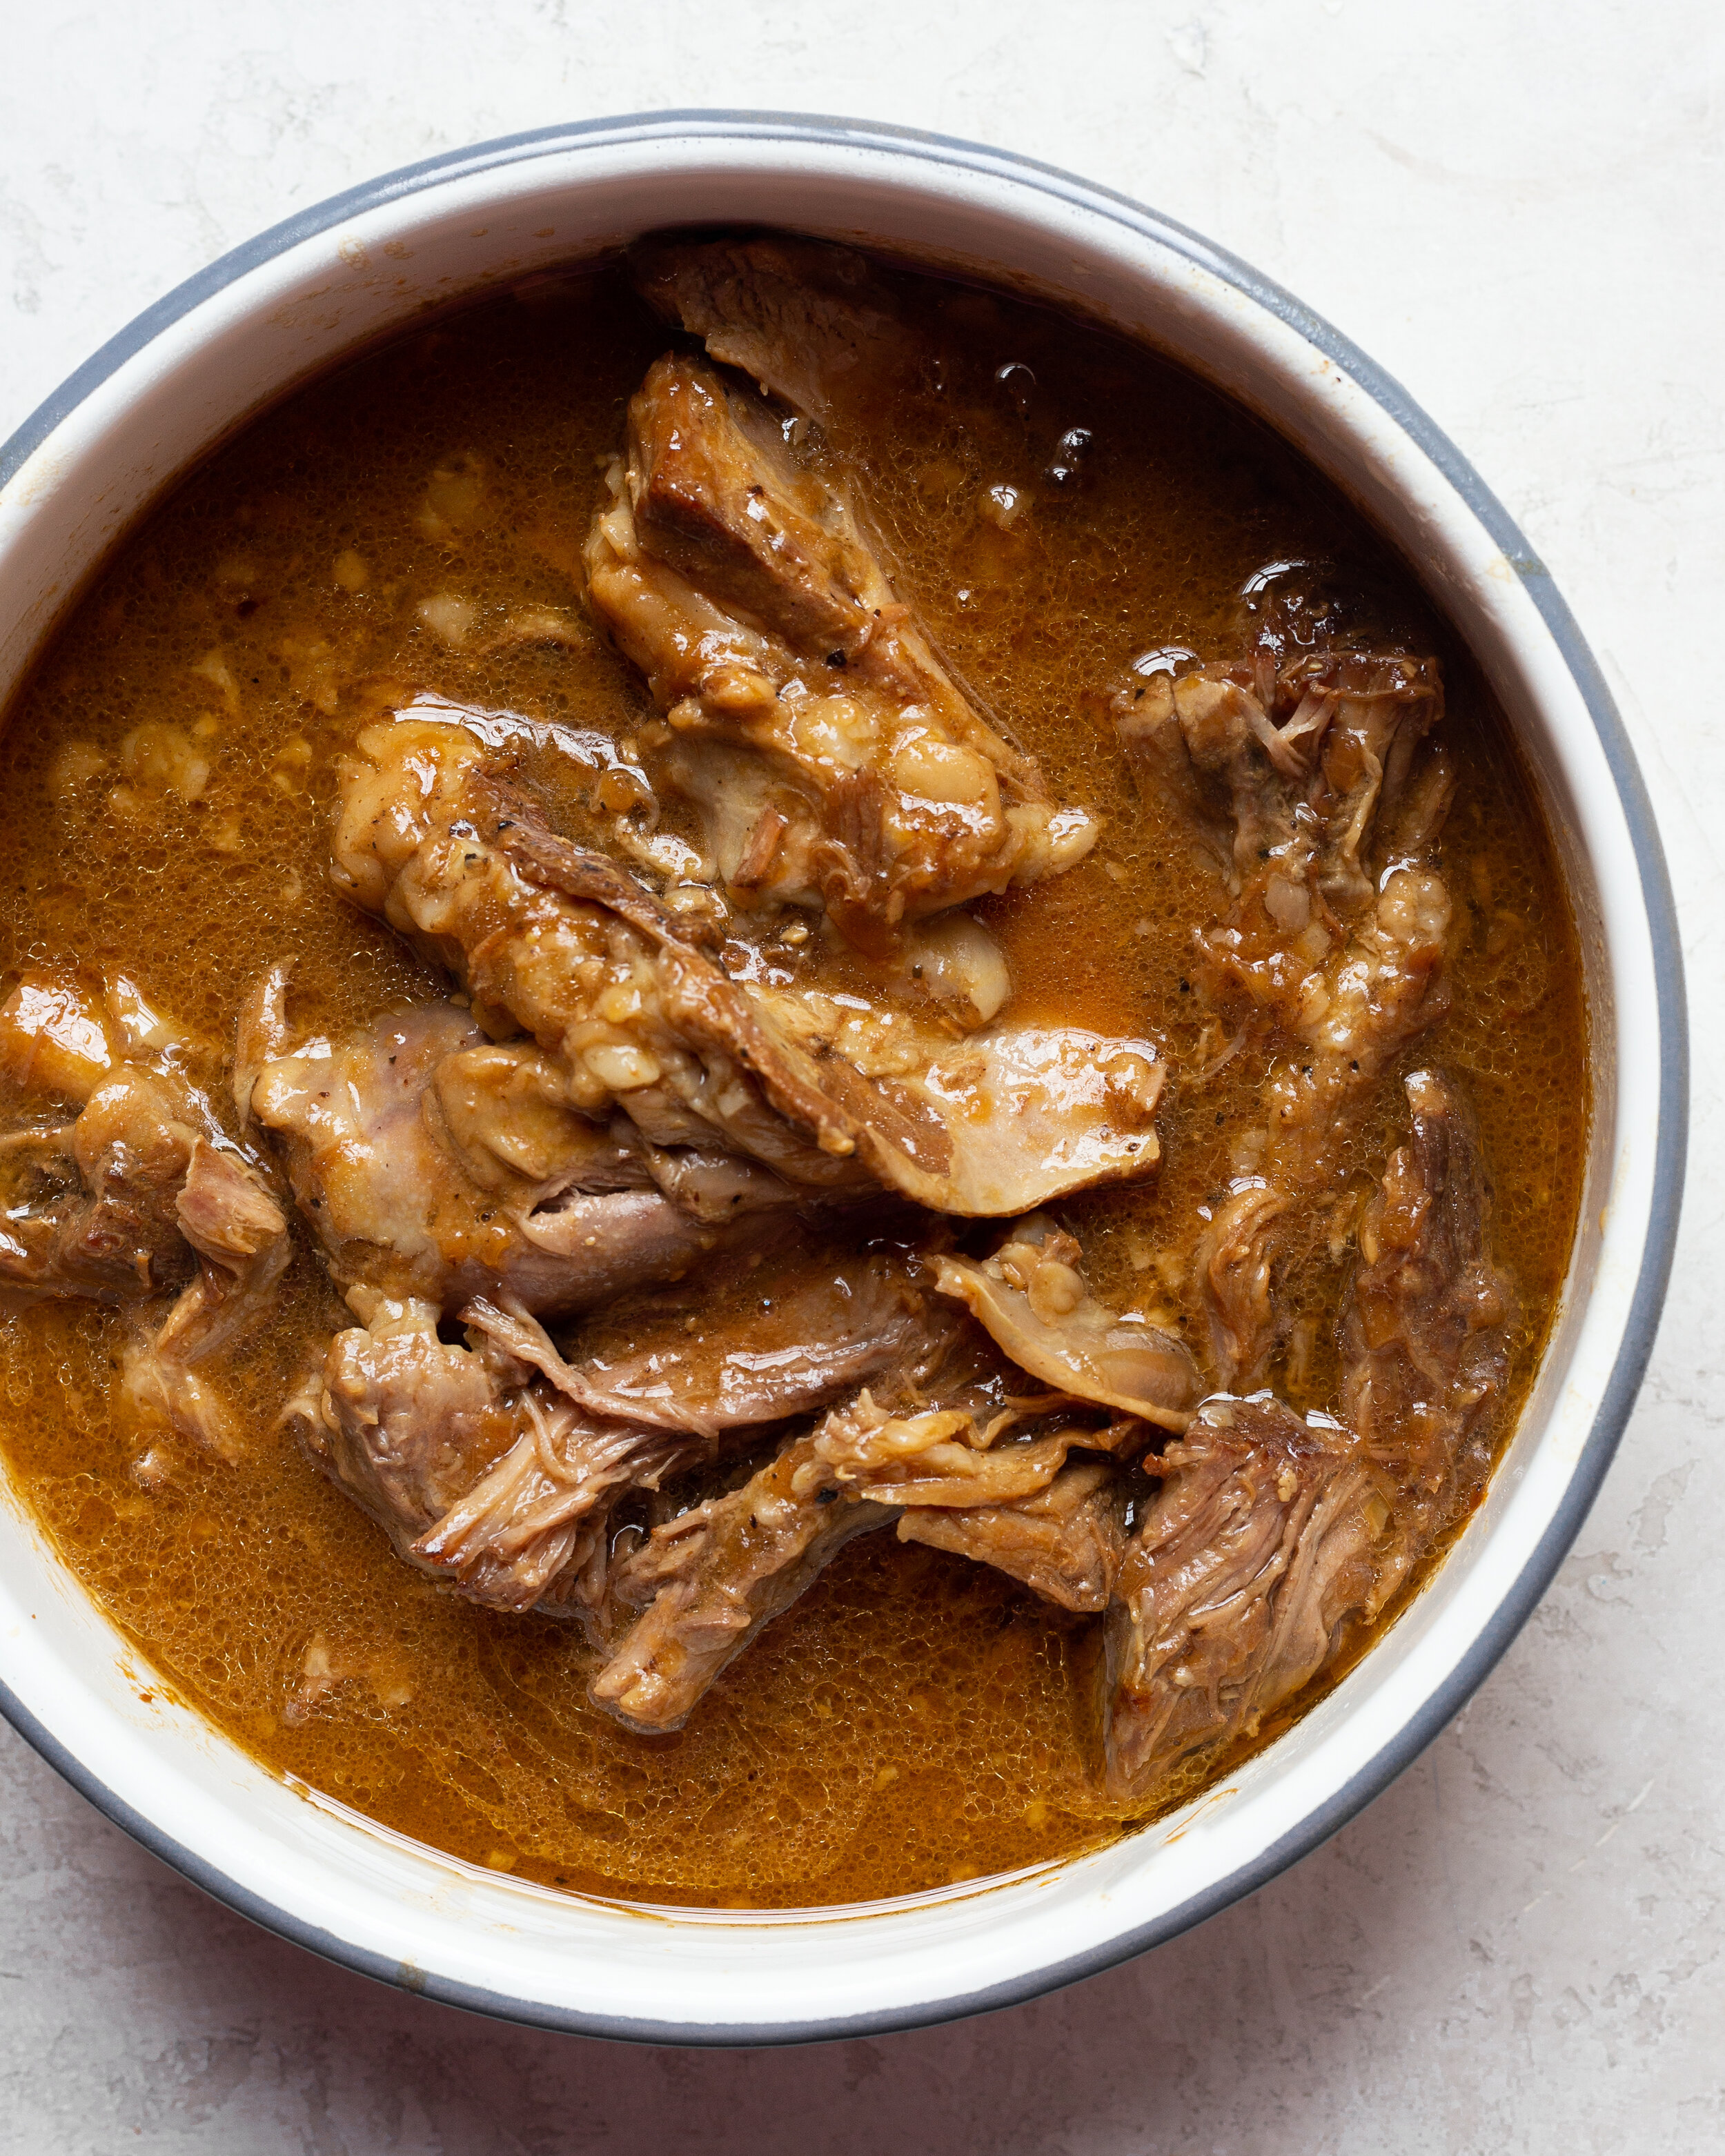
Add onion, garlic, thyme and bay leaf  to the Instant Pot and saute for 5 minutes. Deglaze by adding the broth, stirring and scraping the bottom of the inner pot with a wooden spoon until nothing is sticking. Add white miso paste and gravy powder, followed by the lamb shoulder. Place lid on and set Instant Pot to Manual Pressure for 50 minutes. After cooking, allow pressure to release naturally (10 minutes), remove the shoulder bone and set to saute to reduce liquid until desired consistency. The meat should be fall-apart tender and the garlic and onions completely reduced to form the gravy. Remove bay leaf, season to taste and serve with smoked pumpkin gouda grits.

Tip: To thicken the gravy, add a slurry with 1 tablespoon cornstarch and 1 tablespoon water then stir gently until thickened. 

For the grits: Add vegetable stock and butter to a large pot over medium-high heat, bring to a boil. Lower heat to medium, add grits then stir and cook for 10 minutes until thickened. Add pumpkin puree, cream and grated smoked gouda cheese. Stir and simmer over low heat for 2-3 minutes and season to taste. Serve immediately with crispy sage, braised American lamb and vegetables of your choice.

Braised American Lamb Shoulder Thanksgiving
November 20, 2020 /Dale Gray
DINNER, HOLIDAY, LOUSIANA, SIDES, THANKSGIVING, WINTER
Comment
American Pecans Hero Shot.JPG

Turkey Sausage Rolls with Pecans and Homemade Cranberry Dipping Sauce

November 18, 2019 by Dale Gray in CONDIMENTS, BAKING, LUNCH, THANKSGIVING, SNACKS

This post was written by The Daley Plate on behalf of the American Pecan Council but all opinions are my own. Thank you for your support!

Sausage rolls are such a classic snack or appetizer that is commonly served at parties during the holidays in South Africa. These are popular because they are bite-sized finger foods that are filling and flavorful. Recently I started to think about how I could incorporate more ingredients and create different flavor profiles for our beloved snack, which I often prepare ahead of time and freeze then bake right before guests arrive. These sausage rolls are my latest brainchild, filled with seasonal Thanksgiving flavors and our very favorite nut, the pecan.

Why Pecans?

We all know and love pecans in pie, and here in New Orleans they are an absolutely crucial element in pecan pralines, but pecans are an incredibly nutrient dense nut that is a source of fiber, protein and essential minerals like manganese and zinc. Lately there’s been an emerging trend of blending animal-based protein with plant-based foods like nuts or mushrooms to increase nutritional value. This turkey and pecan sausage roll recipe was inspired by that trend and I couldn’t be happier with the results. The pecans really are the star of this dish, which is both familiar and new at the same time. 
Adding pecans to your recipes adds texture, buttery flavor and crunch, plus it’s a really versatile way to make more out of your meals throughout the year. Add them to smoothies, toss them into a stir-fry, add some crunch to ravioli or make your own pecan nut butter! They don’t call it The Original Supernut for nothing! The American Pecans website has a lot of useful information and recipes using pecans, please do check them out! 

They are currently on a mission to prove that pecans belong in every dish on the holiday table, so they’ve created the Pecan ThanksEverything Pie - An entire holiday meal in one pie created by the ladies of the famed Four & Twenty Blackbird pie bakery in Brooklyn. Eight slices, each a different dish but with pecans as the hero. More on that also on the website, maybe you could make one and share it on social media? :) Please tag me @thedaleyplate and #thedaleyplate so that I can share your pecan recipes, including this one if you decided to try it! By using more American Pecans in our everyday cooking, we support America’s pecan growers and shellers and help the industry to thrive.

American Pecans close up.JPG Prep Shot.JPG

How to prepare turkey sausage rolls with pecans:

Using store-bought puff pastry saves you time and effort during the holiday season. Be sure to follow the package instructions so that the puff pastry is thawed correctly before using.

Did you know that fresh raw pecans have a light golden color? Look out for those in store!

Blend the pecans, herbs, spices and onion separately before adding the ground turkey. Adding everything together will cause the filling to become too mushy, so mix in the pecan mixture and ground turkey by hand for best results.

I use turkey breakfast sausage in this recipe, which is readily available in stores and already is flavored with herbs and spices. Feel free to substitute with regular ground turkey or a different sausage if you prefer. Lean ground chicken and lean pork breakfast sausage are both great options.

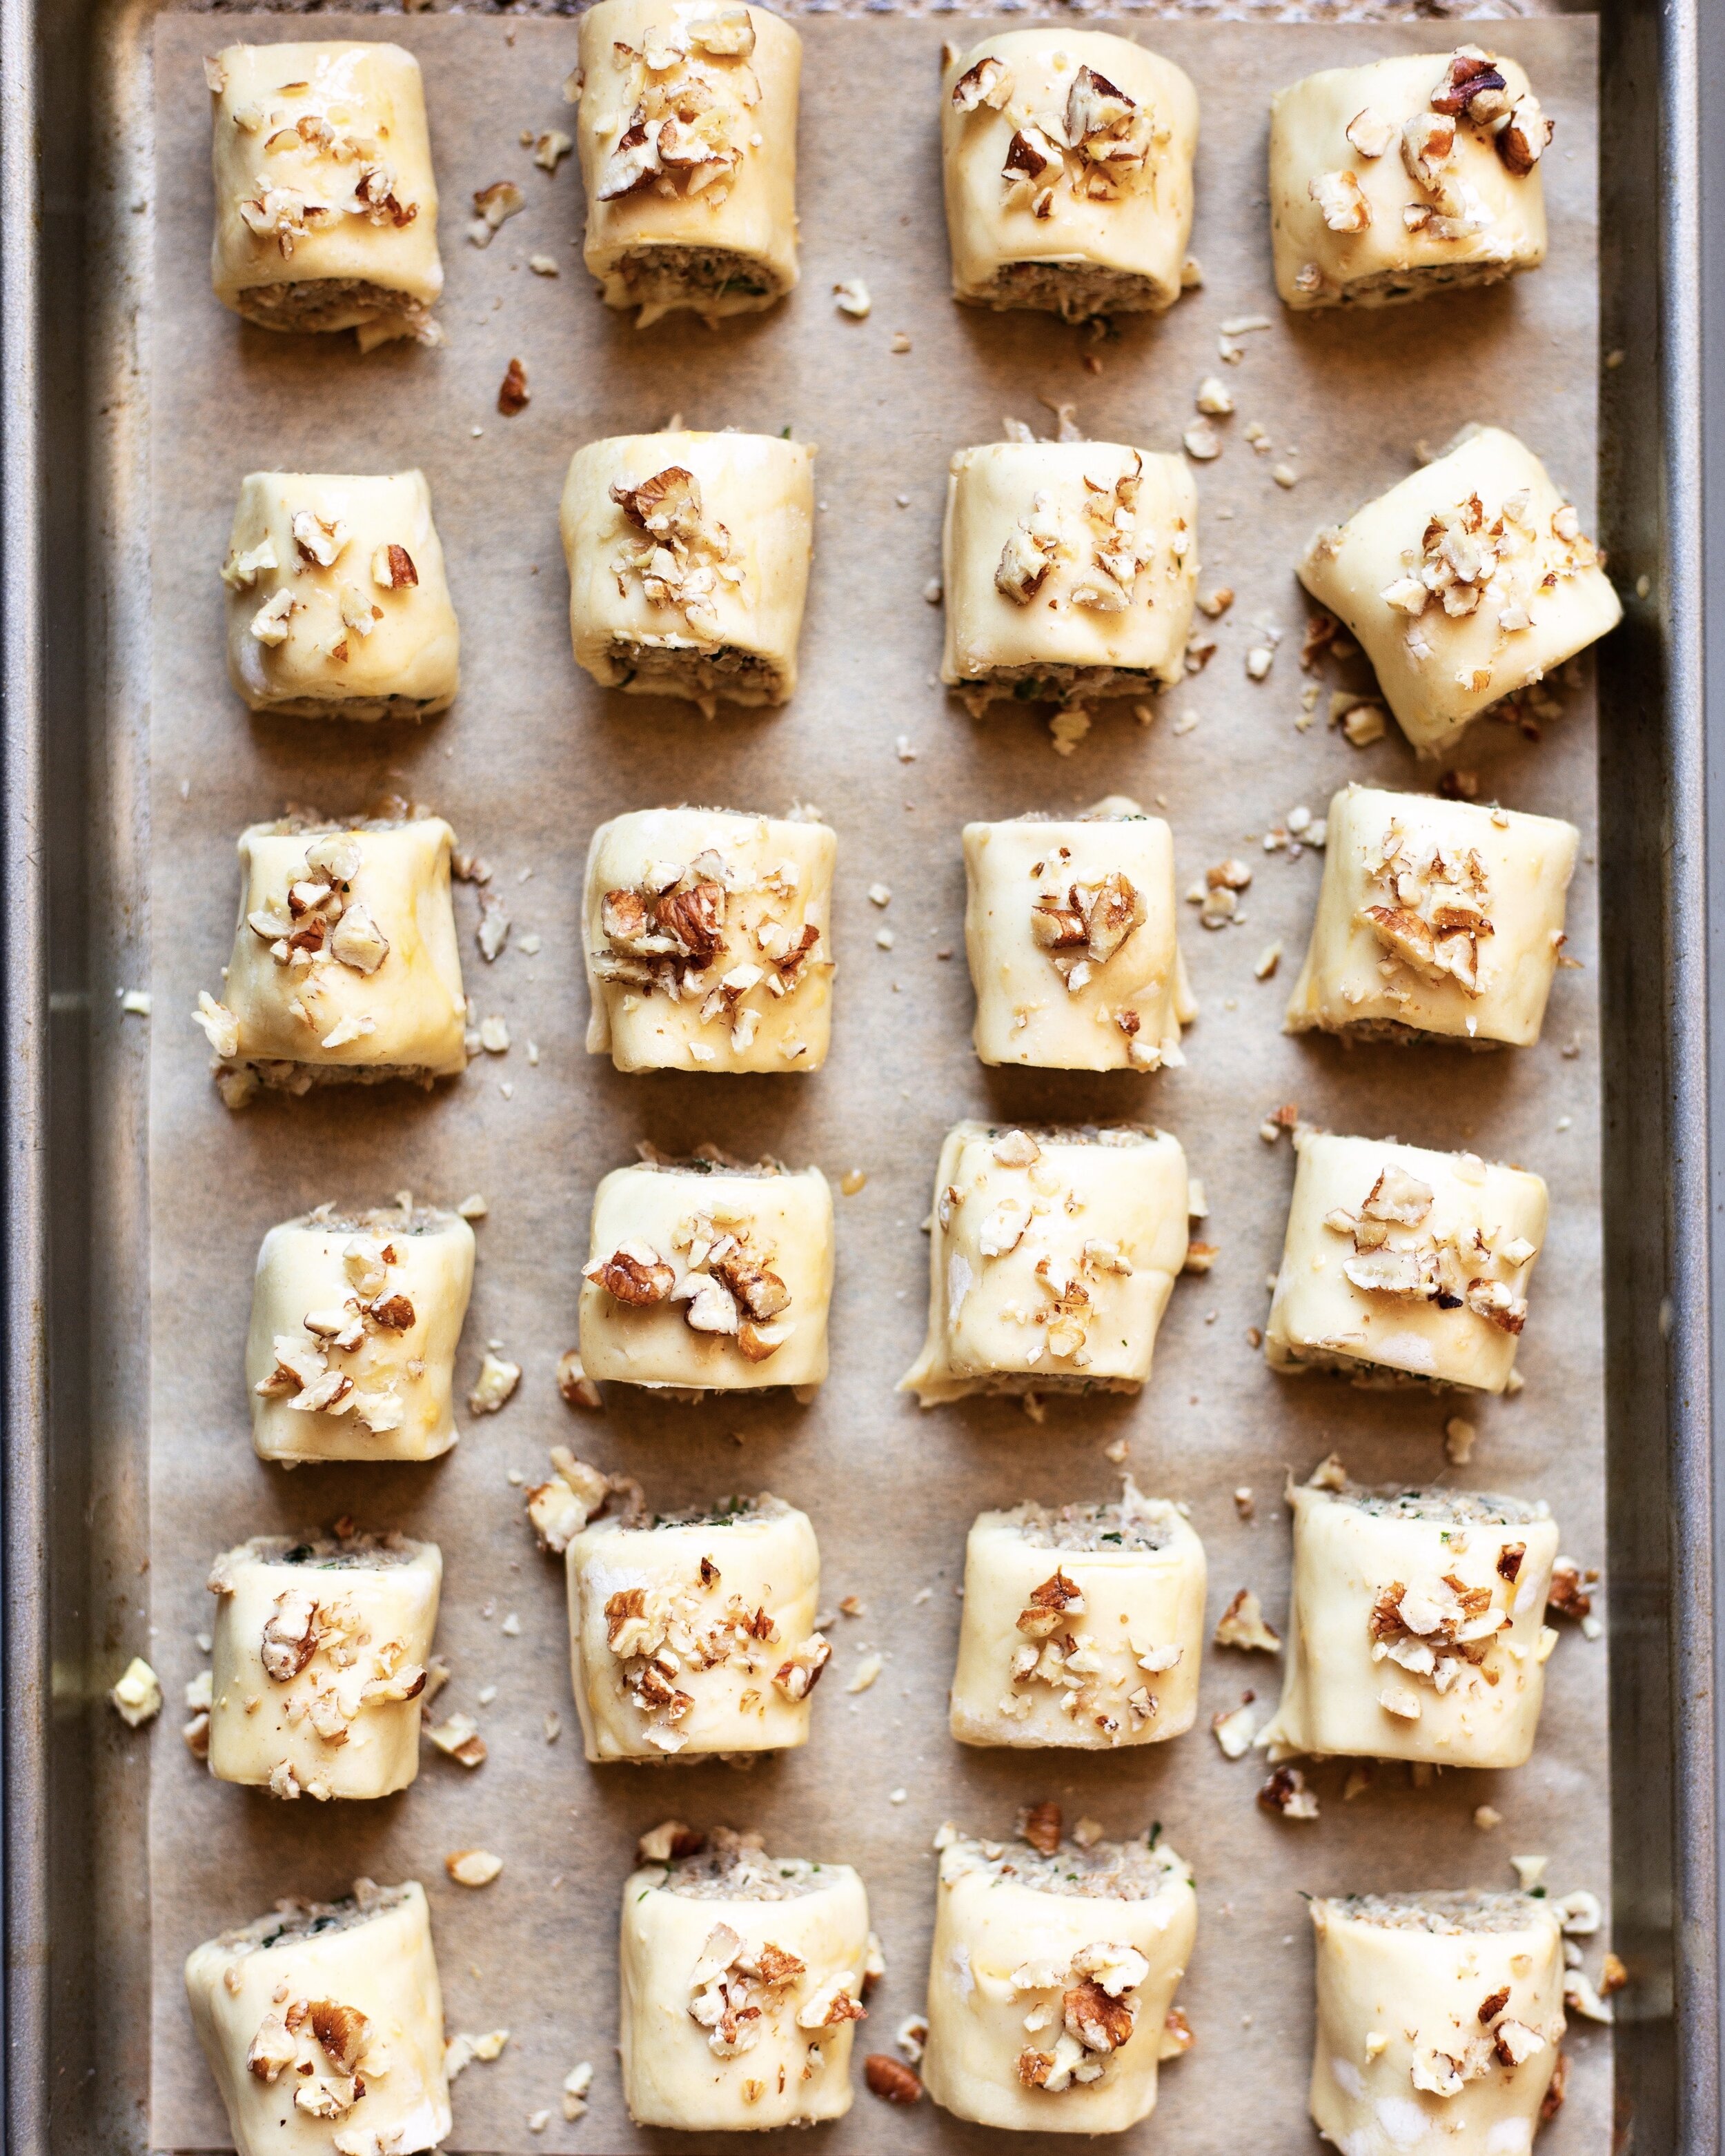
These can either be topped with whole pecans or chopped pecans. I make both kinds! Whichever option you decide to go with, it is important to tent the baking sheet loosely with foil halfway through the baking process so that the pecans don’t get too dark and toasted. You’ll love the nuttiness of these!

I dip mine in an easy homemade cranberry sauce, but gravy works so well also! Save a few for after the big Thanksgiving meal, or combine pecans with leftovers and make your own version of these!
For me, sage is the flavor of Thanksgiving, but thyme or rosemary is a wonderful substitute.

Prep Shot 2.JPG Prep Shot 3.JPG Portioning.jpg Pecan topping.jpg
Portioning.jpg Pecan topping.jpg

Turkey Sausage Rolls with Pecans and Cranberry Sauce
Prep Time:
20-25 minutes | Cook Time: 25 minutes | Makes: 48 | Serving Size: 2-3 per person

Ingredients:

5 ounces raw pecan halves
½ yellow onion, finely diced
4 cloves garlic, finely minced
4-6 fresh sage leaves
½ cup fresh parsley
¼ teaspoon nutmeg
¼ teaspoon mace
1 teaspoon kosher salt
1 teaspoon black pepper
1 lb fresh turkey breakfast sausage
1 (17.25 ounce) package frozen puff pastry, thawed
1 egg, lightly beaten with 1 tablespoon water
1//2 cup whole or chopped pecans for topping
To serve: Fresh cranberry sauce (Recipe Follows)

Special Equipment:

A food processor
Large baking sheet lined with a silpat or parchment paper
Mixing bowl 
Pastry brush
Rolling pin

Guidelines:

Preheat your oven to 400F (220C) and line a baking sheet with baking paper. 

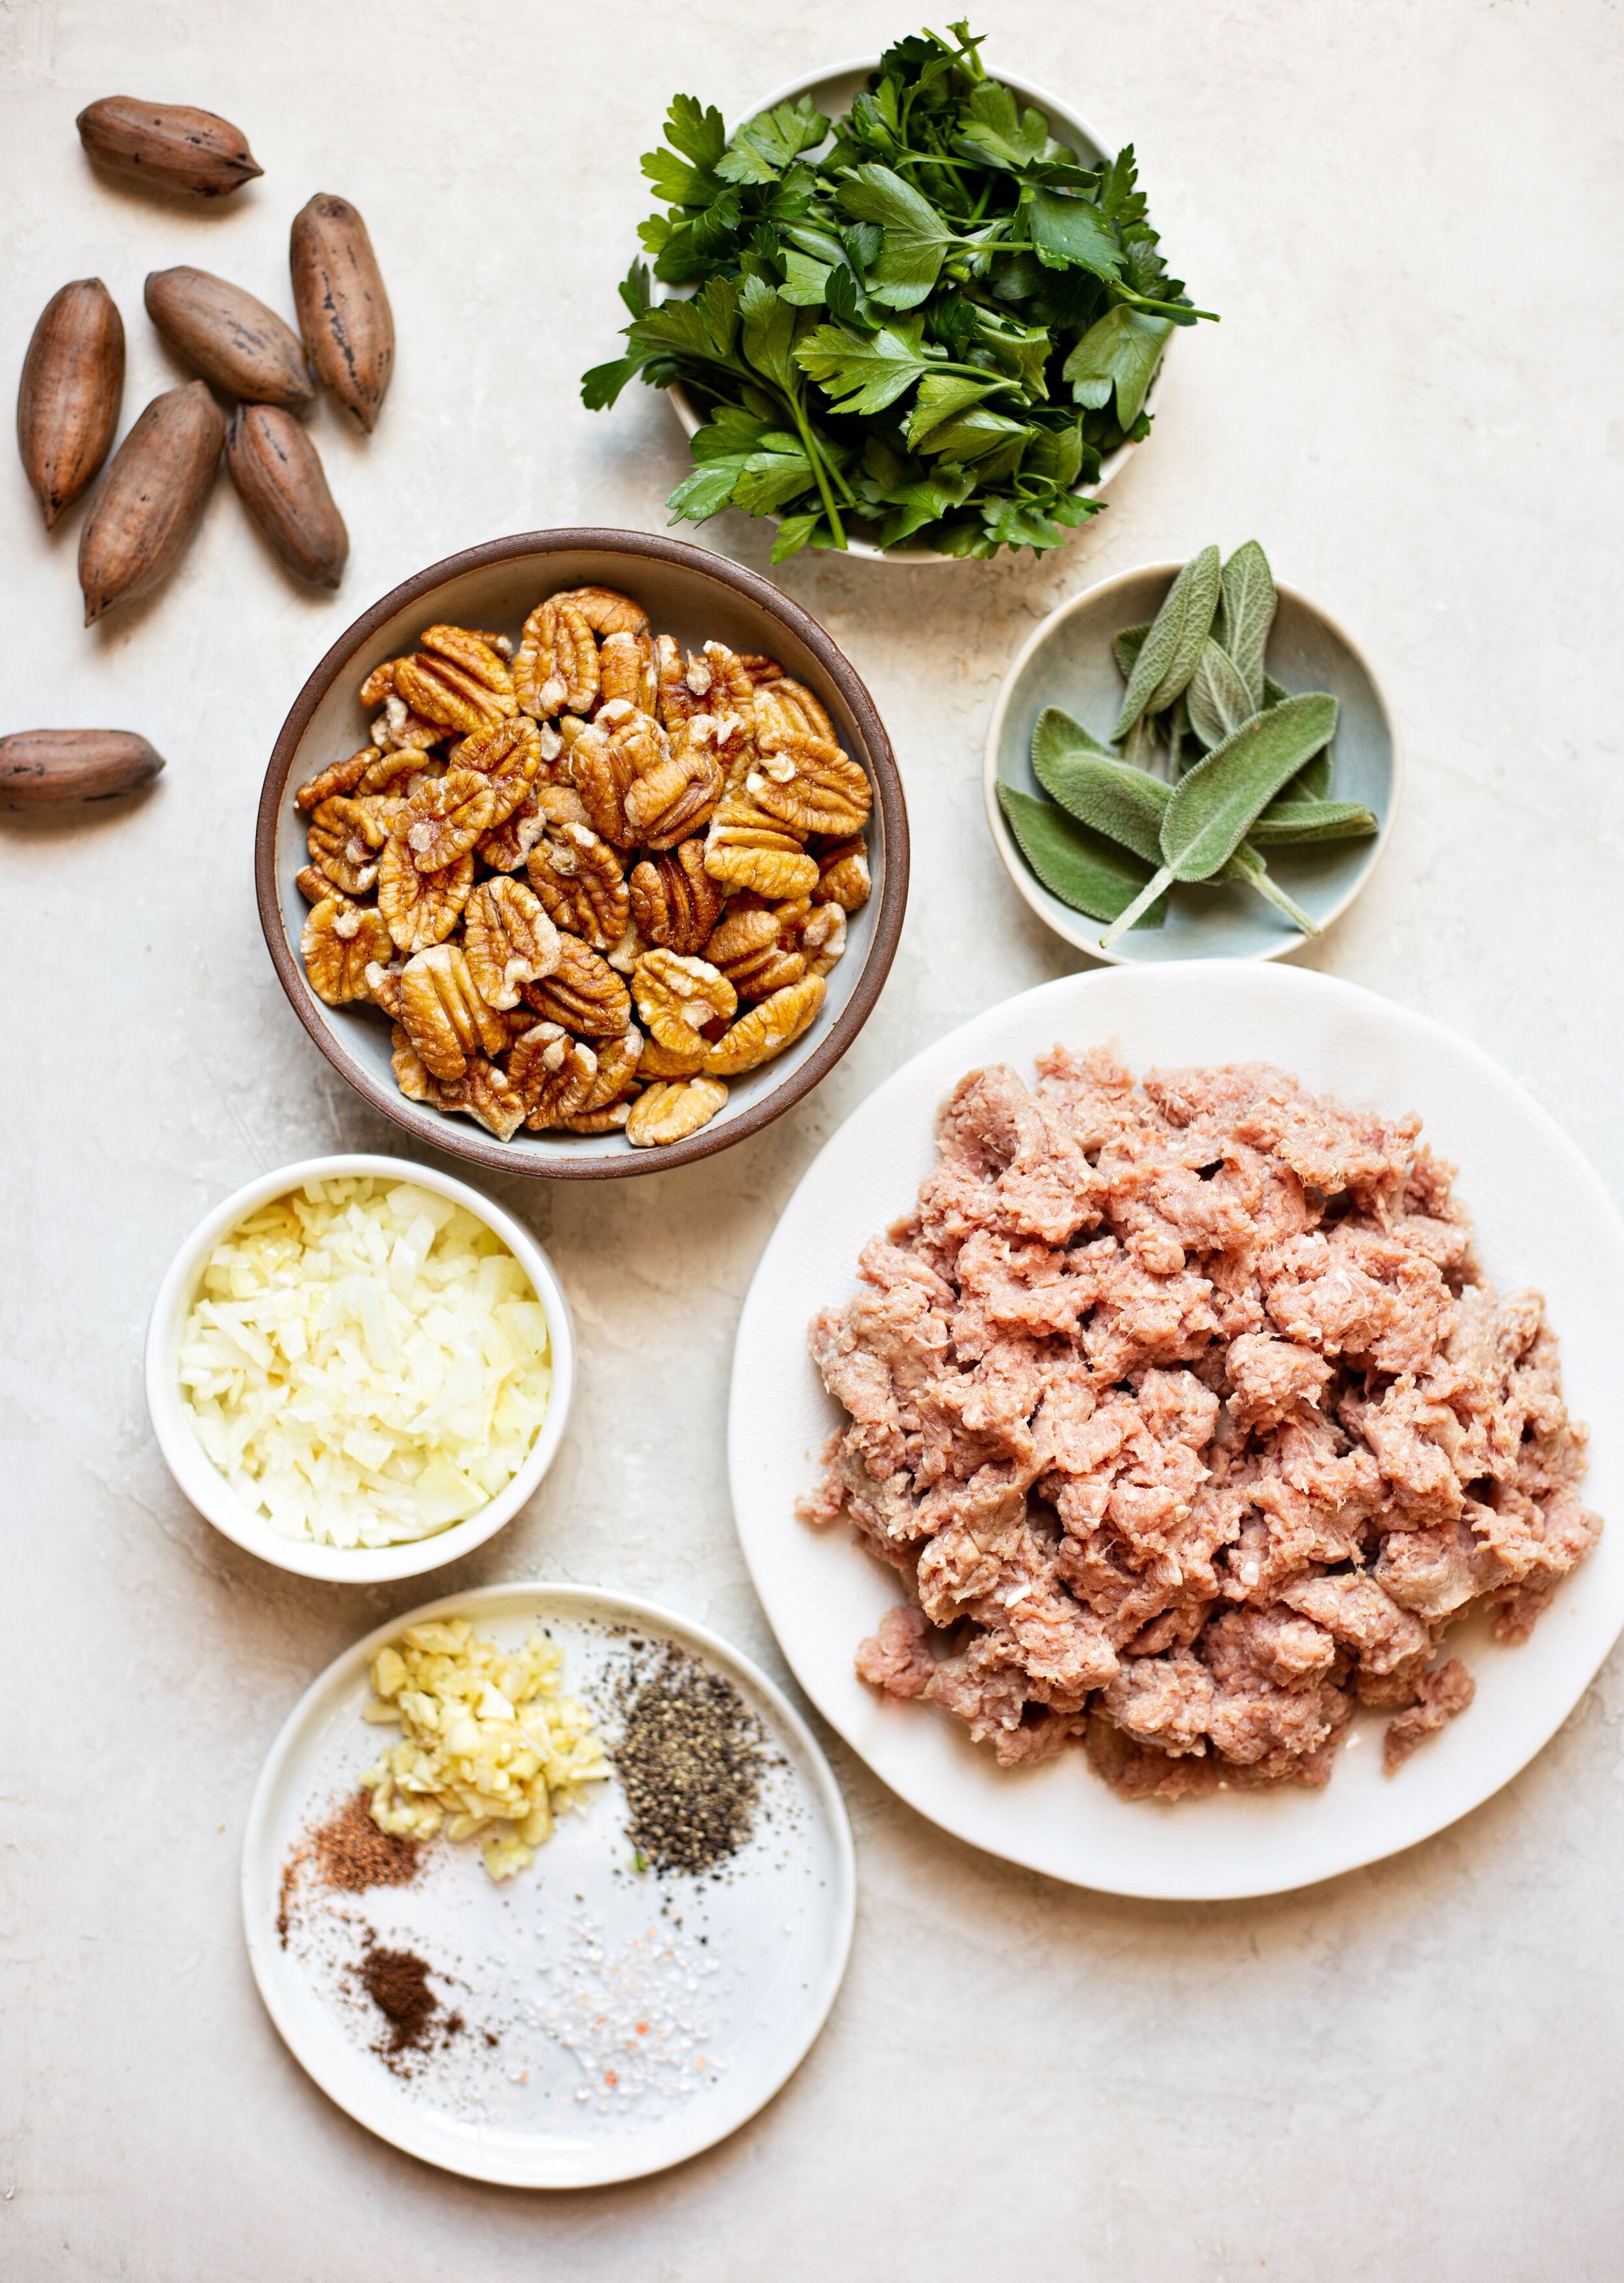
Place pecans, onion, garlic, sage, parsley and spices in the bowl of a food processor fitted with a blade attachment. Pulse until it resembles a fine crumble, then place into a medium bowl. Add turkey breakfast sausage and gently mix with a fork until everything is combined. Cover and place in the refrigerator until ready to use.

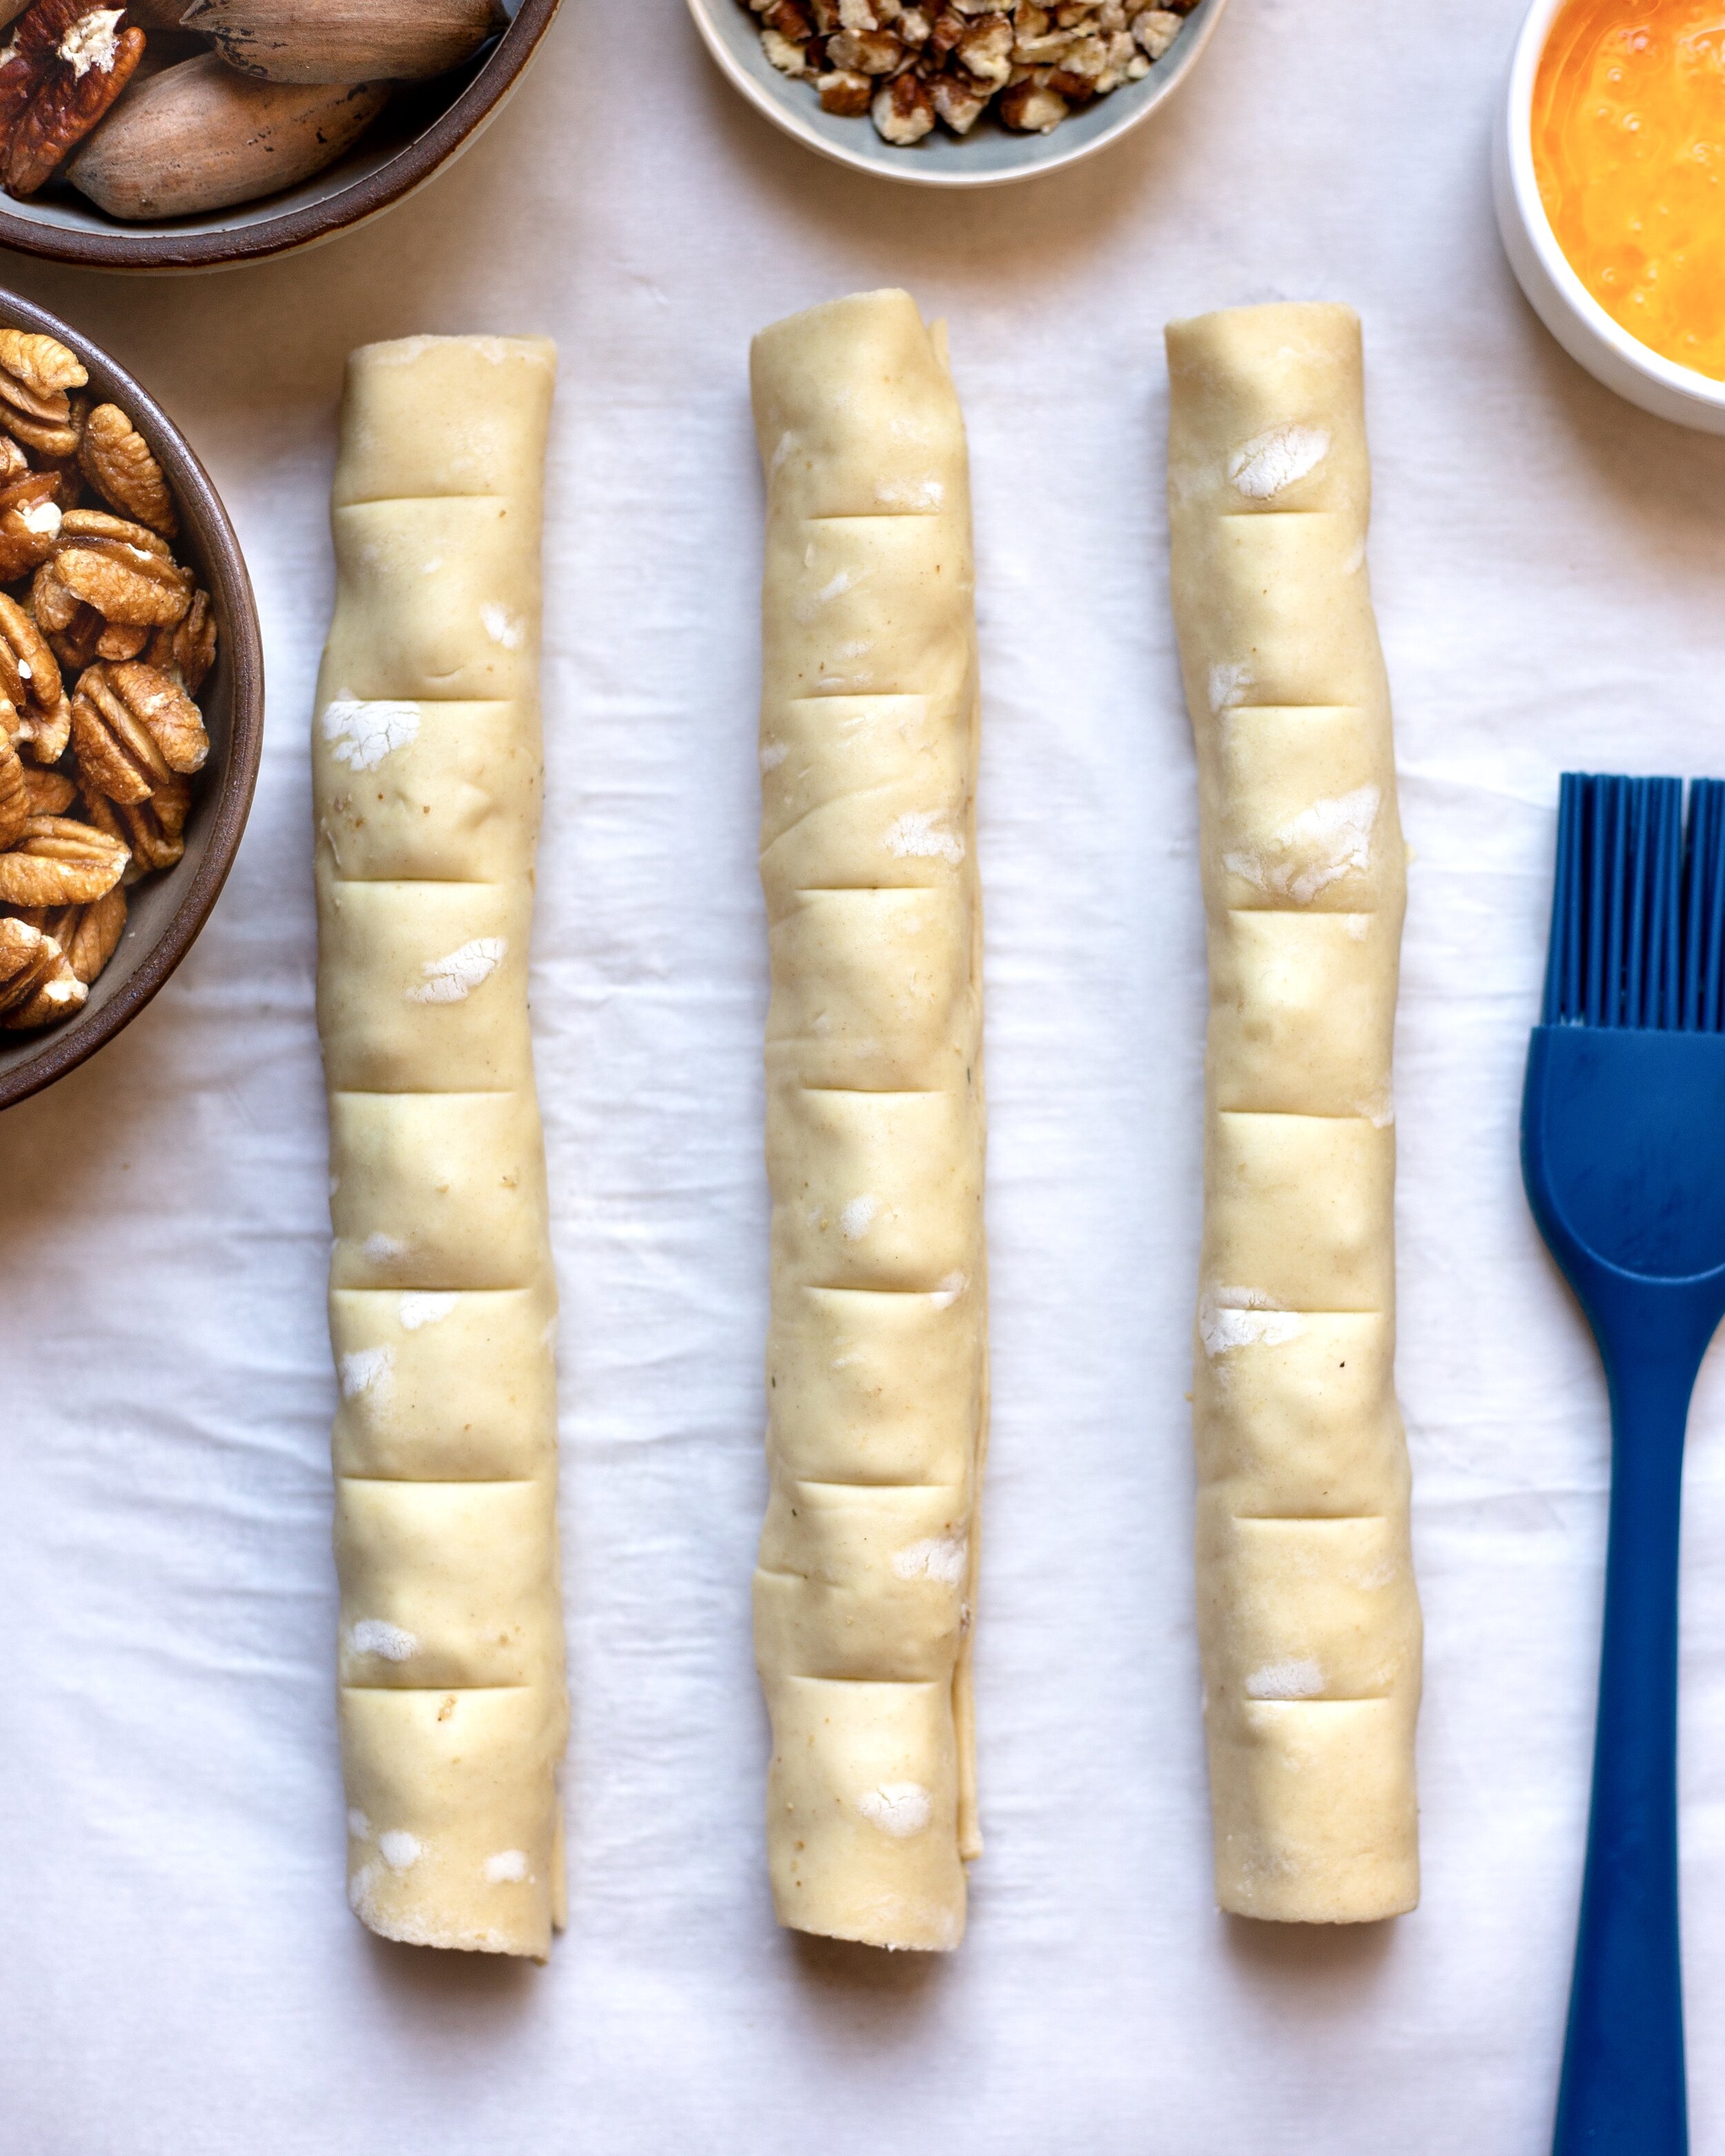
Place puff pastry sheets on a clean surface and roll each until they are about ⅛ -inch thick. Turn pastry on its side so that you’re facing the widest edge. Divide the sausage mixture into 6 equal portions and form logs. Place three logs on each rectangle, with enough pastry on each side to wrap them completely with the seams facing down. 

Divide each log into eight equal portions and cut using a serrated knife. Place on a lined baking sheet and brush with eggwash, placing chopped or a whole pecans on top. Bake for 25 minutes or until golden brown and the meat is cooked, tenting with foil after 15 minutes to prevent the pecans from getting too dark. Remove from oven and serve immediately. Can be made ahead and cooked from frozen, add 10 minutes to your cook time.

Fresh Cranberry Sauce:

1 (12 -ounce) package fresh cranberries
1 cup sugar
1 cup water
1 tablespoon apple cider vinegar

Combine ingredients in a medium saucepan and simmer until thickened. Serve warm.

Close Up.jpg
American Pecans-5.jpg
Sausage Rolls - Mixed.jpg
IMG_9220.jpg
November 18, 2019 /Dale Gray
CONDIMENTS, BAKING, LUNCH, THANKSGIVING, SNACKS
Comment
Instagram Option 2.jpg

Sous Vide Turkey Meatballs with Gravy

November 13, 2019 by Dale Gray in DINNER, HEALTHY, LUNCH, THANKSGIVING

This post is sponsored by FoodSaver®; however, all thoughts and opinions are my own.

These easy Sous Vide turkey meatballs are what all of us who have less interest in spending hours in the kitchen during the holidays have been waiting for! Or those of us who love the flavors of Thanksgiving but prefer not to cook a whole bird. Or those of us who want cozy meals on demand! You get the point :) The Sous Vide process is fun and easy, but most of all it’s a hands-off approach to cooking that saves you time in the kitchen and delivers precise results.

What is Sous Vide?

There was a time when high-tech cooking methods felt intimidating to me, but I think using technology to save money, time and stress is a great thing and I’m willing to move with the times. The cooking method I’ve been experimenting with most lately is Sous Vide. Many, many episodes of watching television chefs use it to cook their proteins to precise temperatures peaked my curiosity and I finally made that purchase.

When you Sous Vide, you seal ingredients in a FoodSaver® Bag and cook it in a water bath with a Sous Vide cooker that maintains a constant temperature. It’s a very slow but hands-off approach and the best way to ensure that whichever proteins or vegetables you’re cooking are perfect. The options are endless! 

Instagram Option 1.jpg

What do I need to start?

You’ll need to use a good vacuum sealer and bags that are BPA-free and my best recommendation is the FoodSaver® Preservation System and FoodSaver® Bags. 

FoodSaver Bags are completely air tight and “hug” the food, they have been specifically designed for the Sous Vide cooking method, don’t float on the water like other bags and go directly from your freezer to the water up to 195F (90c) so you can prep these ahead of time and just take it out when you want to cook. The flavor of the food is not affected at all, in fact the Sous Vide process locks in food’s natural flavors and prevents their loss in the pan or air. 

You can purchase both the FoodSaver® Preservation System and FoodSaver® Bags at Target online or use this special coupon on iBotta. 

Why vacuum seal?

My mother and I have the same interests when it comes to cooking: Preserve everything! Save money! Save time and have dinner ready and available when you want it. We used to joke with her when we were growing up, that she portioned and froze everything right after grocery shopping - We never even had a chance to see what there was :) But now I understand the value of preparing meals ahead of time. When I visit South Africa the things that bring her the most joy aren’t expensive gifts, I actually bring FoodSaver Bags and watch her grin from ear to ear. I’m serious.  The fact is, when items at the grocery store goes on sale I find it best to be economical and purchase then prep them ahead, freeze and Sous Vide while I’m busy with work projects. FoodSaver® Vacuum Seal Bags have multi-layer construction that creates an air-tight barrier around foods proven to help prevent freezer burn. Vacuum sealing is also a great shortcut to marinate your food, and I’ve seen many chefs use this method when they want more flavor. Sous Vide is a cool new way to cook, it generates less heat in the kitchen and it’s passive cooking so I’m here for it! 

Image 3 -Prep.jpg Image 4 - Assembly.jpg Image 5 - Freeze.jpg

Some Tips:

These meatballs are dinner-sized but can easily be made into 1 -ounce portions for appetizers. It’s a large batch so perfect for preparing holiday appetizers ahead of time. The FoodSaver Vacuum Seal Bags will lock in that flavor until you’re ready to party :)

I add cranberries, poultry seasoning and sage to give these turkey meatballs a great Thanksgiving flavor similar to Swedish meatballs, but with a twist. You can customize them to your liking though!

There are no breadcrumbs in order to keep it pretty low-carb, and the cooking method ensures that they are moist and juicy so there’s really no way to dry them out while cooking. FoodSaver Vacuum Seal Bags are air tight so none of those juices will leak out and you can make an amazing gravy with it.

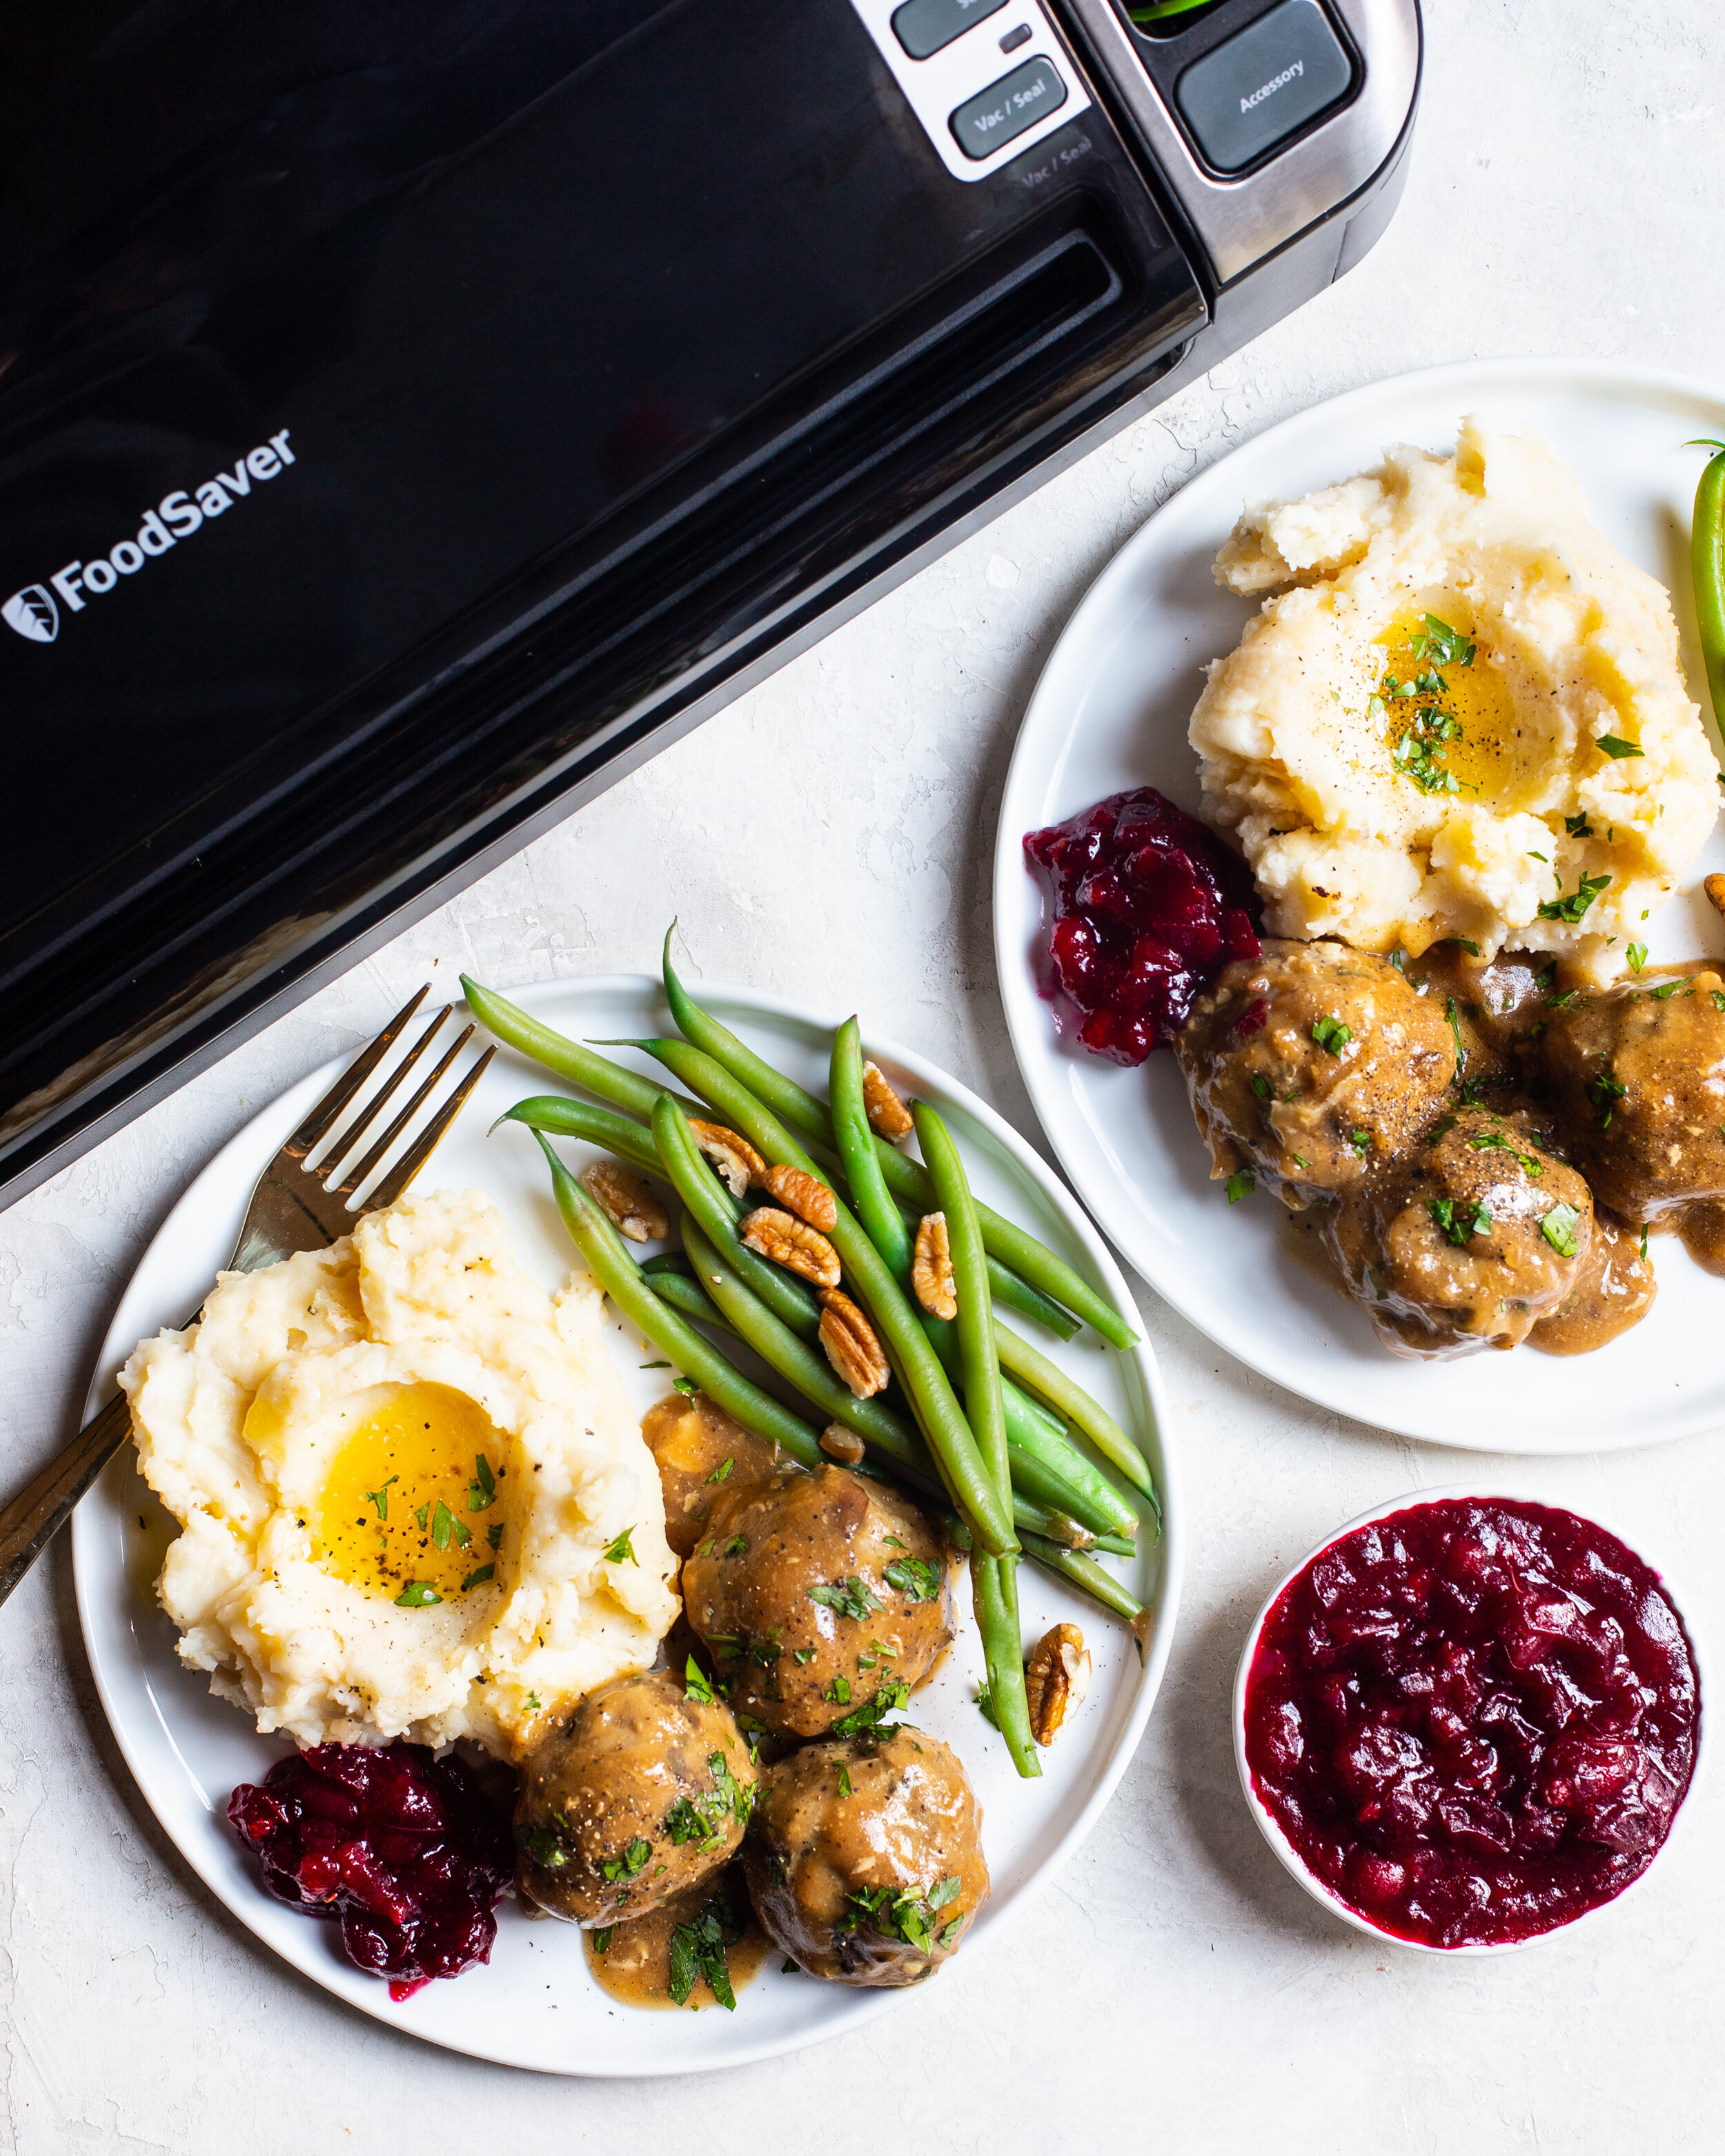
I’d love to know if you’ve made this recipe. You can leave your feedback below or if you decide to share it on social media please tag me @thedaleyplate so that I can share with everyone else! Serve it with creamy mashed potatoes or my double parmesan cauliflower mash, steamed green beans and cranberry sauce on the side. I hope you love it as much as we do!

Image 7 - Cook.jpg
Image 6 - Seal.jpg

Sous Vide Turkey Meatballs with Gravy
Prep Time:
15 minutes | Cook Time: 1 hour | Makes: 28-30  

Ingredients:
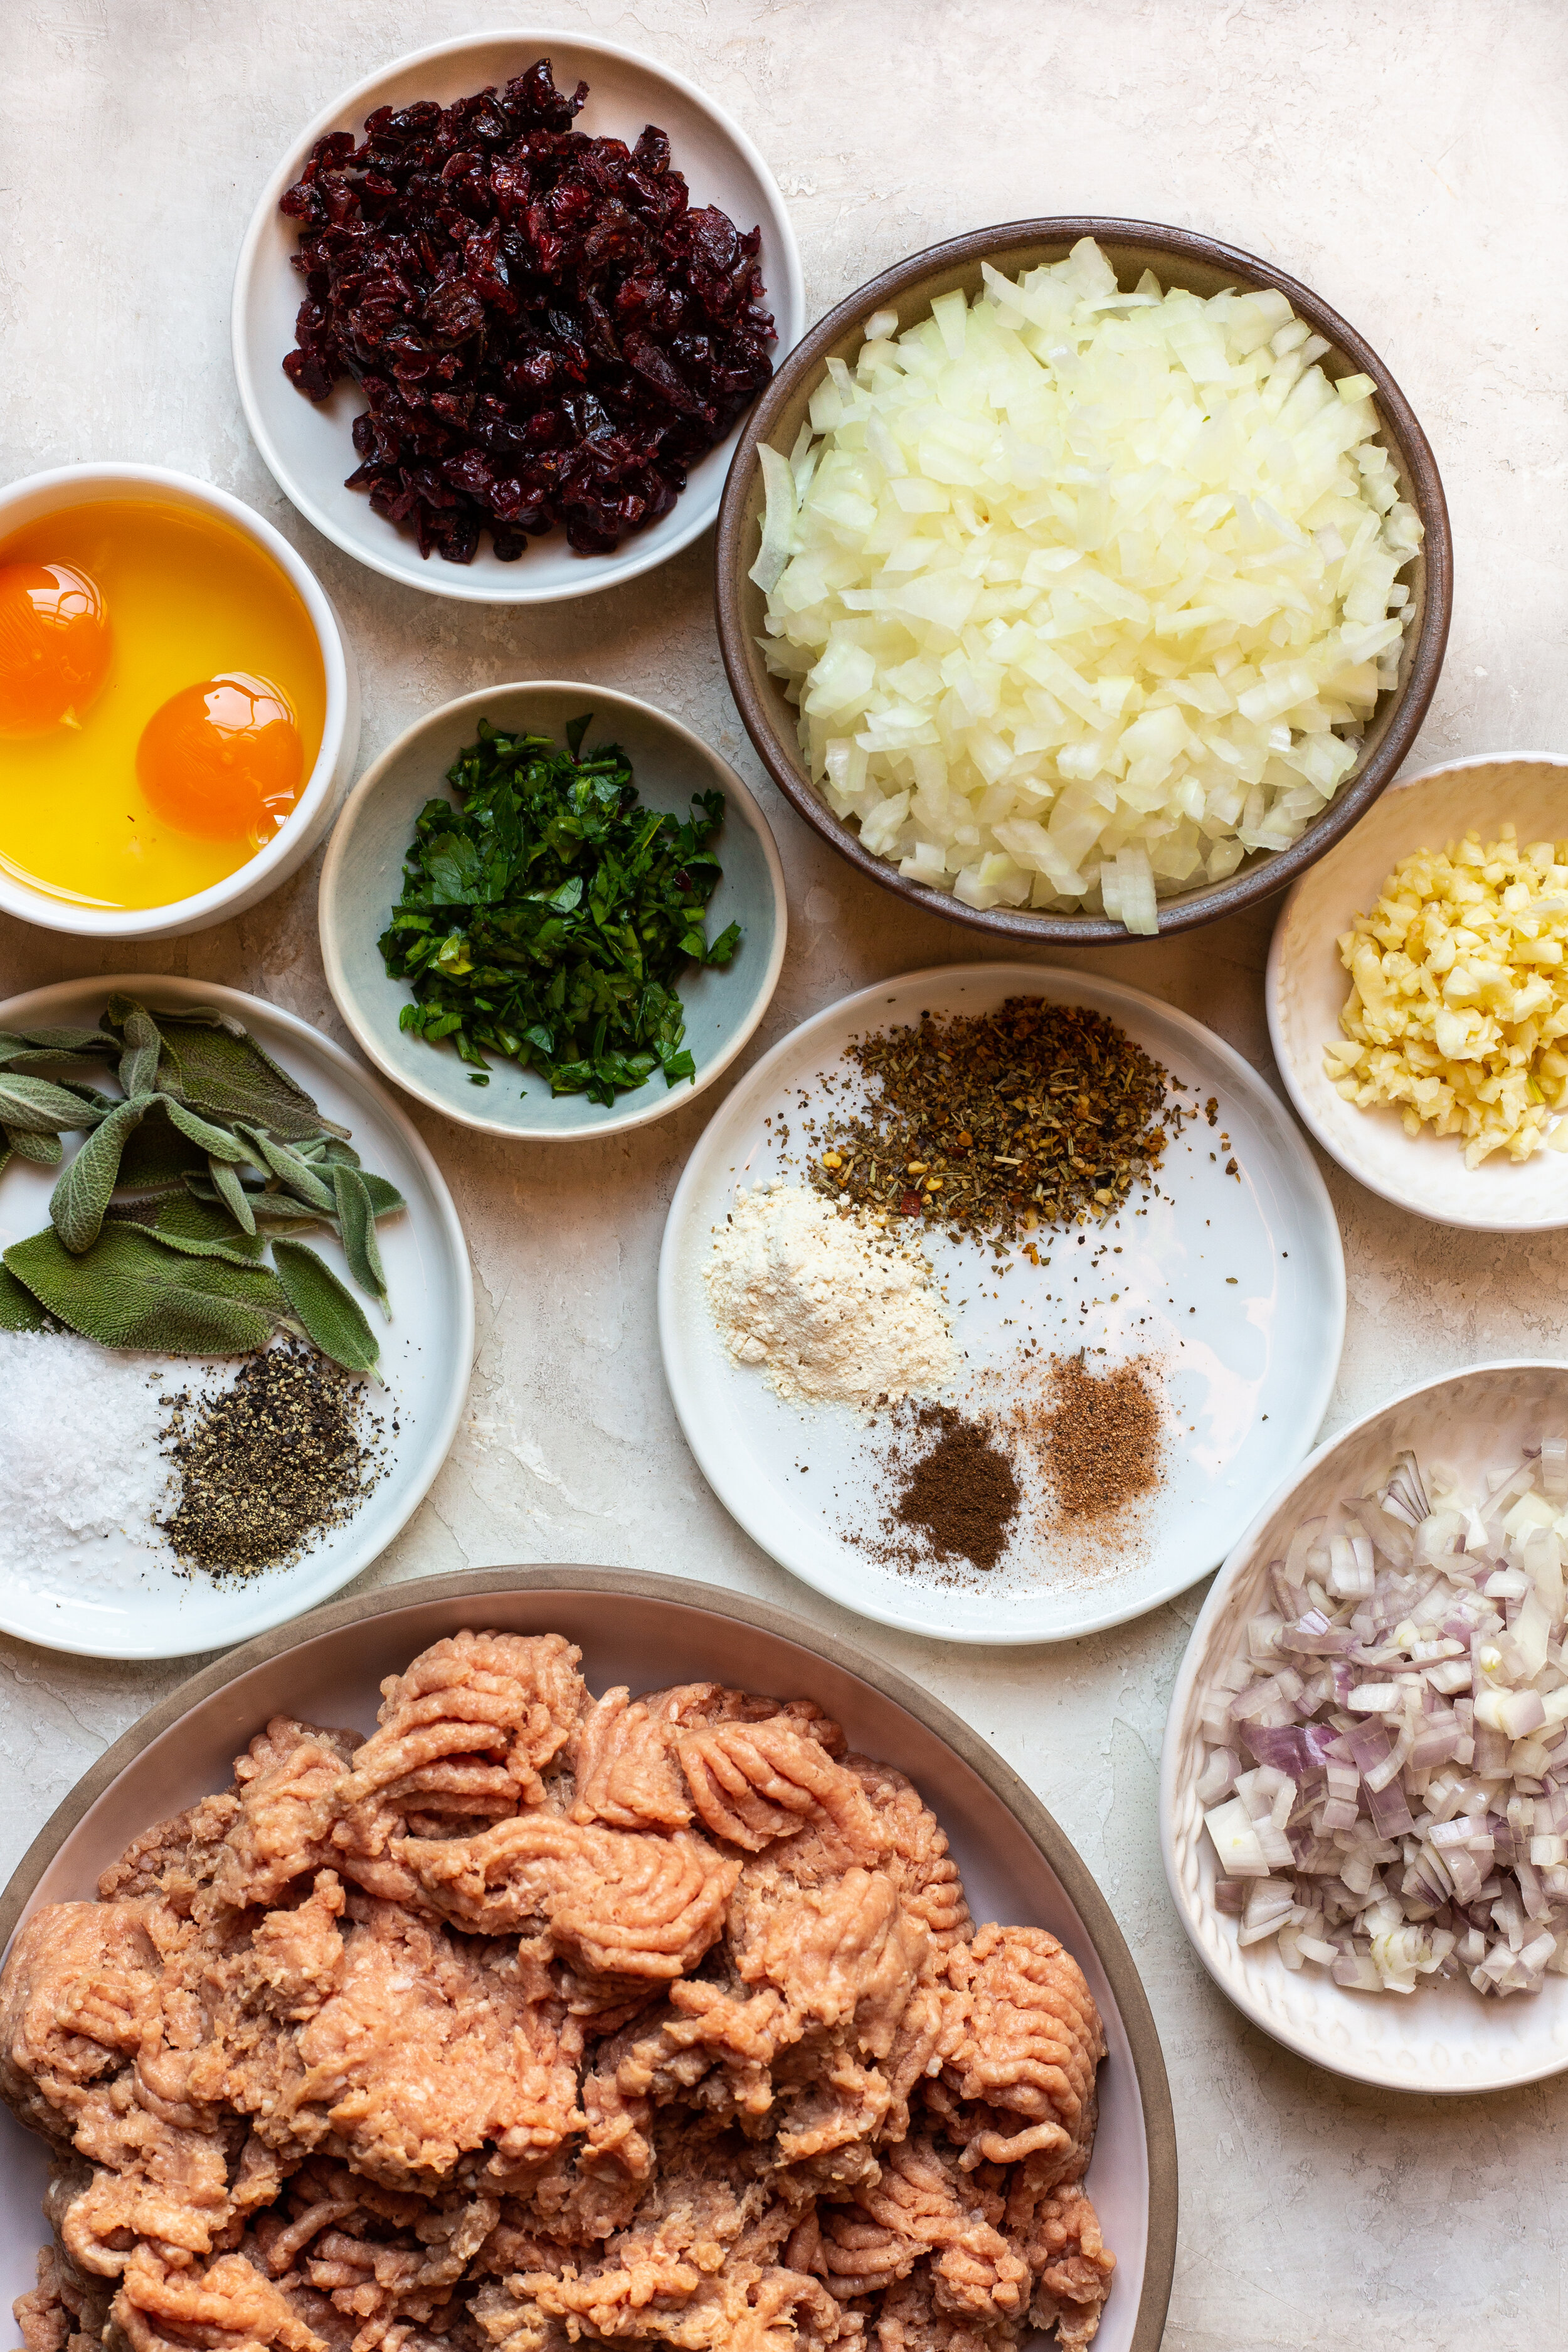
1 tablespoon olive oil
1 large yellow onion, finely minced
1/2 cup chopped shallots
4 cloves garlic, finely minced
3 pounds lean ground turkey
2 large eggs
1/3 cup finely chopped dried cranberries
1 tablespoon salt
1/2 tablespoon black pepper
2 tablespoons finely chopped sage
2 tablespoons finely chopped parsley
1/2 teaspoon nutmeg
1/2 teaspoon mace
1 teaspoon garlic powder
1 tablespoon poultry seasoning

For the gravy:
2 cups chicken, vegetable or beef broth
1 teaspoon cornstarch
the juices from the Sous Vide Turkey
salt and pepper to taste

Special equipment:
FoodSaver® Vacuum Sealing System
2 FoodSaver® Sous Vide Vacuum Seal Bags (1 Gallon each)
Sous Vide machine

Method:

Add olive oil to a saucepan over medium heat, sauté onions and shallots for 5-10 minutes until caramelized then add garlic. Cook for two minutes more, remove from heat and cool.

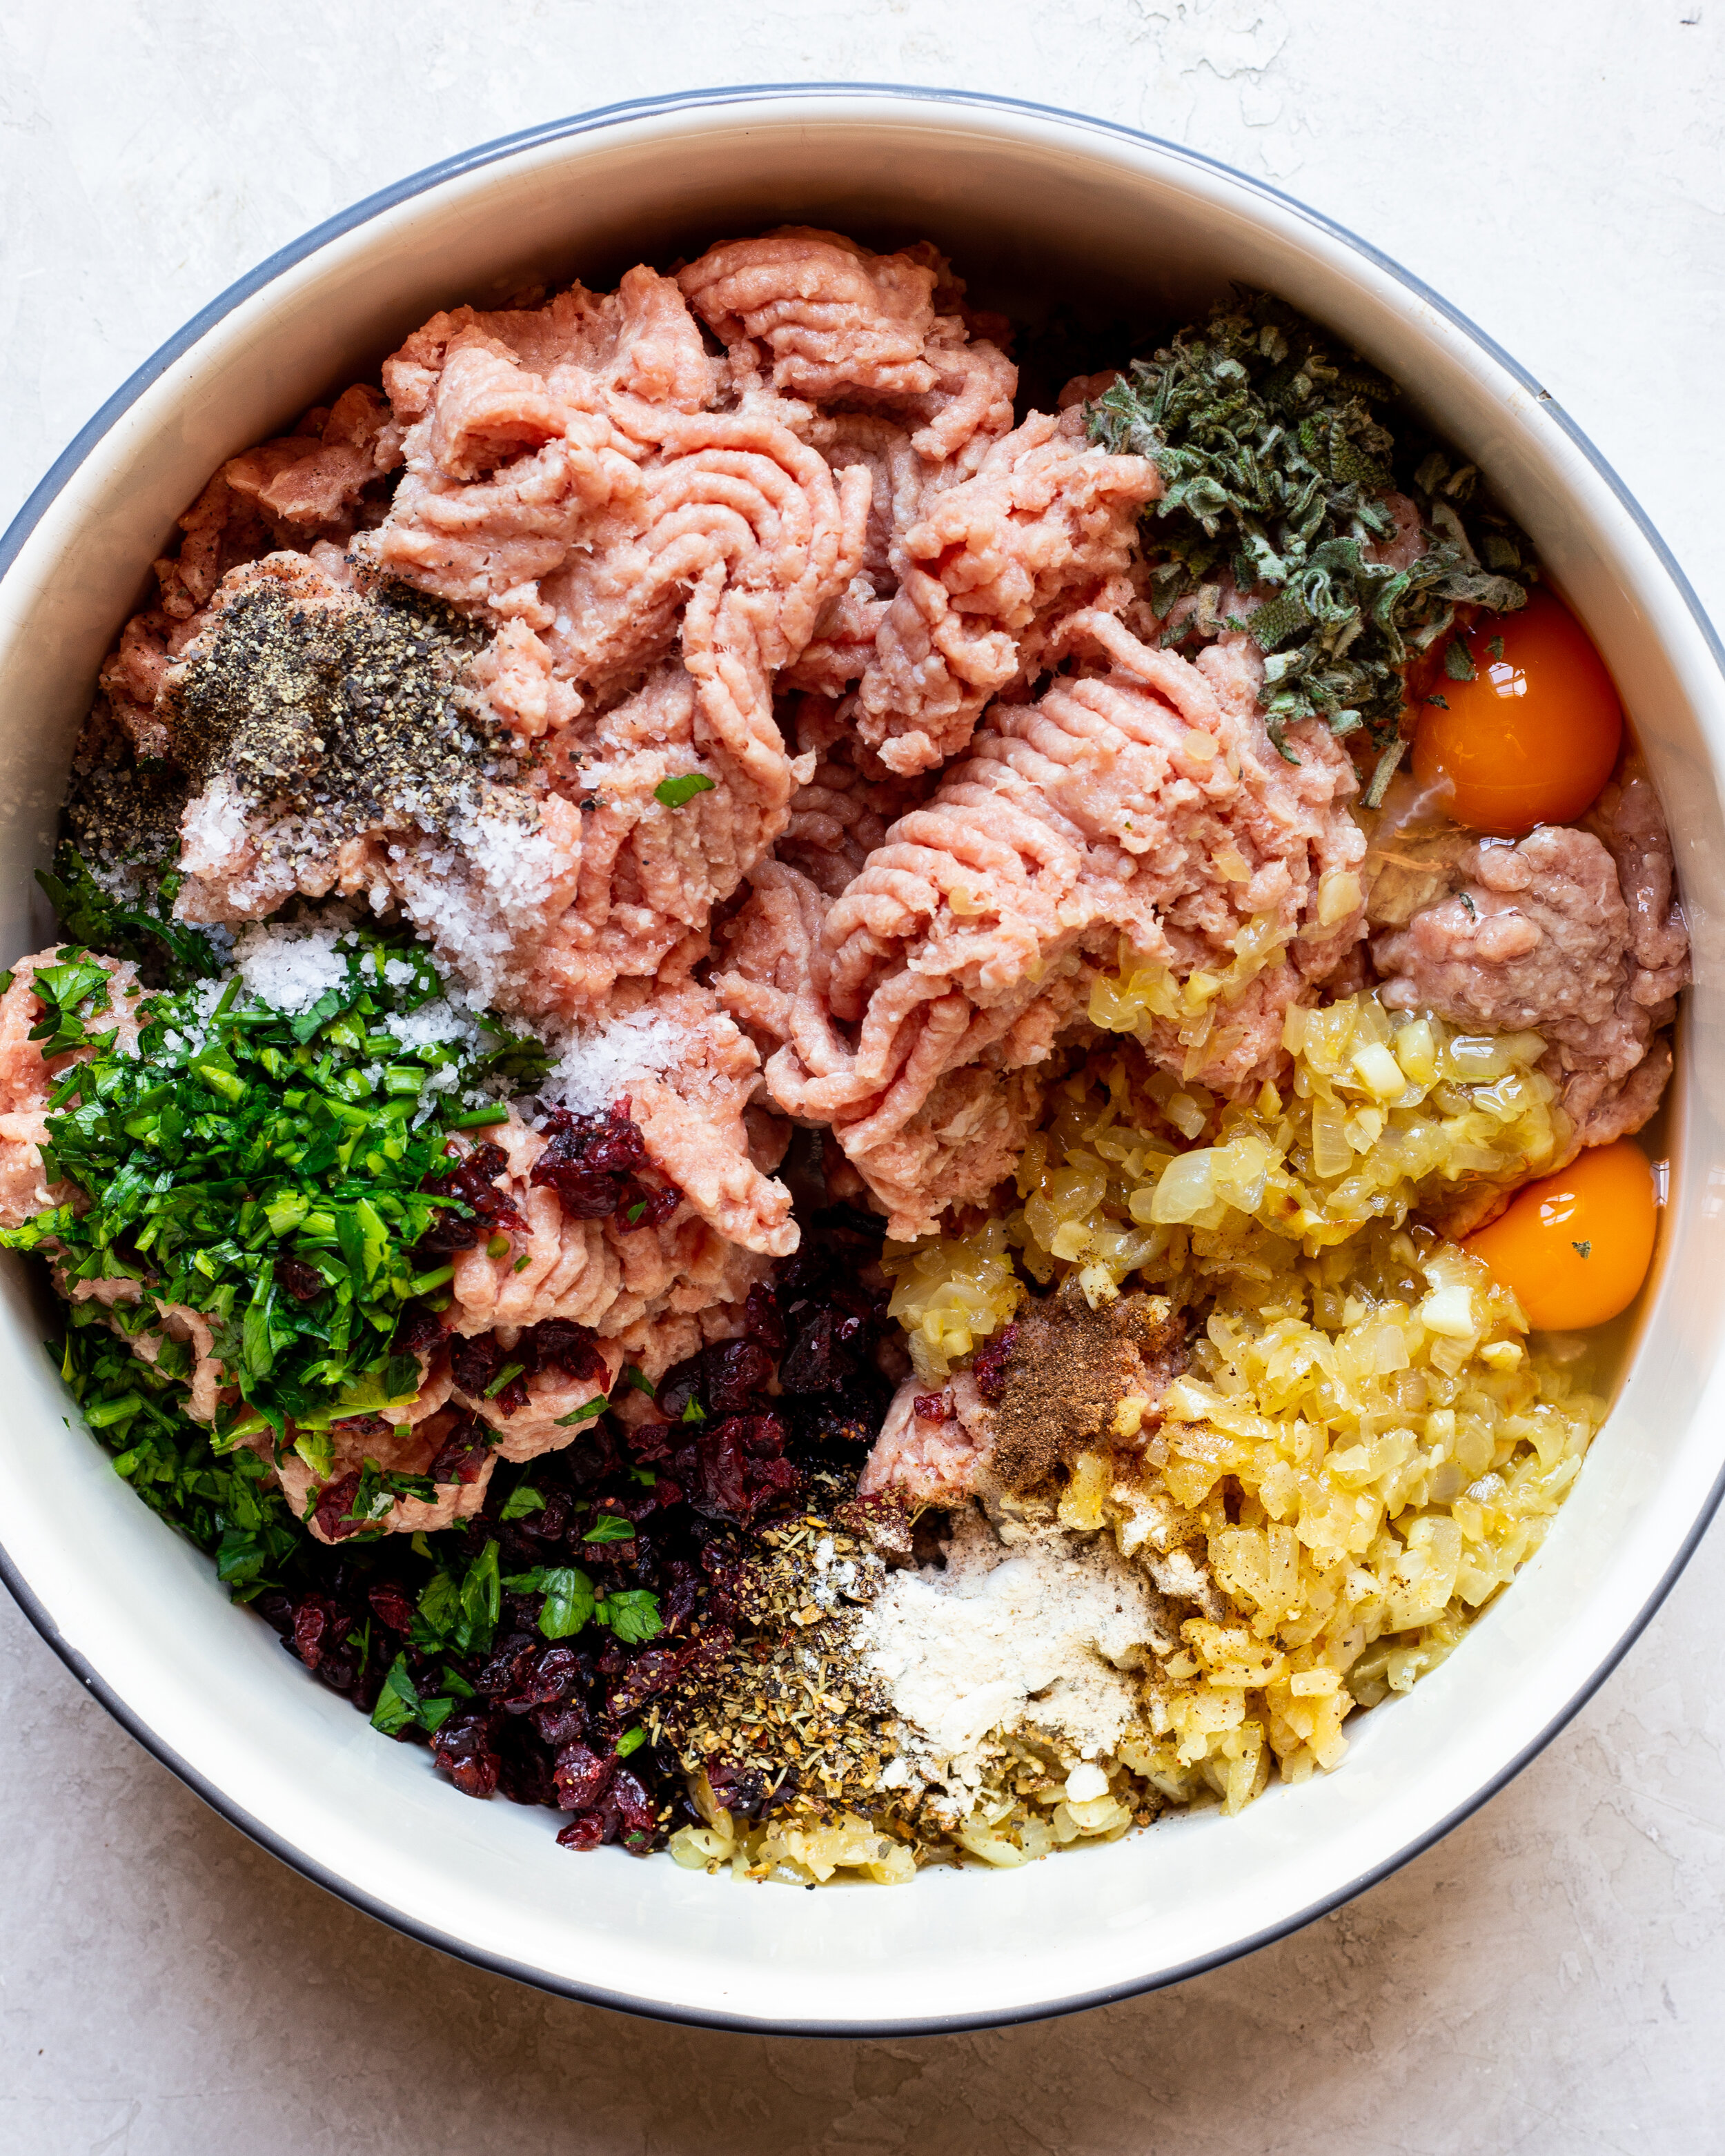
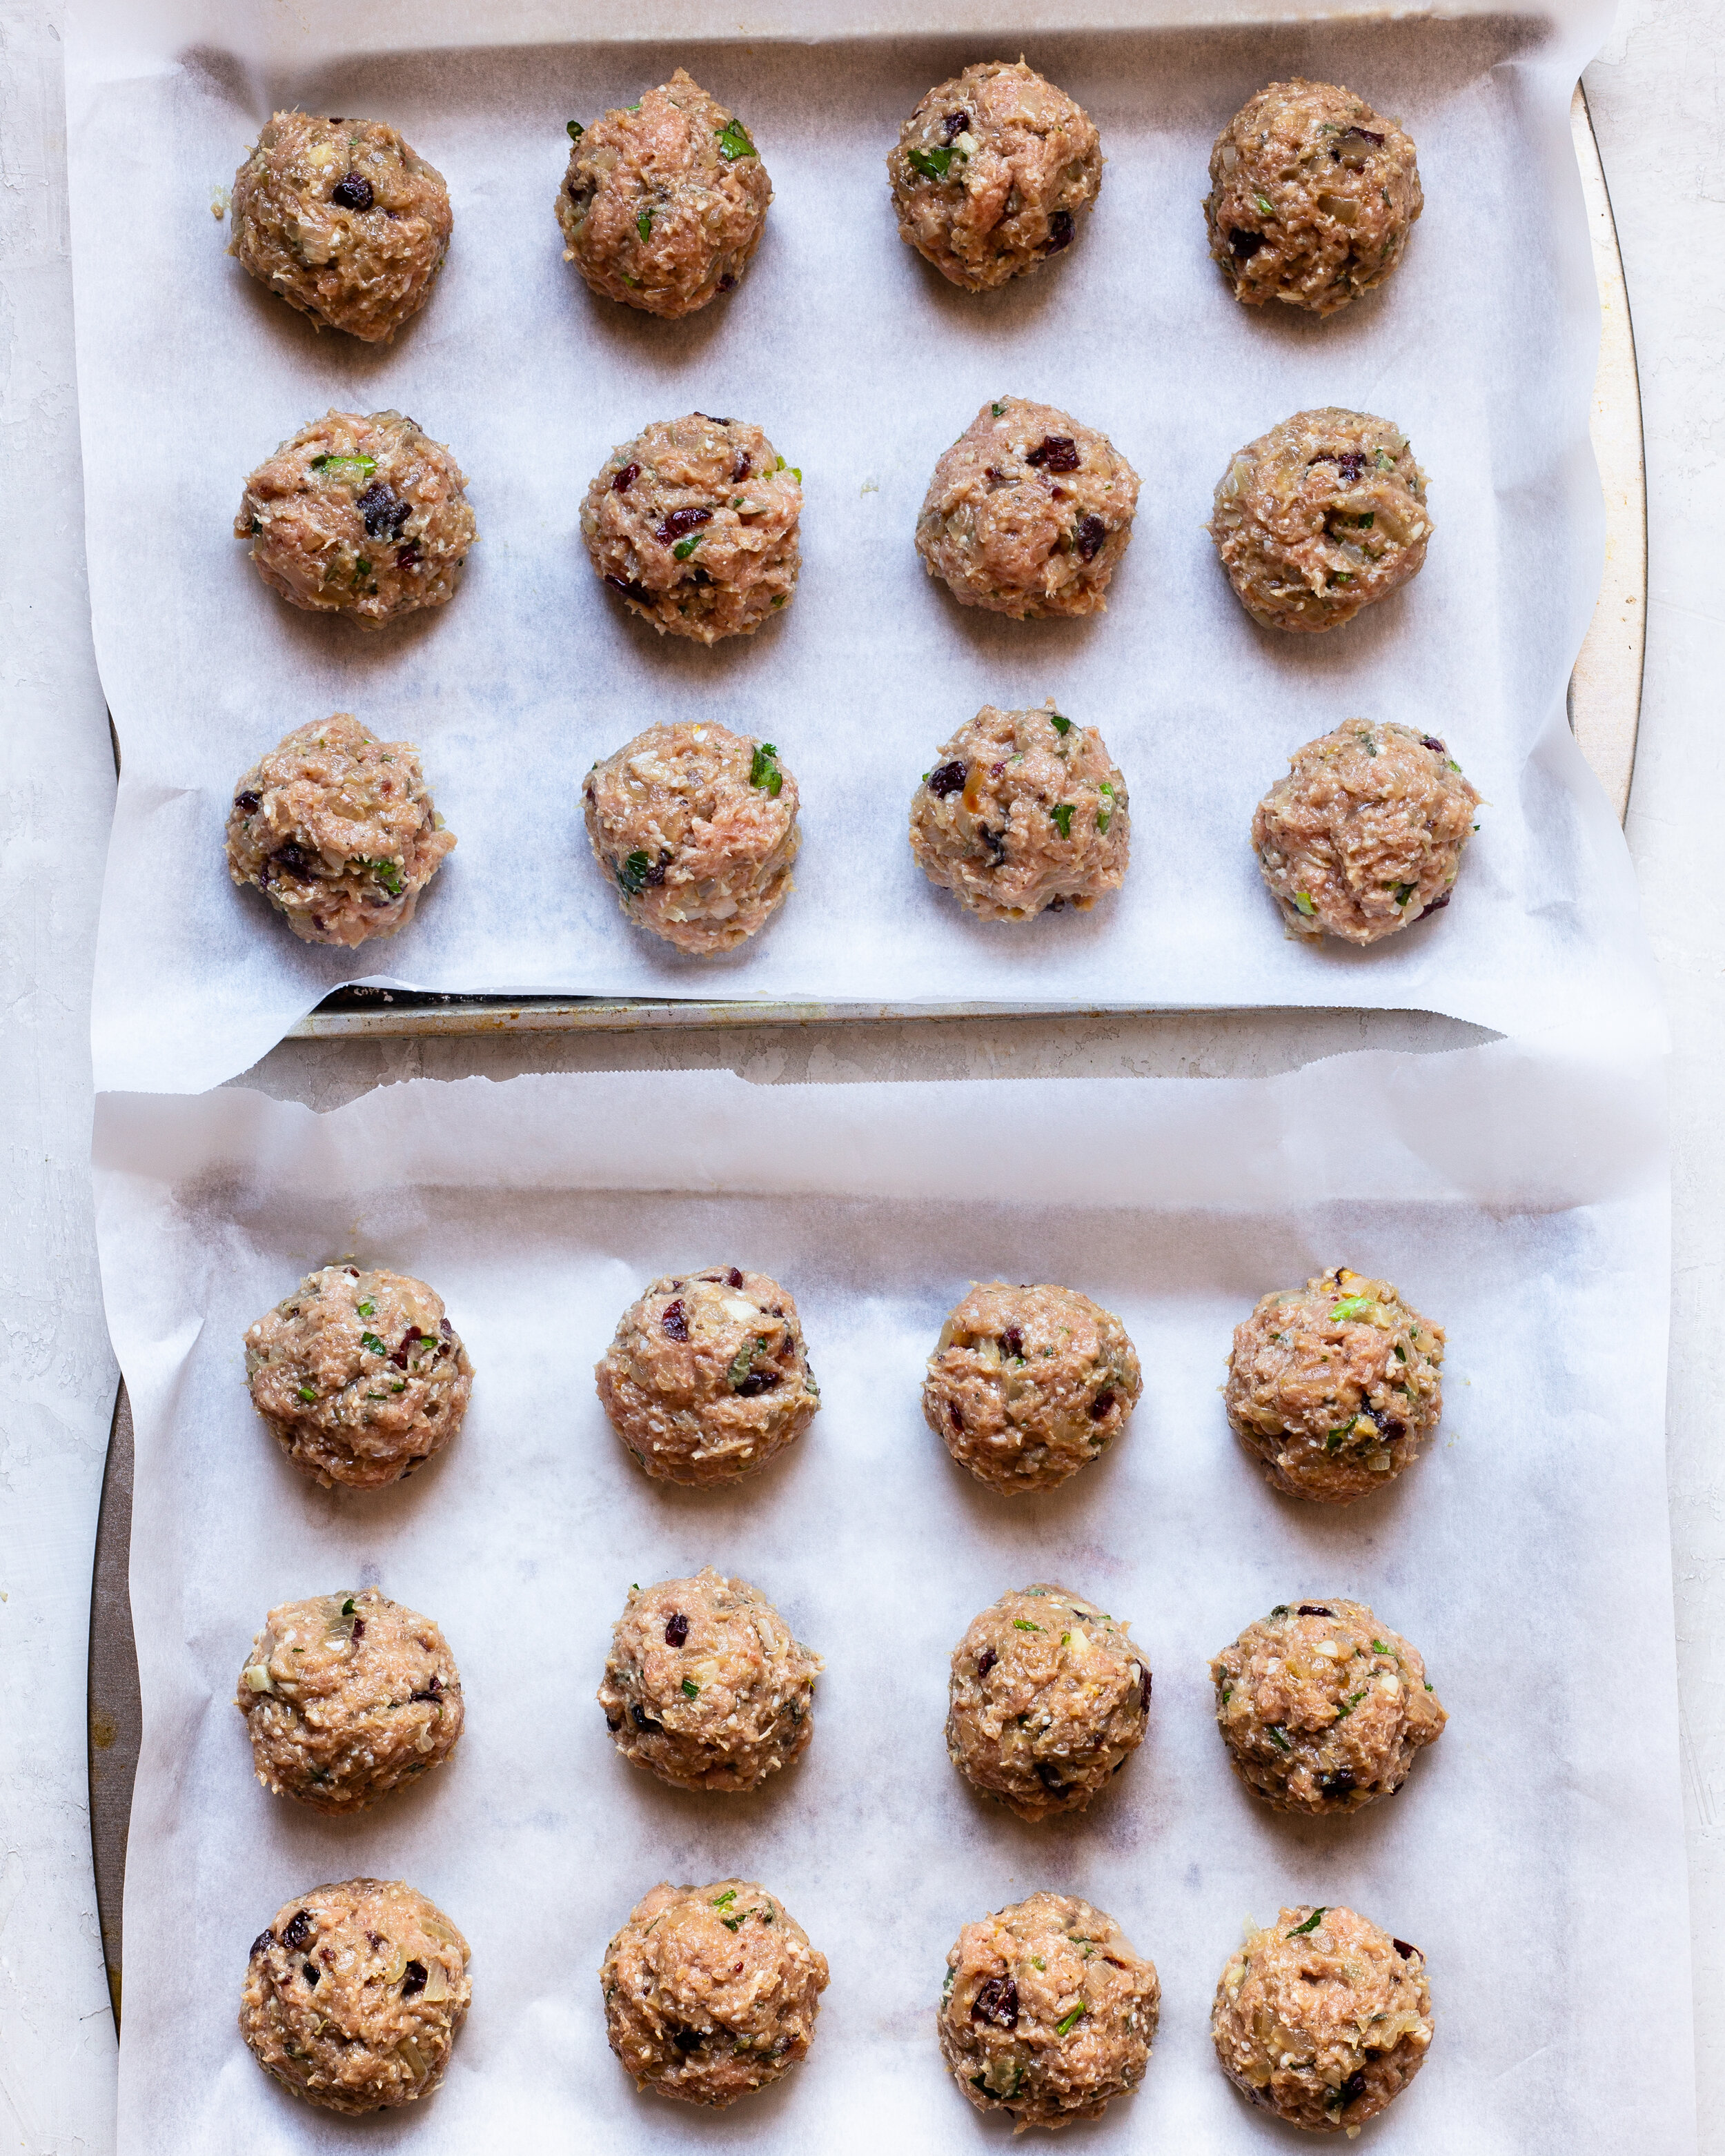
Place onions and all remaining ingredients in a bowl and gently combine until mixed through. Use a cookie scoop or your hands to portion 2 -ounce meatballs out on a lined baking sheet. Place baking sheet with meatballs in the freezer for 1-2 hours until they are able to hold their shape. 

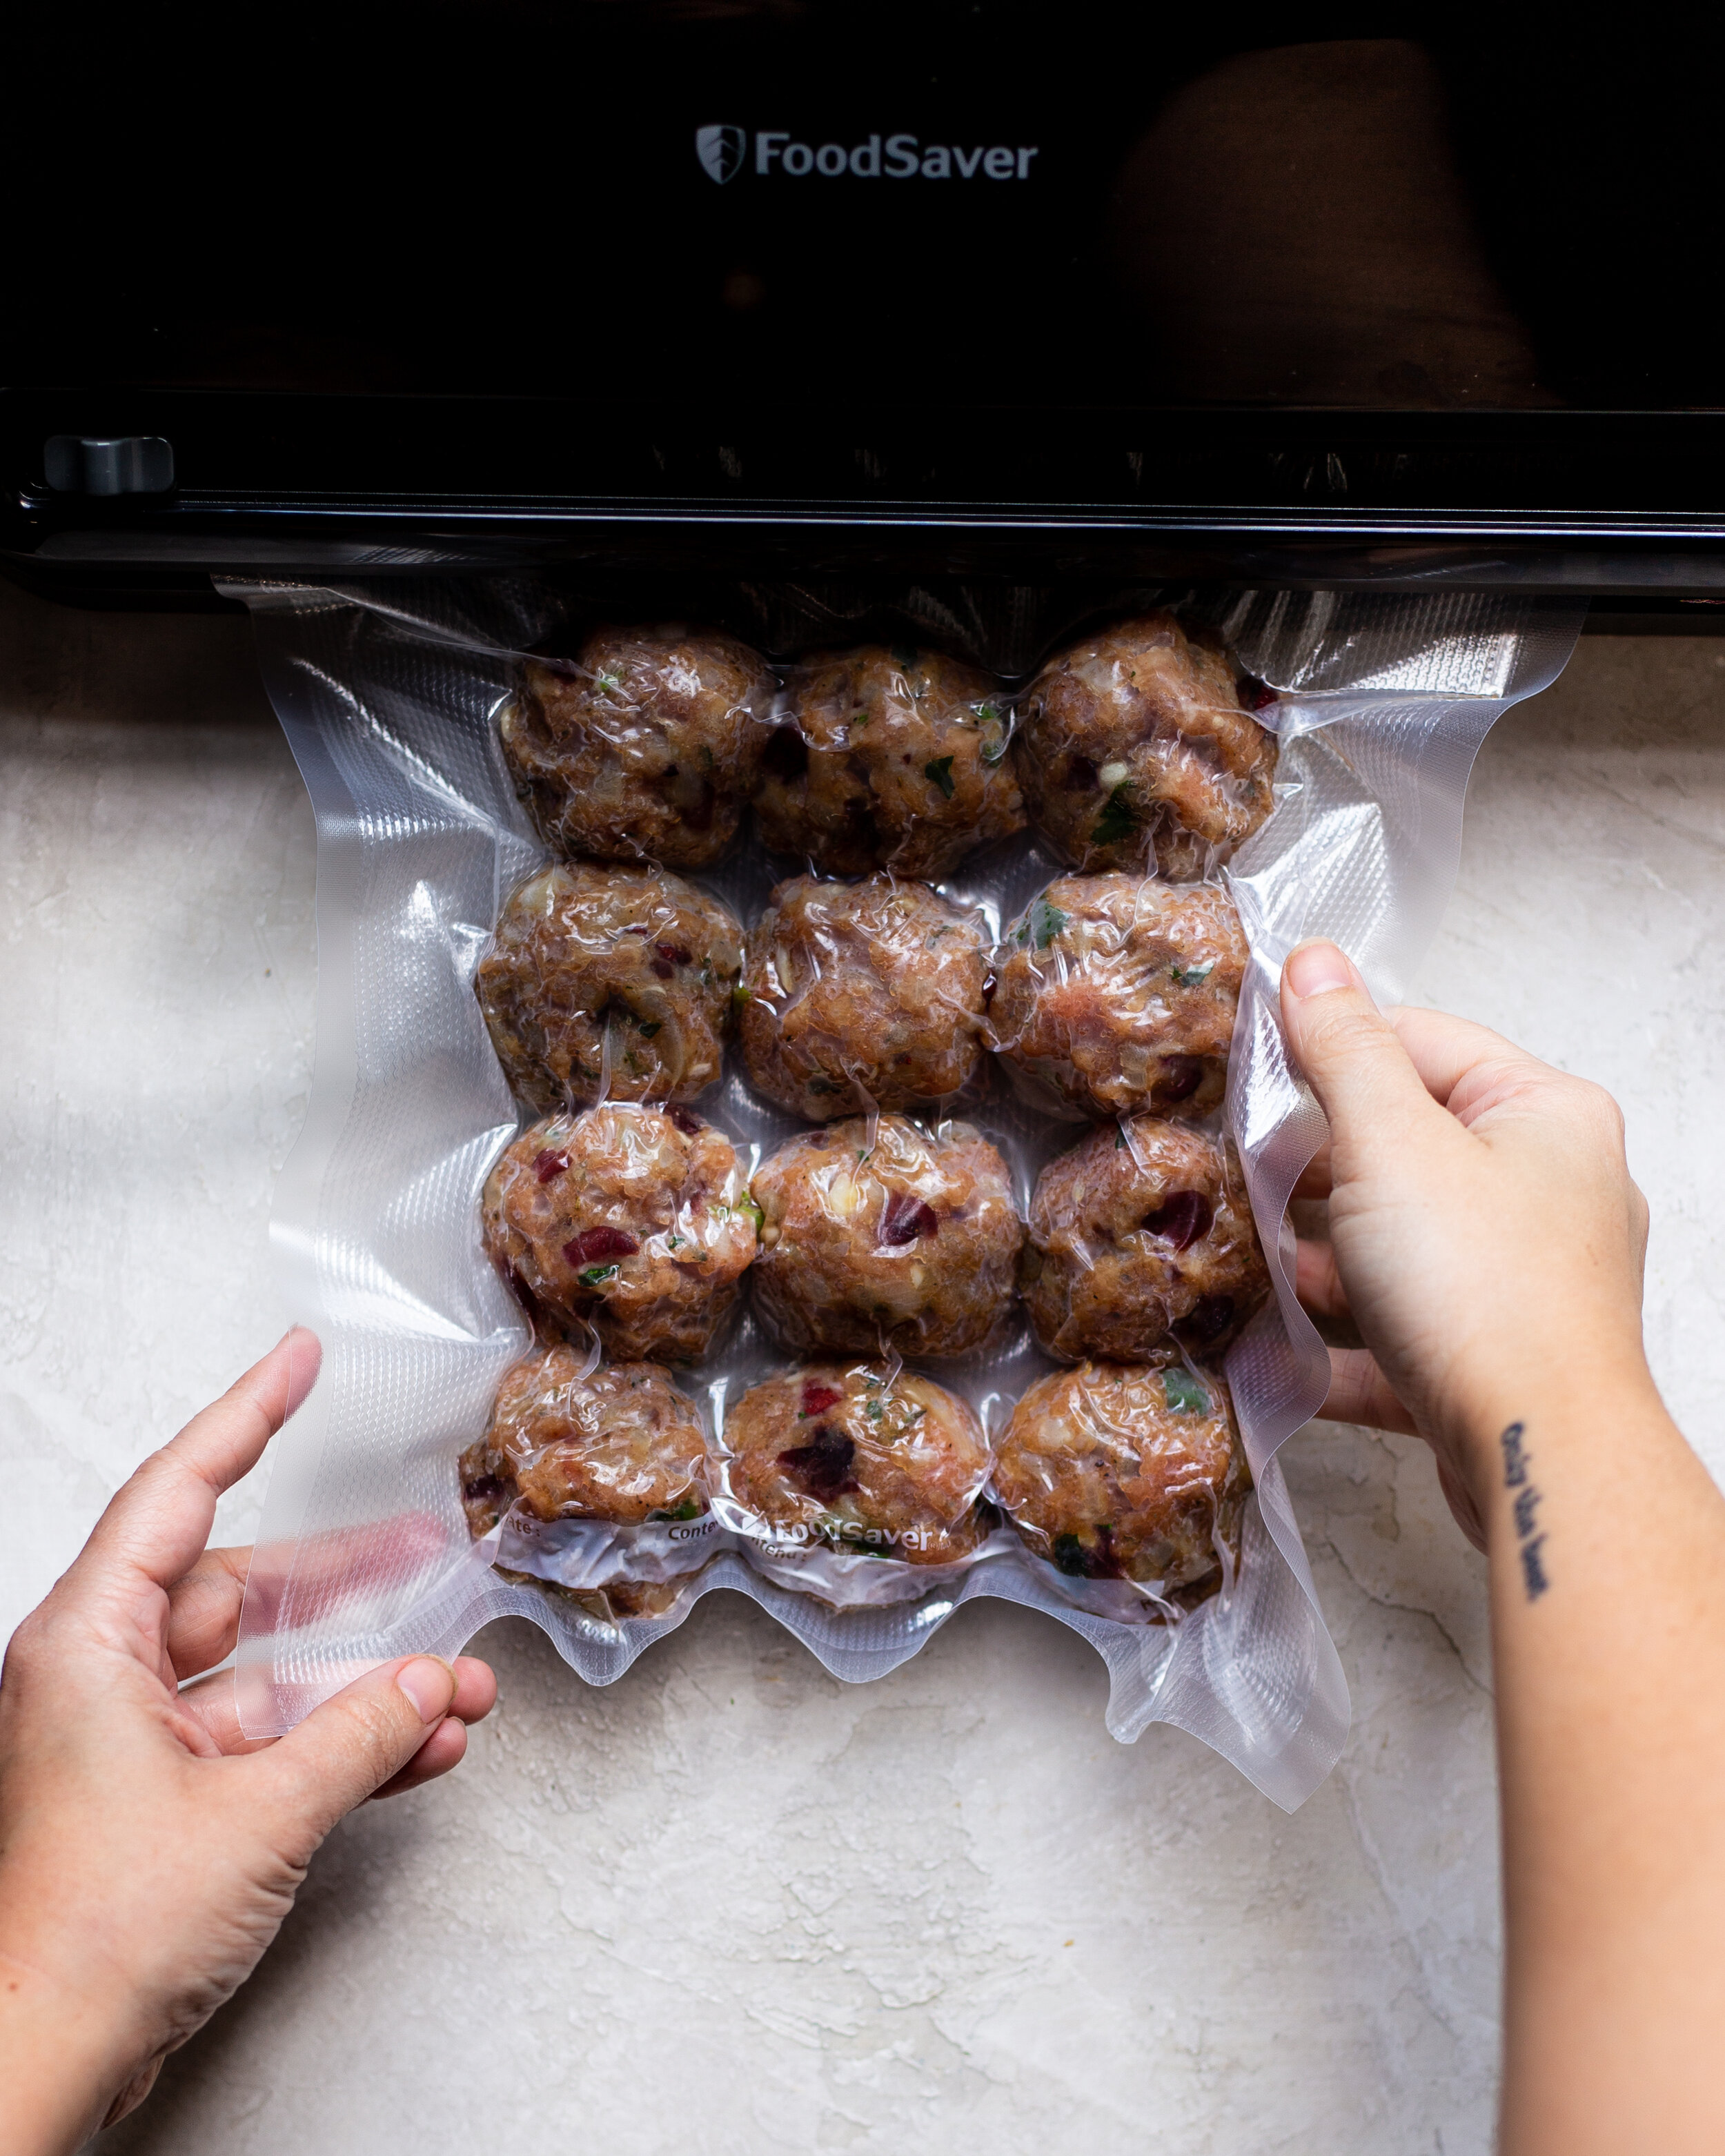
Prepare your FoodSaver® bags and FoodSaver® preservation system. Place meatballs about an inch apart in bags (12-15 per one gallon bag) and vacuum seal. Freeze until ready to Sous Vide.

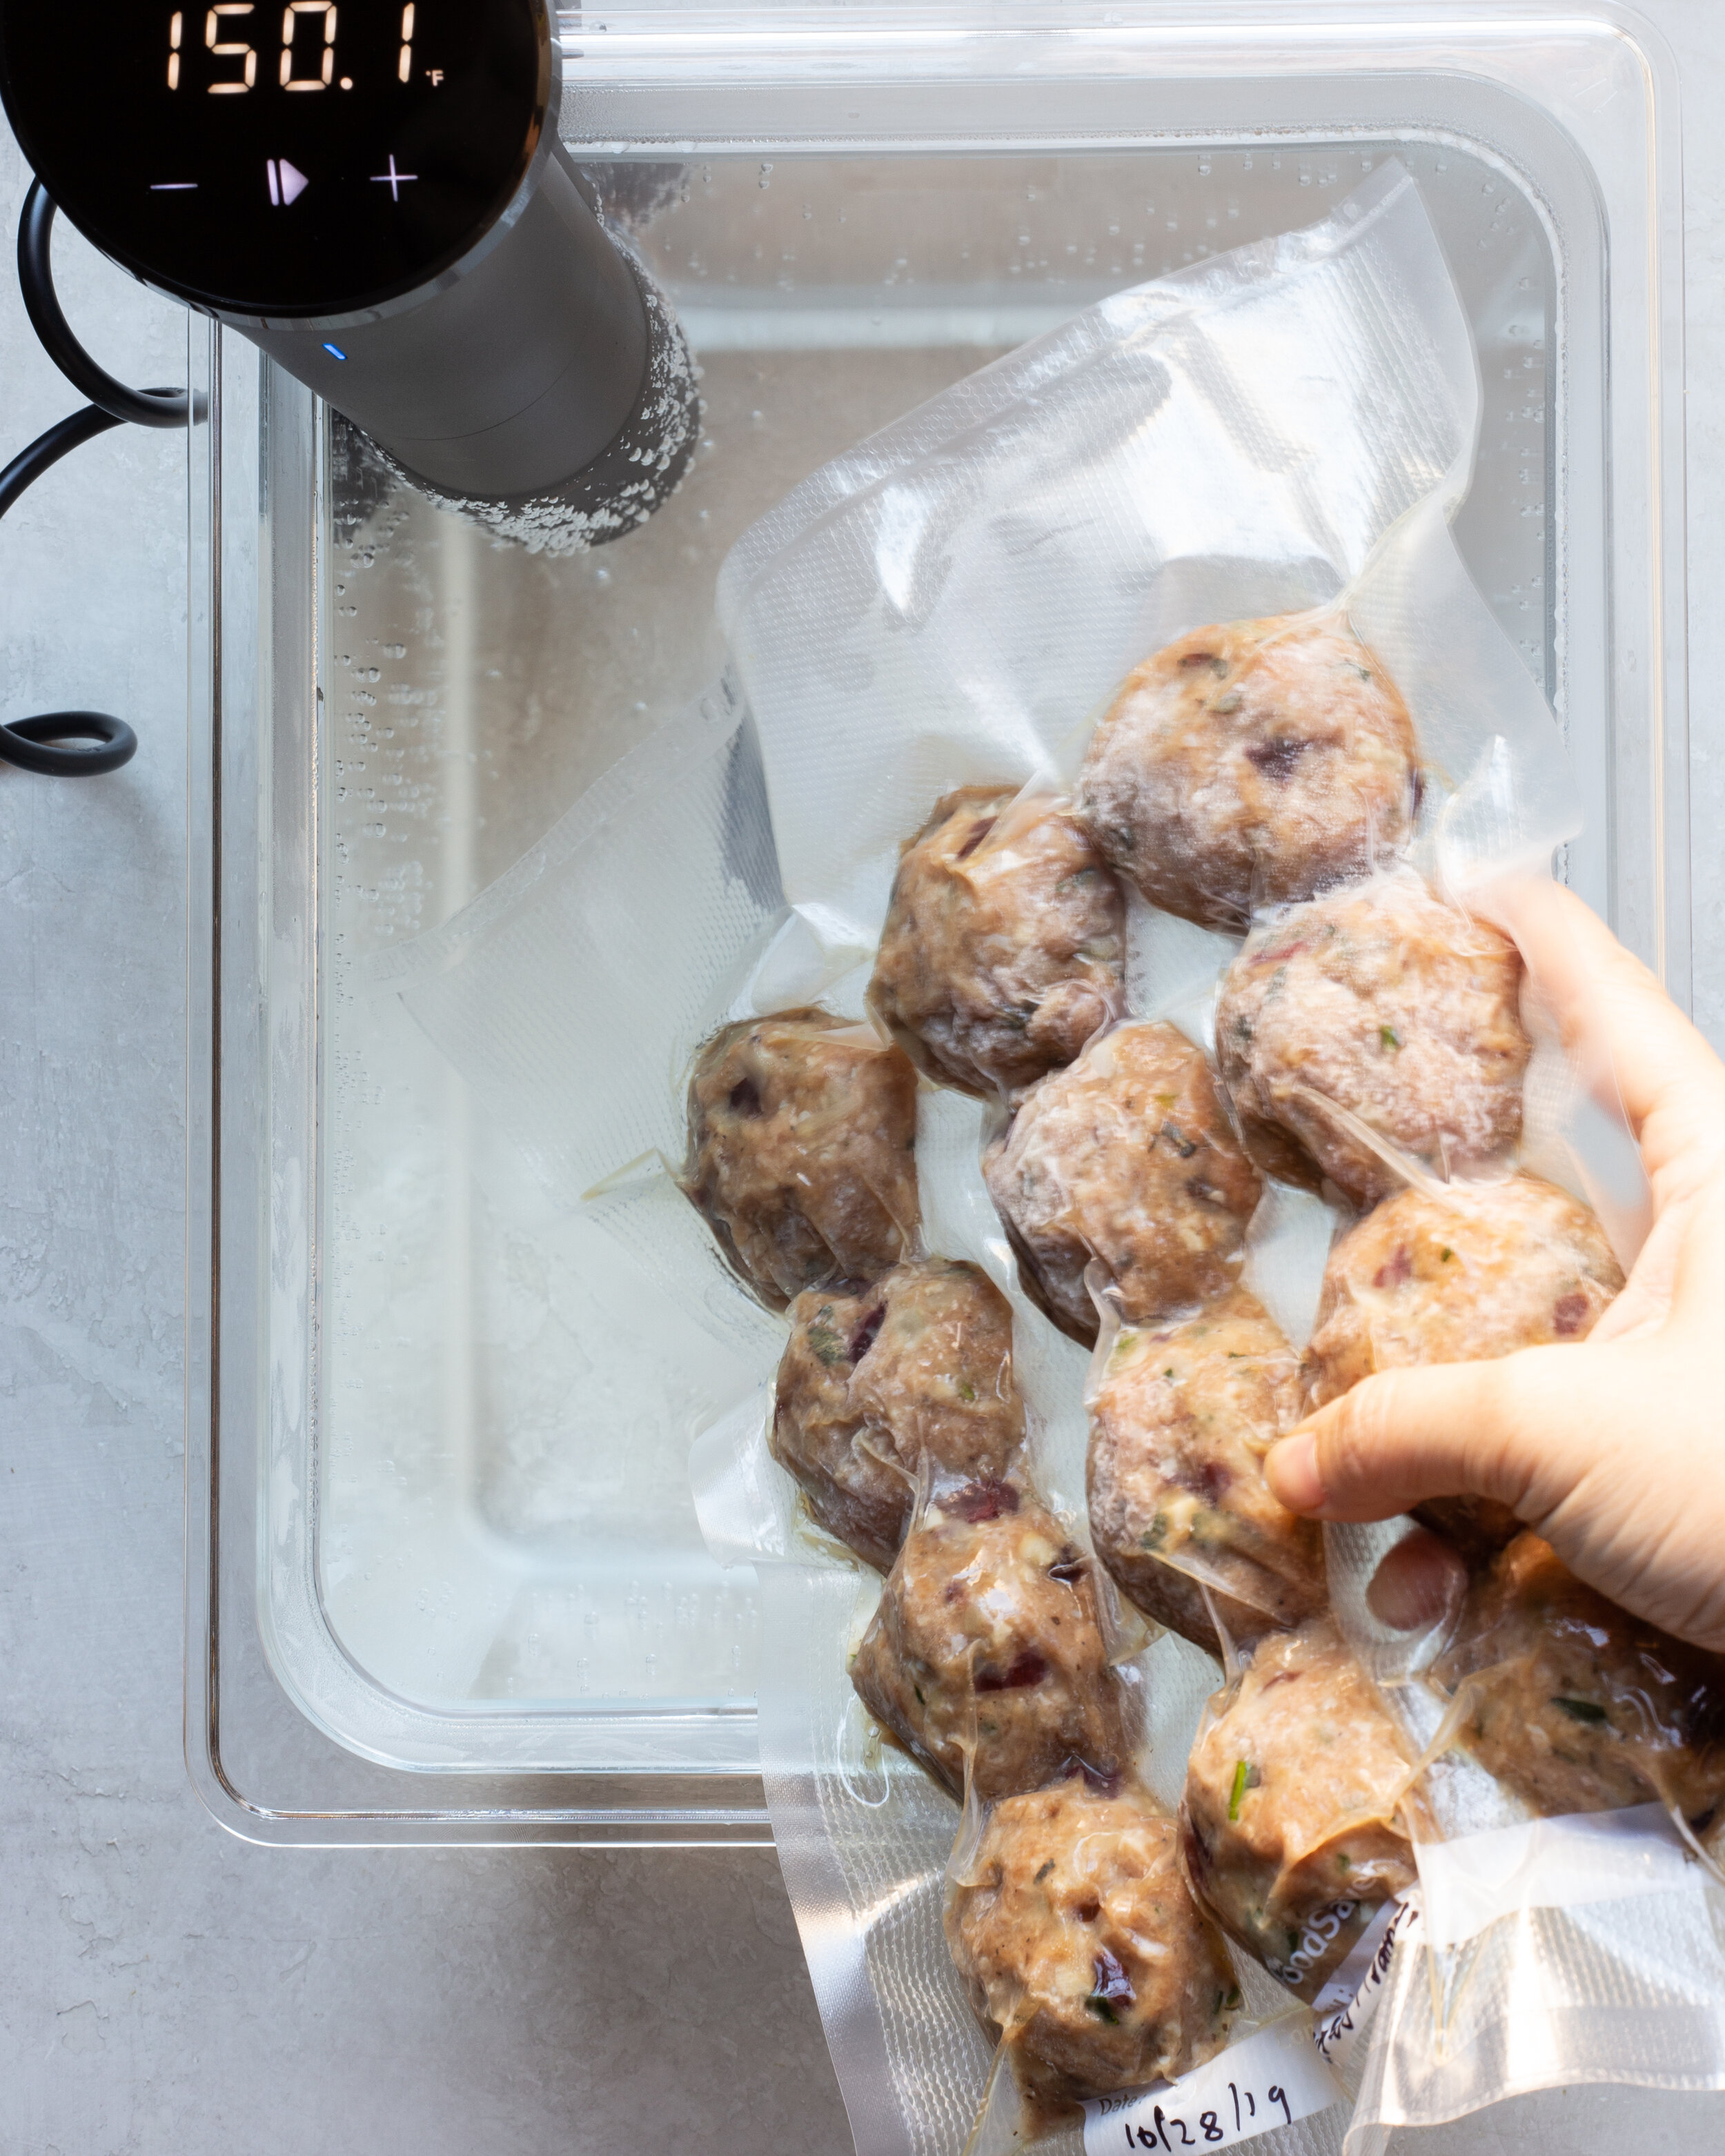
Heat a water bath using your Sous Vide cooker and preheat to 150F. Place frozen meatballs in FoodSaver® Bags inside and cook for one hour. 

Once done, carefully remove the bag and open so that the juices do not spill. 

Make the gravy by adding the juices from the cooked turkey meatballs to a skillet with the stock, stir in a slurry of cornstarch and 1 tablespoon water. Stir for 5-8 minutes until thickened then gently toss meatballs in gravy to coat. Season to taste with chopped herbs of your choice, black pepper and salt then serve immediately.

FoodSaver-4.jpg

<!--ClickMeter.com page views tracking: The Daley Plate --> <script type='text/javascript'> var ClickMeter_pixel_url = '//pixel.watch/ujtc'; </script> <script type='text/javascript' id='cmpixelscript' src='//s3.amazonaws.com/scripts-clickmeter-com/js/pixelNew.js'></script> <noscript> <img height='0' width='0' alt='' src='http://pixel.watch/ujtc' /> </noscript>

November 13, 2019 /Dale Gray
DINNER, HEALTHY, LUNCH, THANKSGIVING
Comment
Char Broil Finished Turkey - Dale Gray.jpg

Easiest Thanksgiving Turkey!

November 12, 2019 by Dale Gray in DINNER, THANKSGIVING

This recipe is brought to you by my amazing sponsor, Char-Broil. Thank you for supporting the brands that keep The Daley Plate going!

As a newlywed person who hadn’t been cooking turkey all my life, it always seemed to be such a daunting task. I was a daughter in law who wanted to impress the new family, a South African in America learning a new culture and quite frankly wasn’t ready to tackle hosting our first Thanksgiving by myself. We had an old creaky oven and I was completely unaware of dry brings vs. wet brining, resting time or even oven temperatures. Needless to say it was a disaster. We all picked at a dry, flavorless turkey as I sat there, flustered. I lost a lot of confidence because of it. 

Over the next few years I picked up a few tips and tricks but never fully loved cooking the turkey in the oven. Seasoning the turkey with Cajun spices and frying it seemed like the only way it came out juicy and flavorful throughout, also highly appropriate because his family is from Louisiana. We invested in a turkey fryer and used it a few times but there were a few problems with this: 

  • Buying a large heavy box of peanut oil just for a turkey seemed wasteful to me. 

  • Cleaning out the fryer was tedious and I wasn’t sure where to discard the oil.

Two uses and we were done. I put it in the garage and it never got used again. We skipped Thanksgiving for the last three years, opting instead to eat at the homes of family members for a less stressful experience. Is that bad? ;-) I did love to entertain and this year decided to try again with the godsend that is The Big Easy® Oil-Less Turkey Fryer. Eureka!

Product+Shot+2+-+Dale+Gray.jpg
Inside Image - Dale Gray.jpg
Process Shot - Dale Gray.jpg

Sometimes the pressure of the holidays and stressing over the turkey makes Thanksgiving more of an anxiety-filled event than it has to be, for amateur cooks and seasoned cooks alike. For this reason I’m listing a few ways to streamline the experience for us cooks who like things easy but want to make an effort to ensure that things come out well. 

1. Make your grocery list early
Don’t wait until the last week to finalize your menu. Pick a few easy sides and write down those ingredients, separating them into perishable and non-perishable so that you know which to buy now and which to buy later (cream, butter and milk for example).

2. Set the table the night before
This is something that you can do in 15 minutes to save time on Thanksgiving day. Set out name cards, napkins, place glassware/dinnerware in the dishwasher so that they are sparkling, and make sure that any wines are refrigerated. Though we never celebrated Thanksgiving in South Africa, these are some things my mother always has us kids do before any family gathering.

3. Take the stress out of cooking the turkey so that you can focus on everything else!
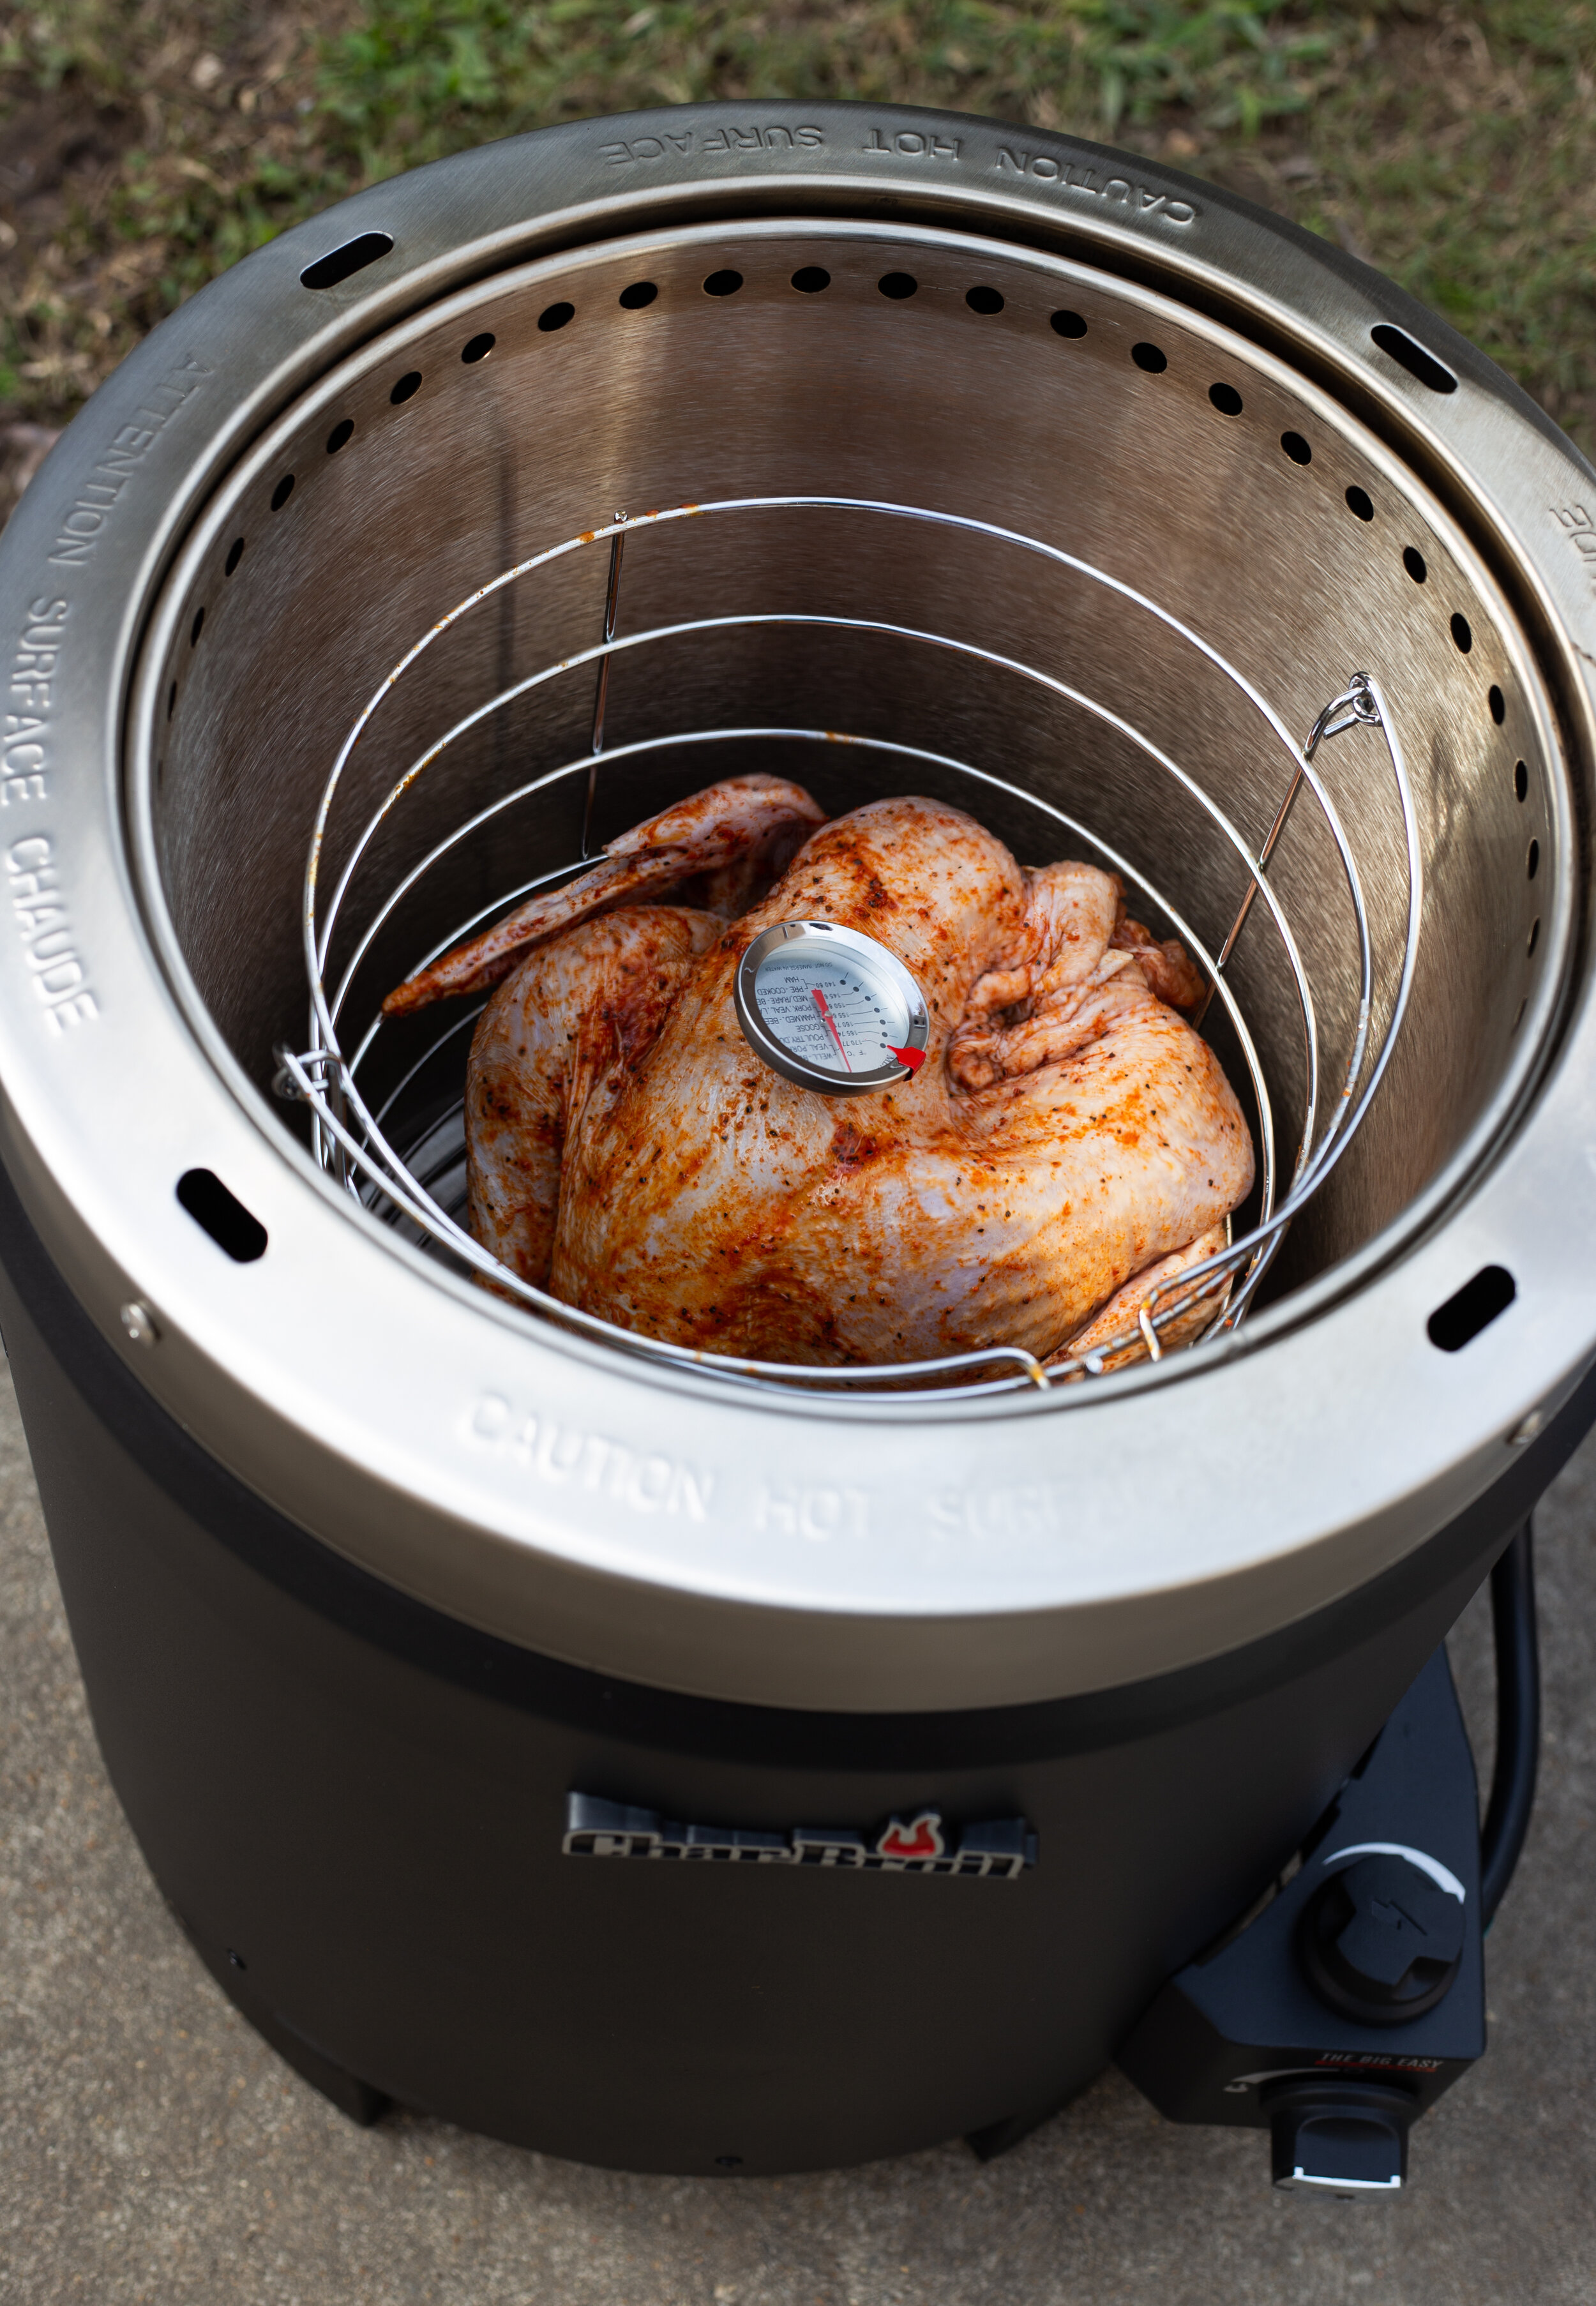
I could tell you to cook as many sides as possible ahead of time, but honestly that won’t be necessary if you cook your turkey in The Big Easy® Oil-Less Turkey Fryer from Char-Broil! I used it to cook three turkeys within the last month and I can’t recommend it enough!

  • You use it outside, freeing up space in your oven for side dishes and counter space too!

  • Frying gives you the most delicious turkey, but The Big Easy® doesn’t need oil! Only a few tablespoons sprayed or rubbed onto the turkey itself. That means no messy clean-up job, no oil to discard and it’s healthier than conventional fryers.

  • Your turkey will cook faster and you’ll be able to easily see when it reaches 165F (USDA recommended temperature for poultry). There weren’t any hot  spots or cold spots in the turkeys that I cooked, so it’s safe to say that The Big Easy® cooks evenly.

I’m adding my Cajun Fried Turkey below. Click here and use code DALEYPLATE to get 15% off your purchase of The Big Easy® Oil-Less Turkey Fryer which comes with a thorough grilling guide to help you cook other recipes as well. Visit www.charbroil.com for accessories that could allow you to prepare vegetables at the same time as the turkey.

Easiest Thanksgiving Turkey Recipe:

Ingredients:
Whole turkey, cavity cleaned
2-4 tablespoons peanut or olive oil depending on the size of your turkey
Cajun seasoning (equal parts salt, sugar, black pepper, cayenne pepper, garlic powder, onion powder and dried thyme)

Method:
On a clean surface or baking sheet, pat turkey dry and rub with oil to evenly cover the surface. Season the turkey thoroughly with Cajun seasoning and place inside the refrigerator for 2 hours or up to 12 hours (so you can prep this the day before!) 

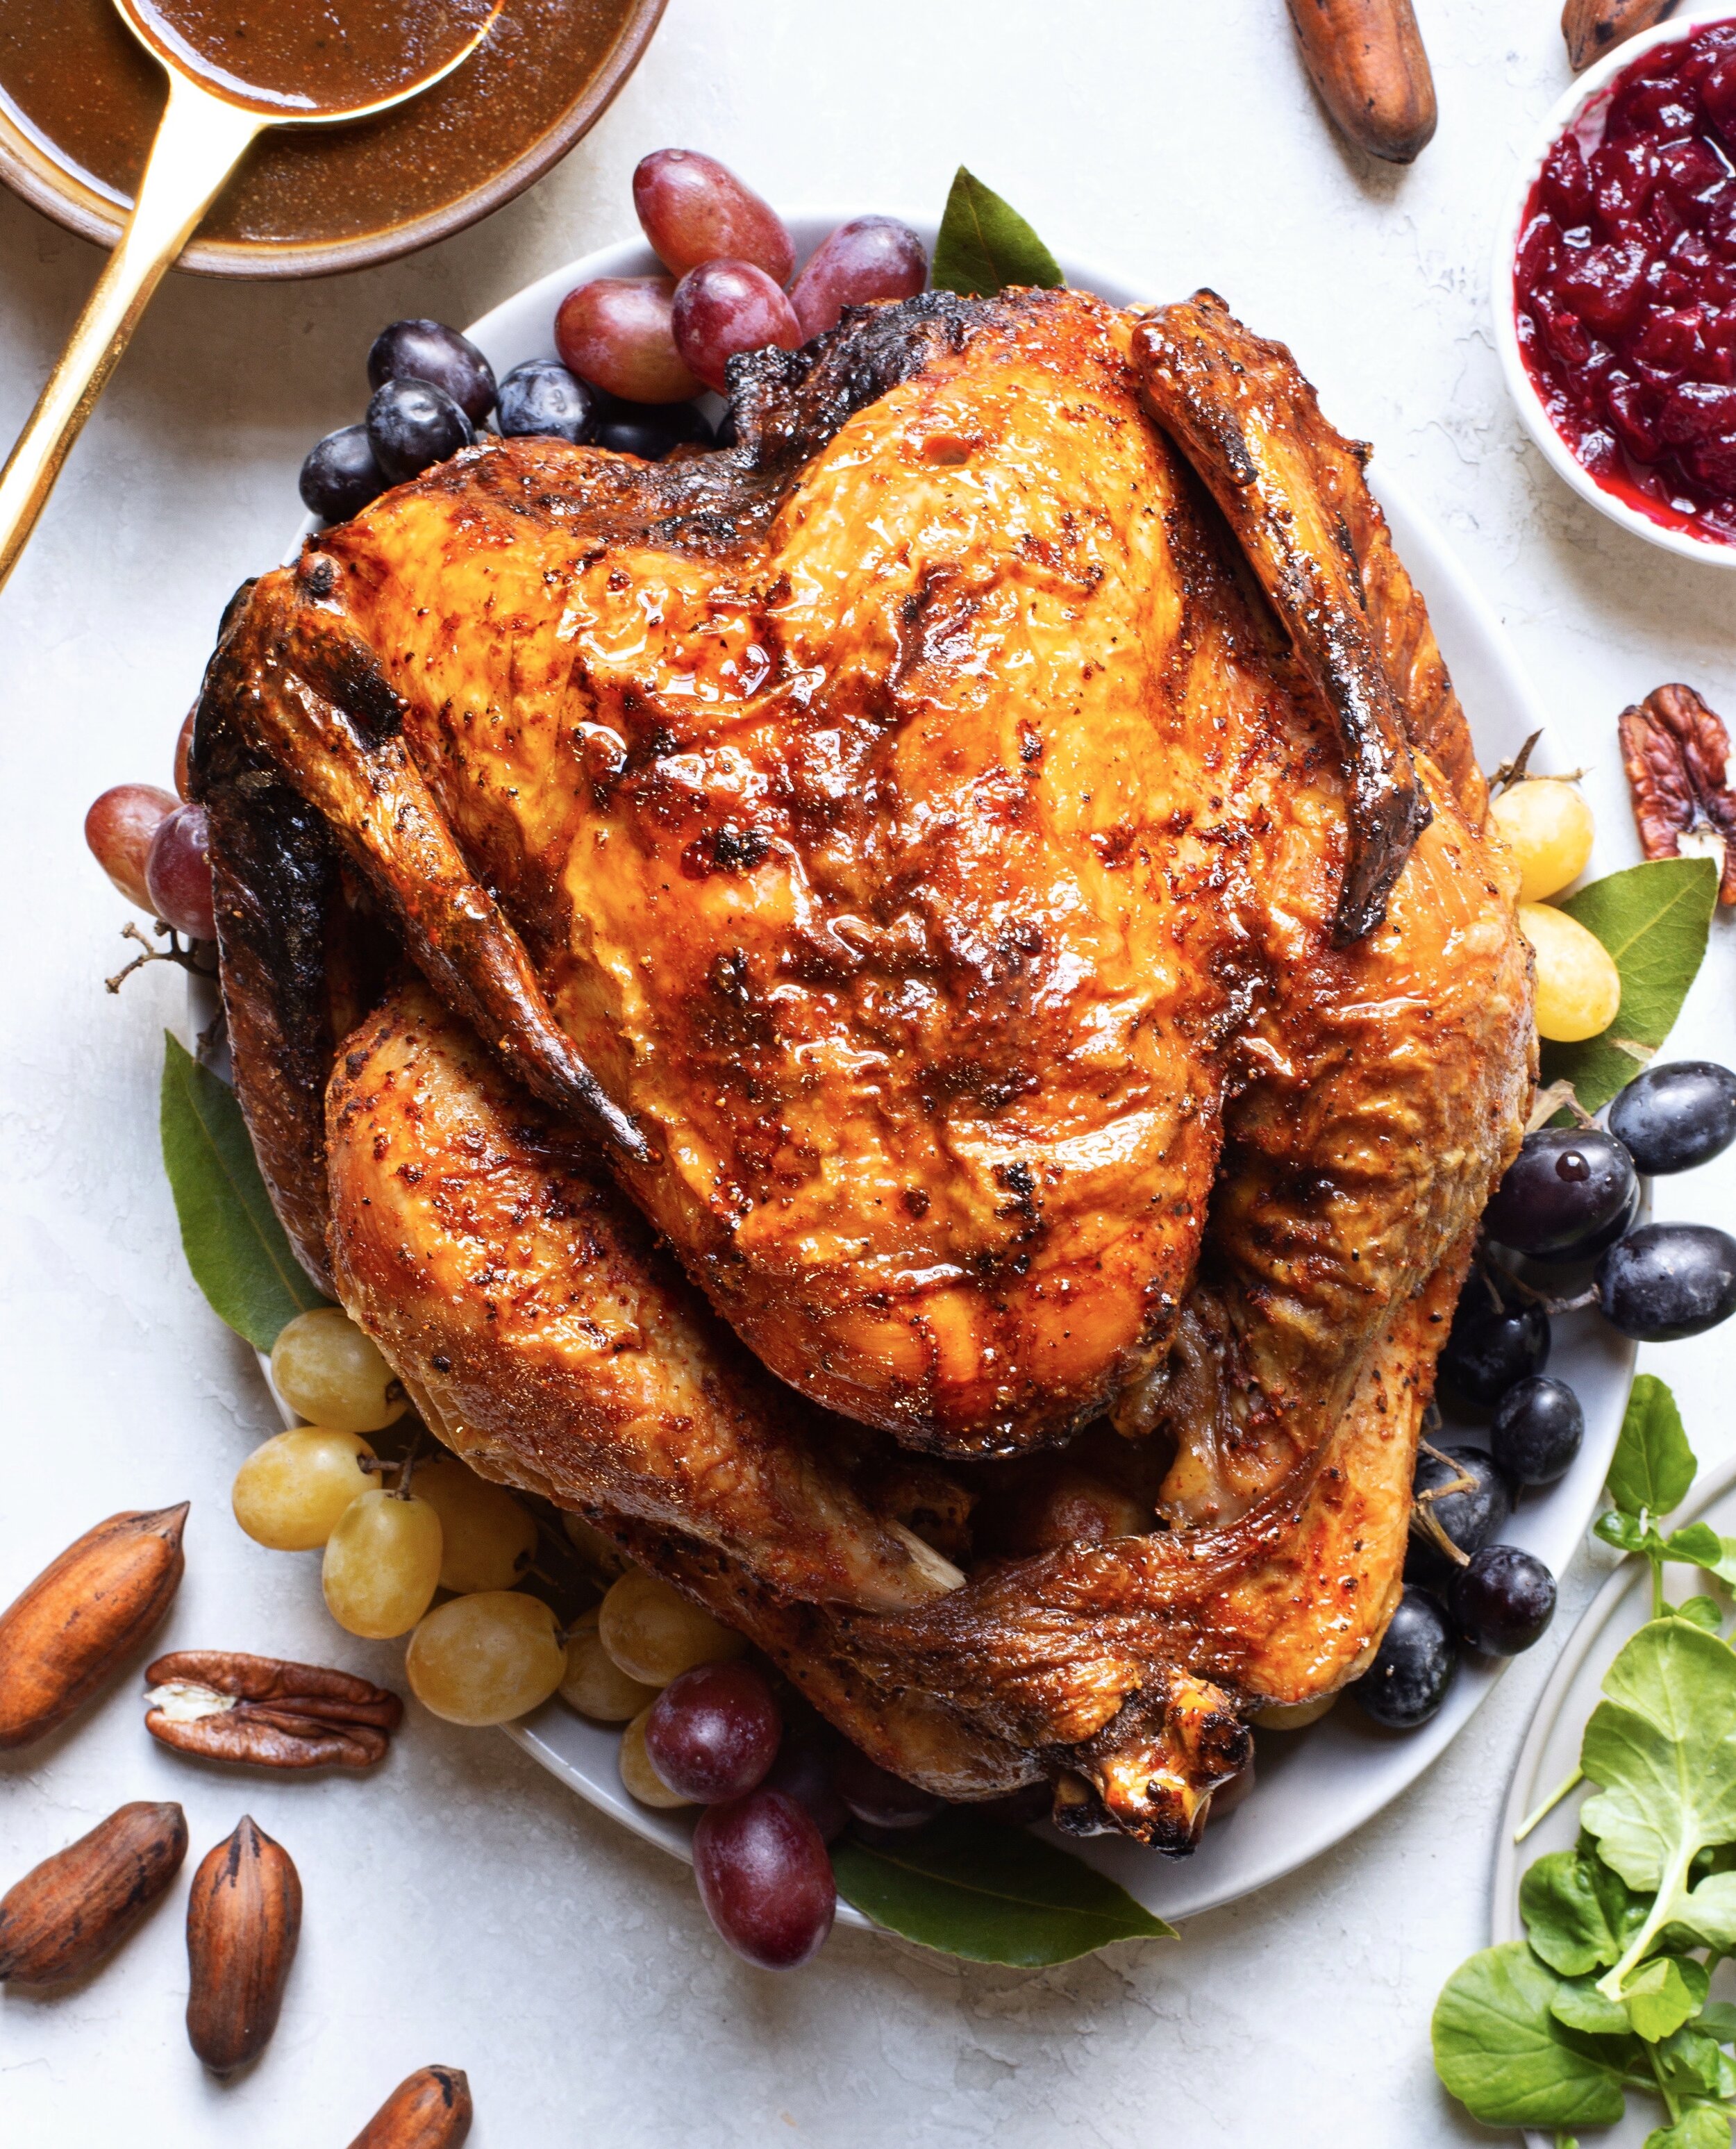
Ignite The Big Easy® and place turkey inside basket breast side up and insert included thermometer in thickest part of the breast. Cook the turkey until the internal temperature is 165F. The outside should be crisp and golden brown. Allow the turkey to rest for 5-10 minutes while the cooking basket cools before removing. Carve and enjoy! I serve mine with steamed green beans, sweet potato mash or my double cauliflower mash, butter pools and lots of gravy! 

Complete Meal - Dale Gray .JPG

<!--ClickMeter.com page views tracking: DaleGray --> <script type='text/javascript'> var ClickMeter_pixel_url = '//pixel.watch/p6y0'; </script> <script type='text/javascript' id='cmpixelscript' src='//s3.amazonaws.com/scripts-clickmeter-com/js/pixelNew.js'></script> <noscript> <img height='0' width='0' alt='' src='http://pixel.watch/p6y0' /> </noscript>

November 12, 2019 /Dale Gray
DINNER, THANKSGIVING
Comment
Egg crepes with smoked salmon &amp; more eggs, chives, watercress. I found inspiration to make these this morning by going through my old work - My keto era to be exact. Super easy to make, and a tasty (low-carb) breakfast:

Blitz 2 large eggs and 2
Recipe below :) Grilled Steak Tacos, my style, with grilled corn &amp; peri-peri sauce too. It had rained all day but this beautiful @aspirebyhestan 36&rdquo; freestanding grill got delivered and when the sun appeared, I fired her up. The color is &l
🇿🇦&rdquo;Koningskos&rdquo; (Afrikaans) ~ Food fit for royalty. A PEI mussel moment in the sun, with ros&eacute; and good friends, and bread &amp; jam. If you know, you know 💛#proudlysouthafrican
&ldquo;When my husband DJ and I first purchased our home, it was a proud moment for us&mdash;a couple of twenty-somethings who had worked so hard to make possible the day that a realtor would put some keys in our hands. It was a pink gingerbread hous
A little over two years ago, I sat down at my dining table for a Zoom call while my husband ,DJ, hovered in the hallway. At the end of that call I felt pretty certain that my dream of writing a cookbook might come true, and hours after the call, ever
Some spring dinner inspo! This is a delicious way to enjoy trout or salmon with all the asparagus popping up. Season a filet of salmon with salt &amp; pepper, rub the fish itself with olive oil, and grill. Meanwhile steam some asparagus &amp; make a
Lamb chops with a minty pea pur&eacute;e. This little recipe was a favorite last year, and since you might be planning a weekend menu still, I decided to share again 🙂 Lamb is generally easier to find this time of year so I stock up &amp; freeze for
Ostrich burgers! While ostrich is available almost everywhere in South Africa, it hasn&rsquo;t quite caught on here in the states. Would you try it? Think of it as an excellent alternative to beef! My friend @thenathanaddison made these GORGEOUS buns

Powered by Squarespace