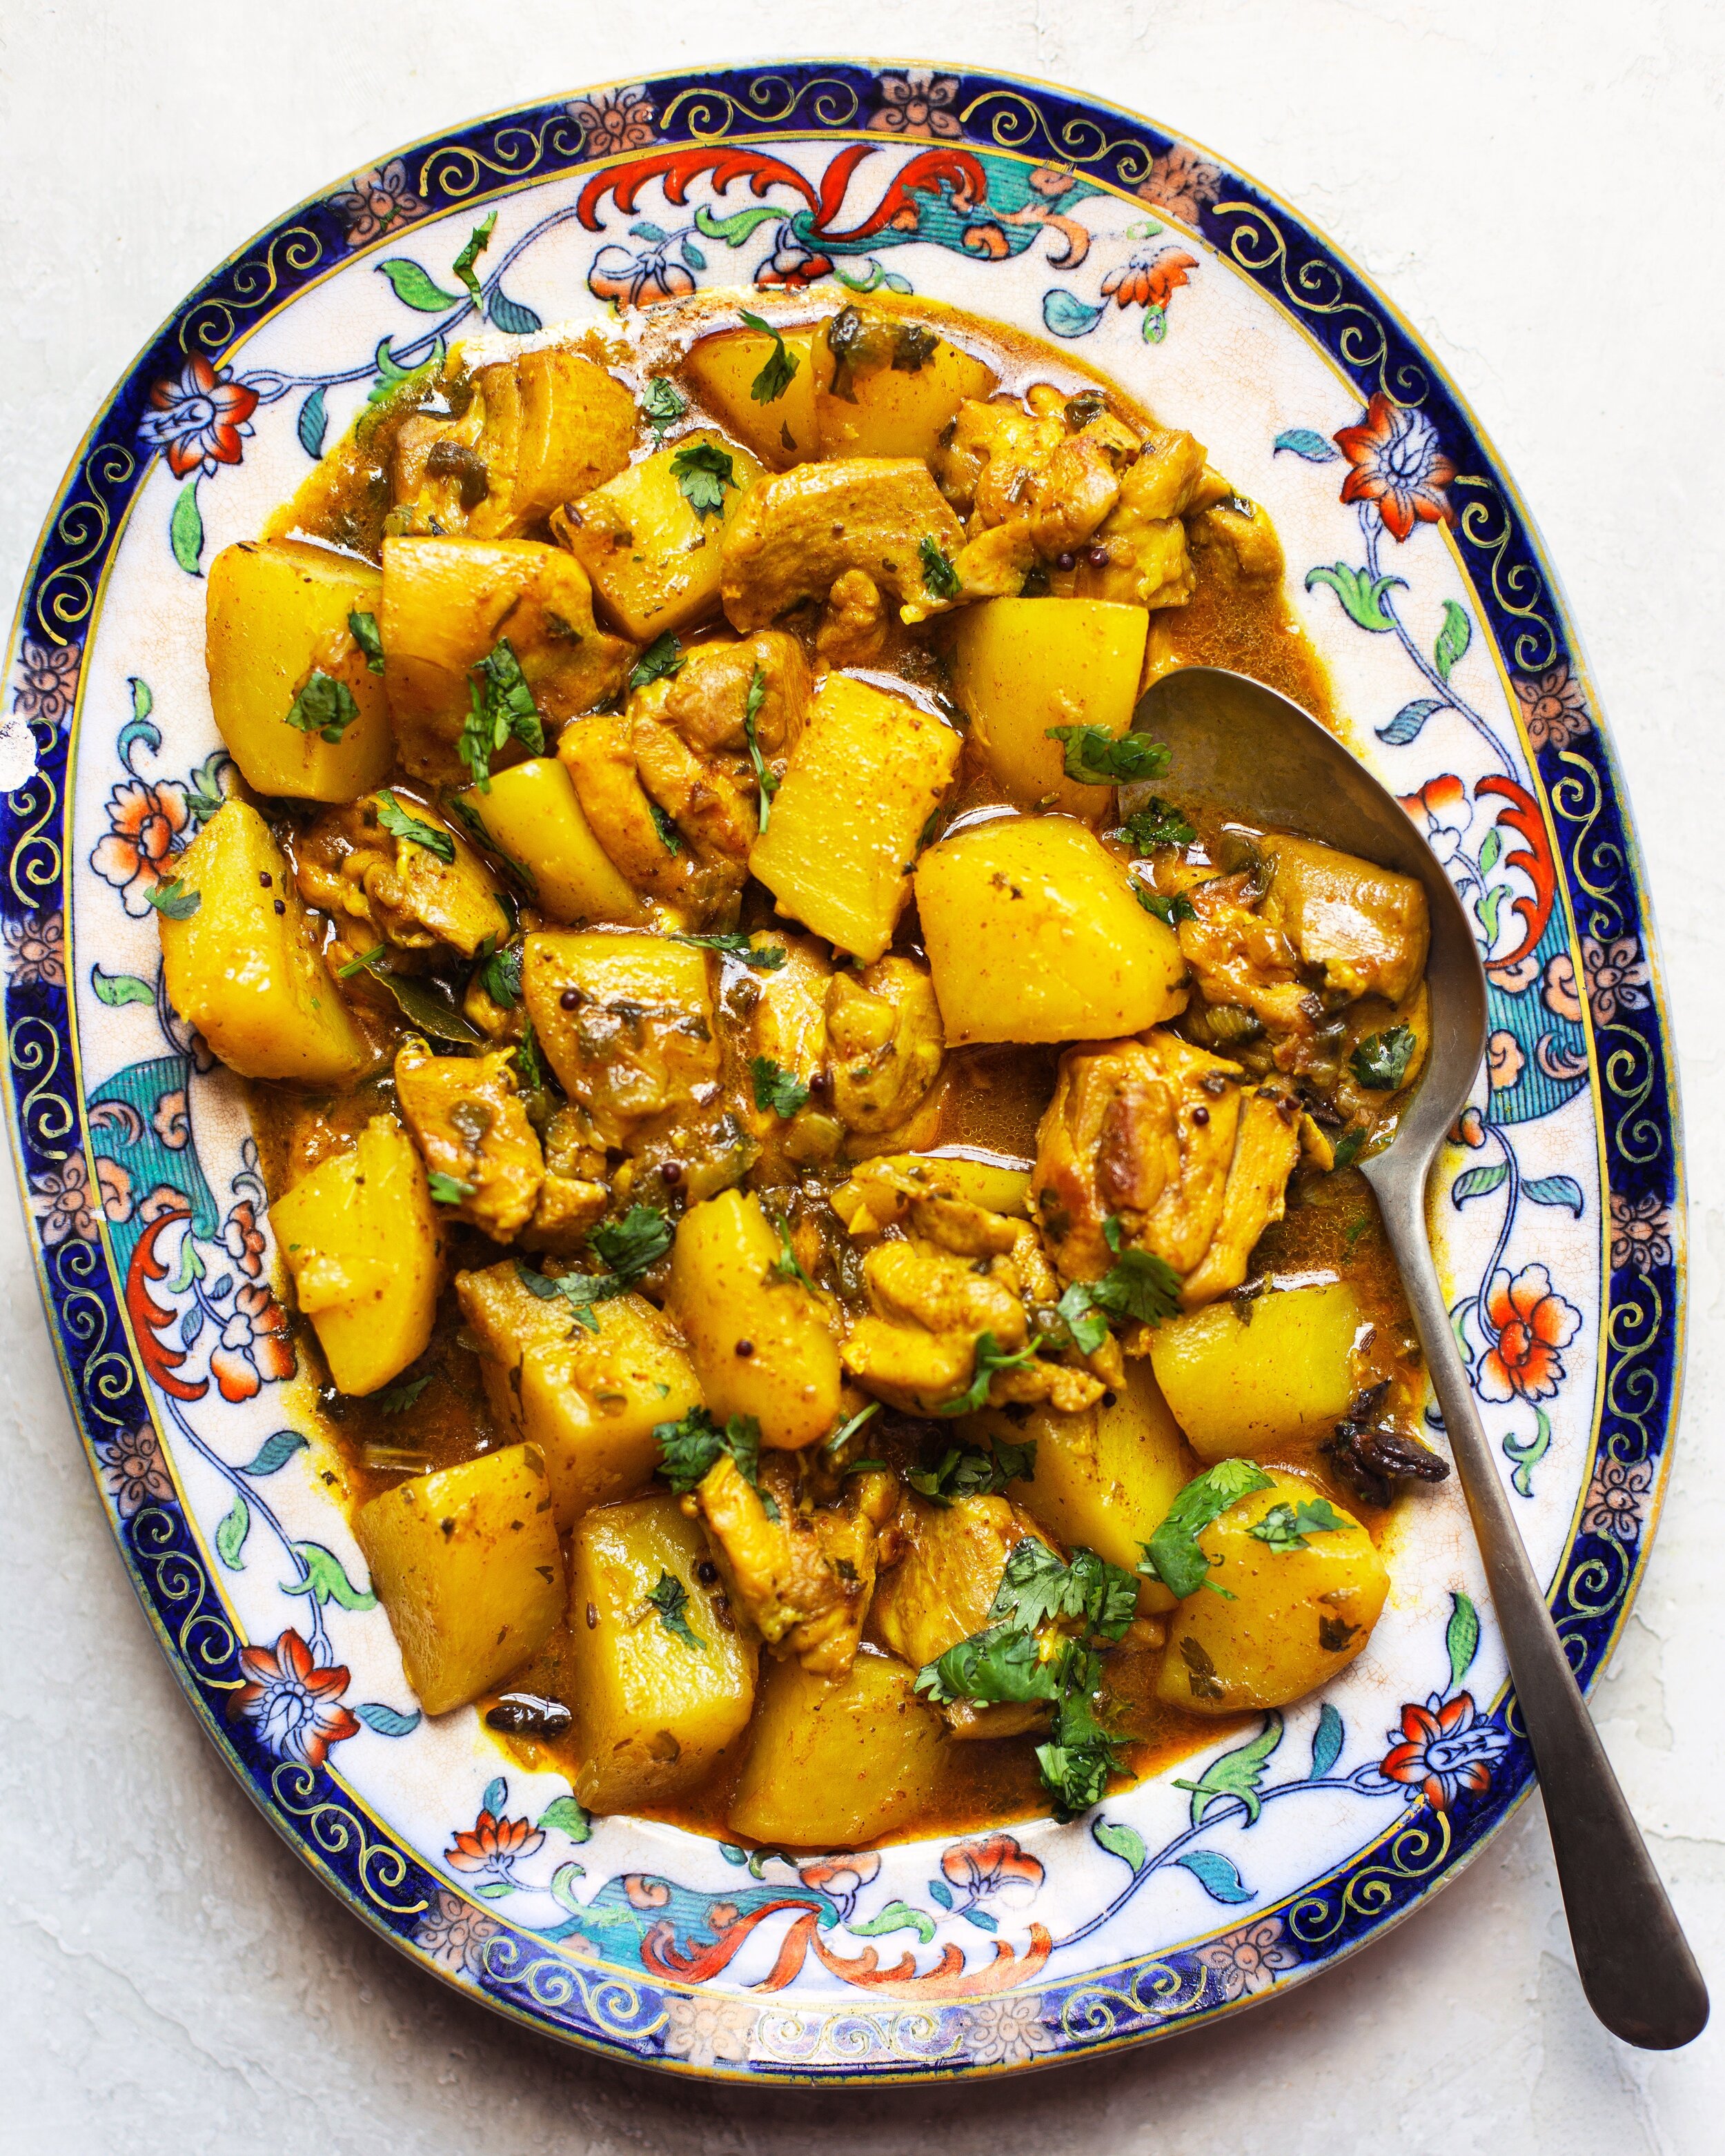
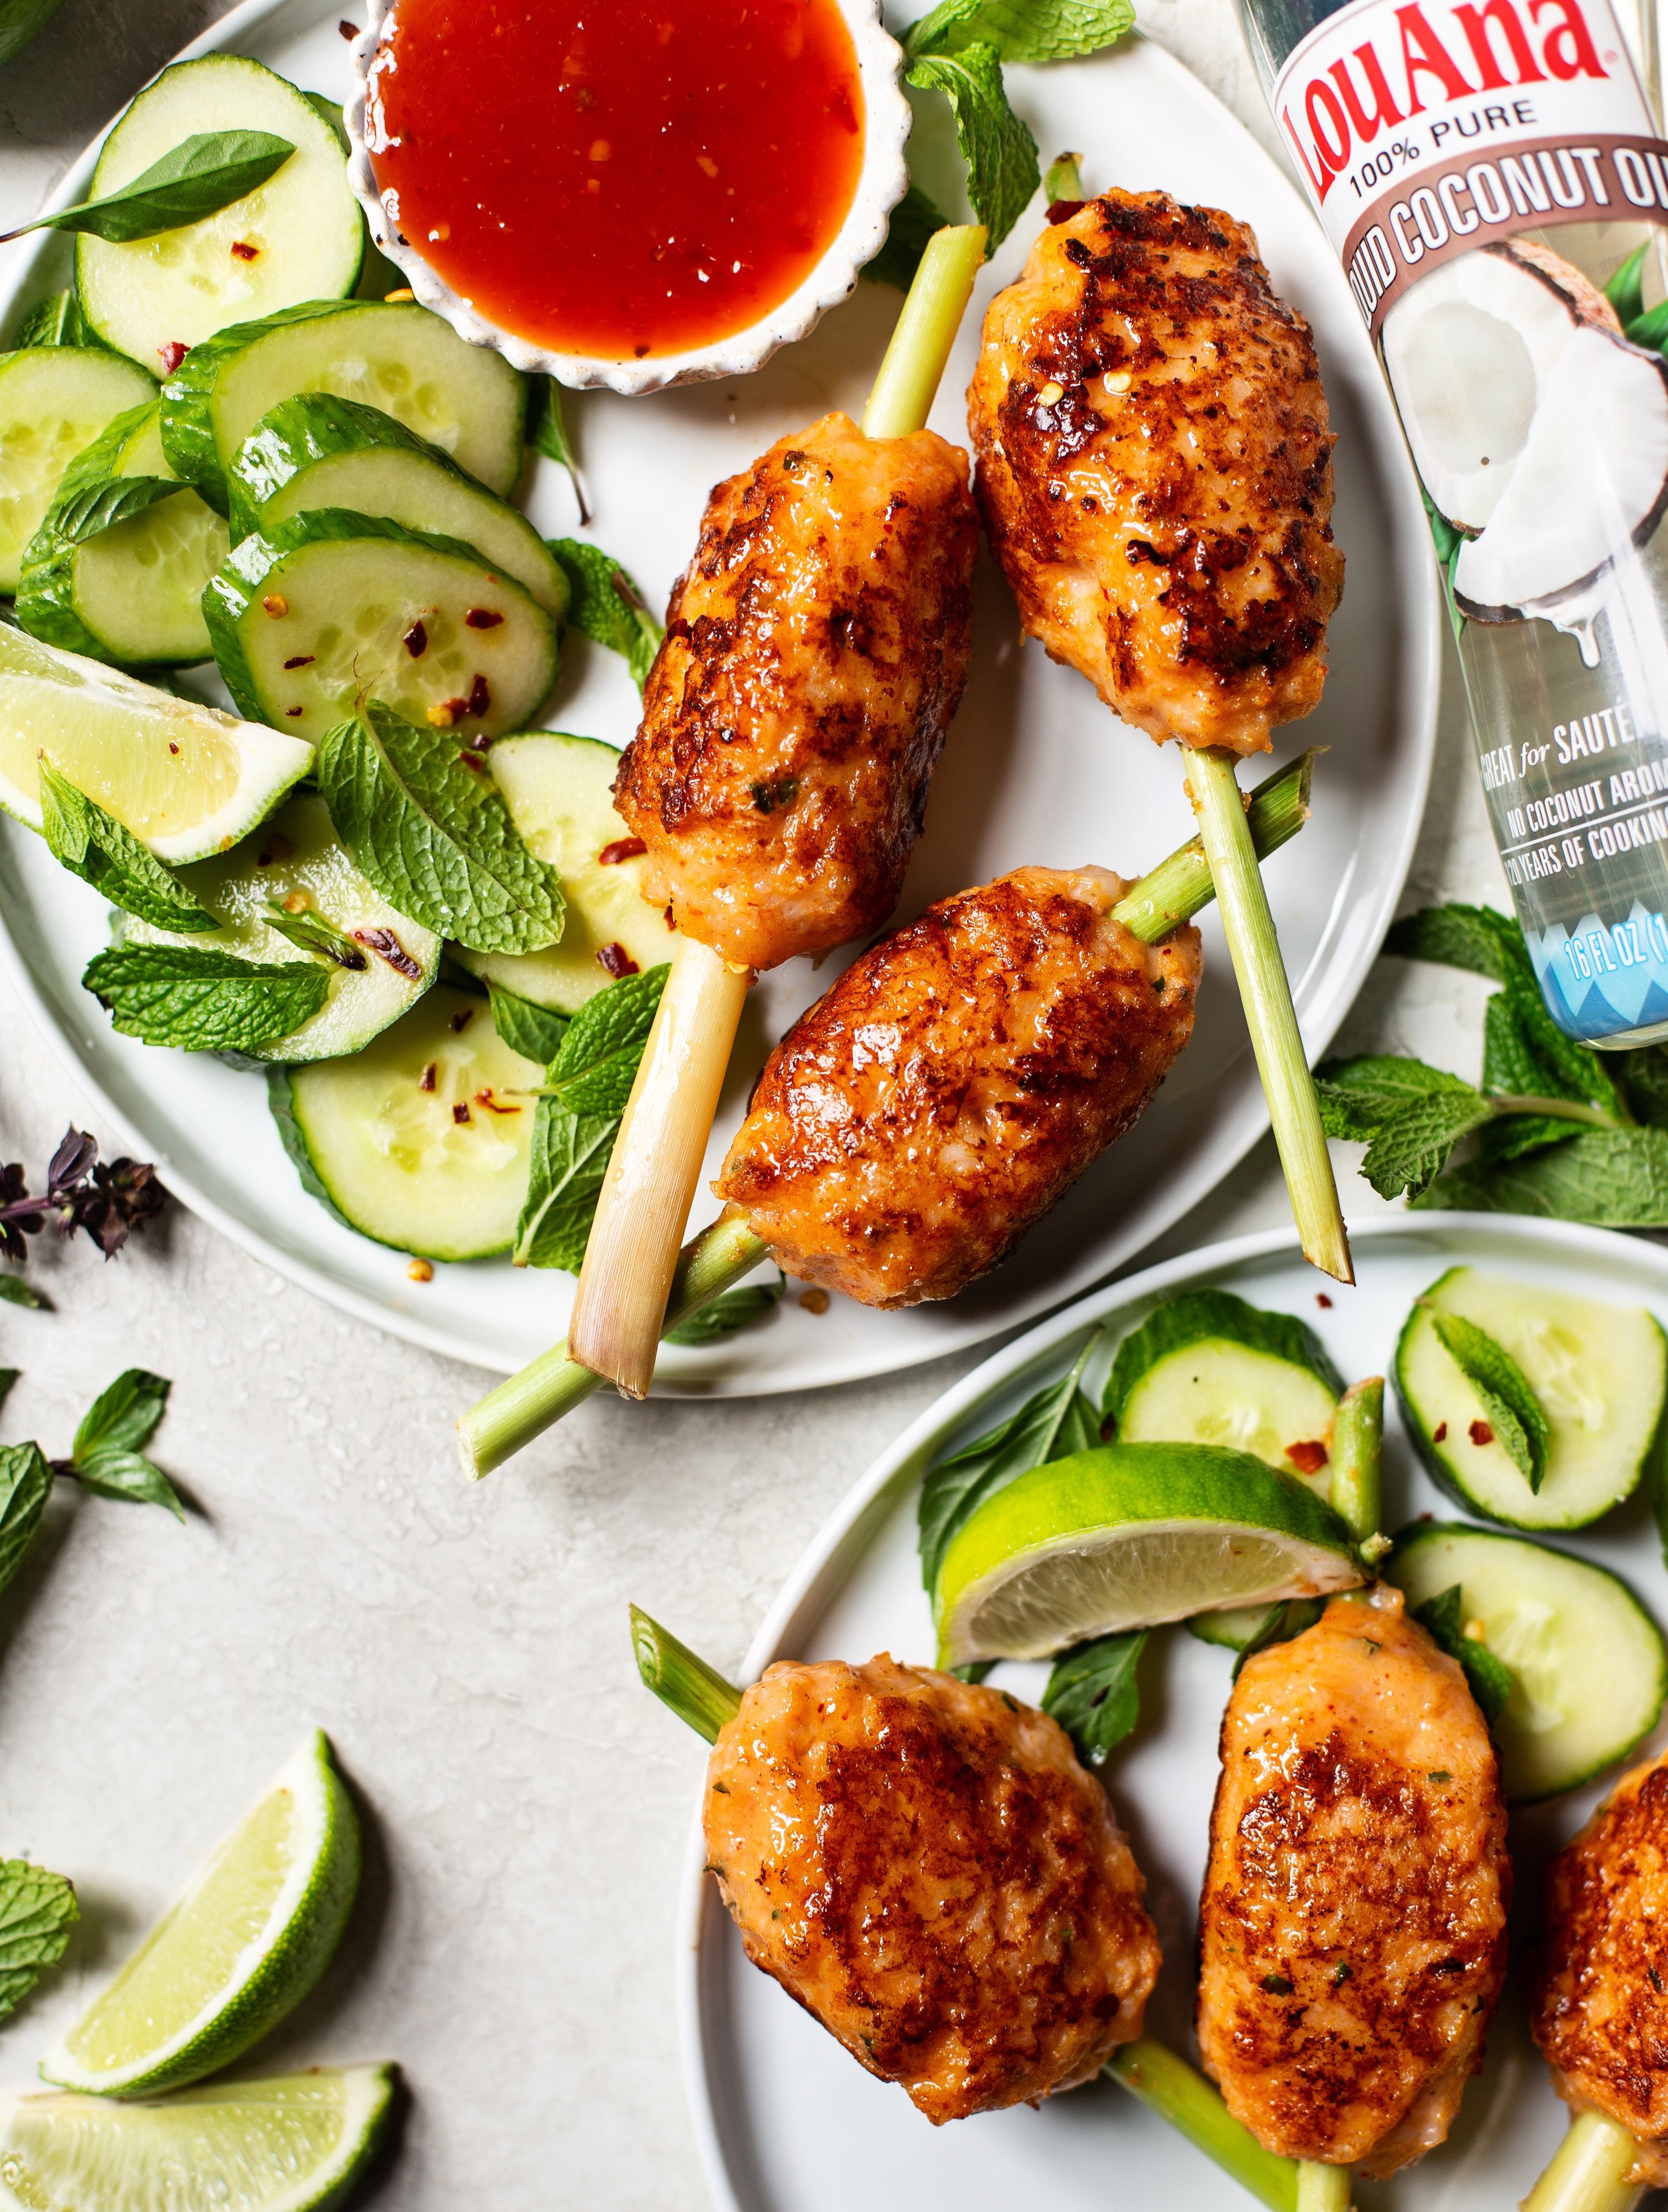
Kimchi Fried Rice with Shiitake Mushrooms

When I think of my time in South Korea, the aroma of kimchi, perilla, sesame oil and steamed rice come to mind. I taught cooking to elementary level students there for six years, which brought so much joy and so much growth on a personal level. This recipe wouldn’t normally be called kimchi fried rice or “kimchi bokkeum bap”, instead the kids would playfully call it something like it “sseulegi bap” - Roughly translated to “mixed rice” or more bluntly, “trash rice.” Basically, rice fried with whatever you have on hand. It’s great because you cook everything in one pan and if you have leftover rice which is essential, it’s a breeze to throw together. I often serve it to friends and family who have never tried Korean flavors but are curious about it. They are more accepting of a dish like this as opposed to hitting them with heavily fermented dishes off the bat.

Top it with an egg to make it extra special.

Top it with an egg to make it extra special.

Ingredients:
Serves 2

1 shallot, finely minced
4 cloves garlic, finely minced
1 teaspoon ginger paste
4 rashers uncured bacon, chopped (Use turkey bacon or omit completely if you prefer)
1 cup kimchi
1/2 cup kimchi juice (from the jar)
2 cups sliced golden oak shiitake mushrooms
4 cups day-old rice
1 cup lacinato kale or spinach, chopped
1 teaspoon toasted sesame seeds
1 teaspoon toasted sesame oil
Optional to serve: Dried and salted laver & olive oil fried eggs.

Guidelines:

Bring a large wok or skillet to medium heat. Add shallot, garlic, ginger, bacon and kimchi all at once and sauté for 5 minutes until bacon fat has rendered and shallots are translucent. The kimchi would’ve crisped up a little around the edges because of the bacon fat - Wait until this stage for maximum flavor.

Deglaze the pan with kimchi juice, scraping off any crispy bits stuck at the bottom of of pan. Adjust heat to medium-high then add rice and mushrooms. Cook for 5-8 minutes until rice takes on some color and dries up a little. Then add kale or spinach (any greens will do), sesame seeds and finish with sesame oil. Season to taste and serve.

Sunday Afternoon Samoosas

Though many versions of this dish exist, beef or chicken samoosas filled with traditional spices are most popular in the Cape Malay communities of South Africa. They are served at parties or anywhere that people gather, and often with peach chutney. The sweetness of the chutney paired with crispy spiced beef parcels keep people coming for more. You can buy South African chutney online now, as well as most of the spices used. Traditionally,  pur or readymade Indian pastry is used. Pur is a common item at any Indian grocery store, but I could only find phyllo pastry where I live. Both work wonderfully.

Samoosas-2.jpg

I remember my mom frying samoosas last December when I visited home for the first time in eight years. Making them in large batches (necessary during holiday season) is time consuming, so she had ordered 250 premade but unfinished from a lady who is well-known for her samoosas. Every town has that Aunty - One who has perfected the art of samoosas, savory pies or smaller confections like lamingtons. Those aunties are a godsend for people like my mom who work full-time. If you do not order by November, you can forget about it because they are that popular. The fragrant aroma of coriander and leaf masala filling our house during the holidays is always magical. Mom knew how much I had missed samoosas while living here in the states, and 250 seems like a lot, but we enjoyed them so much almost every day. If only I could've brought some back with me!

When I returned home to Mississippi in January I was inspired to make them here and shared the image to Instagram, but never made the recipe available. I'm sorry for the wait :) We booked our tickets back to Cape Town the other day and thinking of all the samoosas I'll soon be eating, I remembered. You can substitute the beef with ground chicken thighs or even lamb - I just wanted to share how I make mine, but feel free to change it up as you wish :) 

Ingredients:

2 tablespoons olive oil
1 lb ground sirloin or lean ground beef
1 medium yellow onion, finely diced
4 cloves garlic, minced
1 teaspoon ground cumin
1 teaspoon ground coriander
1 teaspoon fenugreek powder
1/2 teaspoon turmeric powder
1/2 teaspoon chili powder
1 tablespoon South African curry powder OR mixed masala
1/4 cup finely minced fresh coriander
1 teaspoon each sugar and salt
1/4 cup freshly squeezed lemon juice
10 sheets phyllo pastry (You may need more depending on how much filling added)
1 small egg, beaten (to seal pastry)
olive oil spray
Optional to serve: Peach Chutney 
 

Filling:
Heat the olive oil in a large skillet over medium heat and add ground sirloin until browned, about 5 minutes. Add the onion, garlic and spices and sauté until onions are golden and soft. Finish the filling by adding coriander, sugar, salt and lemon juice. Stir and remove from heat - Allow to cool. Can be made ahead of time, stored in the fridge and assembled later. 

Preheat oven to 375F.

Assembly:
Place phyllo on a clean, dry surface and use a sharp knife to divide phyllo rectangle into three parts lengthways. You should have three equal long stacks of pastry. Take one at a time and cover the remaining sheets with a clean damp kitchen towel so that they don't dry out. 

Lay the phyllo strip on a work surface and add a tablespoonful of filling to the top corner, then fold the filled pastry across to close the open side. Keep folding from one edge to the other, keeping the triangular shape and making sure the corners are tight, until you're left with a lip. Brush it with the beaten egg and secure. Alternatively you could make a slurry of 1 tablespoon cake flour and 2 tablespoons water to do this. If you prefer, you could also just cut this portion off. Set finished samoosa aside on a baking sheet covered with a clean damp kitchen towel and repeat this process with all phyllo pastry sheets. Makes 30 - These freeze very well in an airtight container and then you can bake it off later. 

Spray with olive oil spray and bake for 8 minutes or until pastry is golden. Serve immediately. 


Easy Enchiladas

Ever have a craving for something but unable to place exactly what it is? I found myself at home one evening after a hectic day of shooting stills for clients, so starving hungry. How can one work with food all day and be hungry? It's possible - Because I don't always cook what I really want when working. I realized after (As I always do) that the craving was for my Mom's enchiladas. The kind of meal that you whip together with fridge and pantry basics. The kind of dinner that doesn't take any time at all and that doesn't require me to beautify it. I know it's good, I know it's reliable, I know I can cut down on prep time and I have a well stocked pantry to thank for it. I've partnered with Cans Get You Cooking to share with you some of my pantry staples and how I use them to make this easy dish! 

Cans Get You Cooking Enchiladas.JPG

My dad worked in the canning industry for 20 years - Making the machinery that allowed fresh produce grown in our farming community to be safely canned and preserved for market. Did you know that it takes about 4 hours from the time produce is harvested until it's canned, sealing in nutrition and flavor? Not long considering some fruit and vegetables sit on grocery store shelves for a much longer time. 

Cans Get You Cooking.jpg

I feel pretty strongly about this because we live in a day and age where social media has led us to exclude certain things or change our way of eating, when it's important to realize that not all people have countless resources. Not all people are getting the nutrients that they need. Not all people have an unlimited amount of time or the luxury of wasting any food. It really is a fact: Most Americans throw away approximately 15 to 20 percent of the fresh fruits and vegetables they purchase every year. Stocking up on some canned goods can help with this exactly because they are shelf stable. 

My mom made good use of the boxes of canned goods that dad brought home from work. Most of the time they weren't labeled so we took turns opening cans and as kids, being surprised by what was inside gave us all the giggles. Most of the time it was tomatoes, beans, corn or jam. So many memories of creative meals made using canned goods - but this Enchilada recipe is probably my favorite. It reminds me of late nights studying for high school finals and a hot midnight plate brought to me my mom. It reminds me of Friday's when we would cook and eat a meal from a different part of the globe. Simple as it may be, I love the nostalgia and the taste. I hope you enjoy this easy recipe.

Easy Weeknight Enchilada
Serves 4

1/2 lb lean ground beef
1 cup onion, finely minced
1 4.5oz can chopped green chiles (I like Trader Joe's or Old El Paso)
1 tablespoon garlic paste
2 teaspoons salt
1 tablespoon smoked paprika powder
1 tablespoon cumin powder
1 teaspoon cayenne pepper
1 14.5oz can Muir Glen Organic Crushed Tomatoes
1 10oz Old El Paso Red Enchilada Sauce - Mild, divided
1/4 cup chopped cilantro
4 flour tortillas
2 cups shredded jack cheese

Preheat oven to 350F.

1. Combine beef, onion, green chiles, garlic paste and salt in a large skillet over medium-high heat and sauté until onions are translucent and beef browned. Add smoked paprika, cumin, cayenne, crushed tomatoes and half of the red enchilada sauce. Reduce heat and simmer, uncovered, until reduced and thickened (About 10 minutes). Remove from heat and stir in cilantro.

2. Divide beef mixture between flour tortillas by placing spoonfuls in the middle, then roll the tortillas and place next to each other in a skillet or ovenproof baking dish. Top with shredded cheese and remaining enchilada sauce. Bake for 15 minutes or until cheese has melted and browned. Serve immediately. 

Keto Chicken Parmesan with Fresh Tomato Slices

This post is sponsored by Belgioioso and FeedFeed.

Where does the time go my dear? My mother used to say that at the end of every single Summer. We had spent the warmest days of the year enjoying lengthy outdoor dinners, eating fruit harvested just a mile away and listening to crickets awake after their slumber. We held on to what Summer brought for as long as we could until it was time to polish our school shoes, put up the outdoor seating and prepare as all routine returned back to normal once again. Aaah, Summer is always a dream, isn't it? To this day, I spend the last week of August gathering as much Summer produce as I can to preserve and cook with. 

Image 1.JPG

I recently made the decision to try following a Keto diet and have since been coming up with ways to enjoy my favorite Summer recipes, minus the carbs. Thankfully, cheese (Fresh Mozzarella in particular) is a very popular and beloved ingredient in the ketogenic way of eating. The cream of the crop in terms of mozzarella for me is the line of BelGioioso Fresh Mozzarella.  You all know (If you've known me for a while) that delicious cheese is my kryptonite :)

Image 2.JPG

BelGioioso as a company was started in 1979 when founder Errico Auricchio moved to Wisconsin from Italy with his family and started making the cheese he grew up eating. The company grew and now offers over 25 varieties of specialty cheese to the U.S market and counting. I love family companies so much, tradition and recipes passed down from one generation to the next - What a legacy to leave and what a way to continue the traditions of one's home country. As an immigrant to this country myself it really resonates with me. Heritage is everything and it shows in their products - I've always found their cheese to be so fresh and truly, you can taste the love. That's exactly how I feel about simple food prepared with intention. It doesn't have to be complex to be delicious, and it doesn't have to take a long time to prepare. This recipe is perfect for those weeknights where you're short on time and uses up some of those Summer tomatoes you still have on the counter :) I did not include a recipe for marinara because we all have our favorite, jarred keto-friendly marinara works perfectly here. Else, roast some tomatoes and garlic then blend it with some olive oil.  I used one of BelGioioso’s freshly sliced cheese logs, which I always have on hand to save time. They are wonderful marinated and eaten as is or used in caprese salads, sandwiches and so on. But you already knew that!

Click here for official giveaway rules on how you could win a BelGioioso Cheese prize box and some awesome Le Creuset pieces, perfect for your next gathering!

Ingredients:
Serves 4

1 BelGioioso Freshly Sliced Mozzarella Cheese Log
1 tablespoon fresh oregano
1 tablespoon dried basil
1 teaspoon red pepper flakes
½  cup olive oil, divided
½ cup fine almond flour
½ cup BelGioioso Freshly Grated Parmesan Cheese
2 large chicken breasts, split in half lengthways
1 tablespoon kosher salt
1 teaspoon crushed black pepper
1 egg, beaten
2 cups marinara
2 campari or other tomatoes, sliced
Optional garnish: Fresh oregano, basil and cracked black pepper

Method:

Preheat oven to Broil.

Season BelGioioso Fresh Mozzarella with oregano, basil and red pepper flakes and drizzle with ¼ cup olive oil. Set aside to marinate.

Heat a large ovenproof skillet to medium-high and add remaining olive oil. In a shallow bowl, whisk almond flour and BelGioioso Grated Parmesan with a fork to combine. Season chicken on both sides with salt and pepper, then dip in beaten egg mixture and dredge with almond flour cheese mixture.

Shallow fry for 2-3 minutes per side and remove chicken. Add marinara (I love making my own and freezing, then using in dishes like this) to skillet and place the chicken on top, followed by the marinated BelGioioso Fresh Mozzarella slices. The reason why I do this instead of the traditional method of pouring the sauce on top is because I like to keep the top crispy. Please change this up if you’d like.

Broil for 5 minutes in the oven until the cheese is melted and bubbling and chicken registers 165F when using a thermometer. Remove skillet from oven and top with fresh tomato slices, followed by fresh oregano and cracked pepper. Serve immediately - Delicious on top of zucchini noodles! Keep scrolling for a few step-by-step images.

When dredging the chicken, sometimes I omit the egg and it works very well. A great way to reduce some of the calories.

When dredging the chicken, sometimes I omit the egg and it works very well. A great way to reduce some of the calories.

Belgioioso Image 5.jpg
Belgioioso Image 6.jpg
Belgioioso Image 7.jpg
Belgioioso Instagram Post - Final Dish.JPG

This post is sponsored by BelGioioso and FeedFeed but all opinions are my own, thank you for supporting the brands that support The Daley Plate.


Easy Scallops with Haricots Verts & Prosciutto

Can you believe, I've never cooked with scallops before today! Years of living in South Korea where they are abundant, and I never had the desire to pick them up from market. Even so I found them extremely easy to prepare today and chose to serve them with seasonal haricots verts (fancy name for French thin green beans), crispy proscuitto (Green beans and prosciutto - You just gotta have them together) and a simple brown butter pan sauce with capers and lemon. 

I had gotten a box of fresh fish from a seafood subscription company a week ago, and thought why not give it a go! They are a sustainable seafood choice and best of all, take a very short time to cook. Hope you enjoy this easy and keto friendly recipe for one :) Double and adjust as you see fit!

Scallops.JPG

Ingredients:

4 large sea scallops, side muscles removed and patted dry.
1/4 teaspoon kosher salt
1/4 teaspoon freshly cracked black pepper
1 teaspoon garlic powder
2 tablespoons grass-fed butter, divided
1 cup haricots verts (about 4 oz)
1 slice prosciutto
1 tablespoon capers, packed in brine, drained
Juice of 1/2 lemon

Method:

Bring a small pot with salted water to a low boil. Place a steaming rack on top and add haricots verts. Steam for 5 minutes or until desired doneness - I like mine still crunchy.

While the haricots verts cook, bring skillet with 1 tablespoon of butter to medium-high heat. Sear the proscuitto until crispy and set aside. Season the scallops on both sides with salt, pepper and garlic powder and them place them in your skillet to cook in the rendered fat from the proscuitto + butter. They should sizzle as they hit the pan. Cook without moving them for 2 minutes and flip to sear the other side for the exact same time. Remove from skillet. Add remaining tablespoon of butter and capers plus lemon juice to the same skillet. Simmer and stir then turn the heat off. 

The steamed haricots verts should be done by now. Plate them, place the crispy proscuitto on top followed by the scallops. Pour pan sauce over everything and enjoy! I did add some chopped chives to mine which added a lovely bit of extra freshness. 

Dale


South African Braaibroodtjies with Sun Dried Tomato Butter

It does not matter where we as South Africans find ourselves around the globe. If there is an opportunity to Braai (Grill outside over a wood fire), there's a very high chance that Braaibroodtjies are accompanying our meal of farmers sausage, lamb chops, chicken and salads. The Afrikaans word broodjie translates to sandwich in English, therefore Braaibroodtjie means grilled sandwich. They are usually prepared after everything else is done cooking and the embers start to fade - the ideal temperature to toast bread and impart a wonderful smoked flavor. 

Tillamook Prep Shot 3.JPG

The Braaibroodtjie of my childhood was unapologetically unsophisticated. Layers of tomato, onions, cheddar and white bread spread with butter - Ingredients that were mostly always availabe, save for the cheese that sometimes got left off during more difficult times. Do you sometimes remember things unintentionally and feel super nostalgic?
When I make Braaibroodtjies now, I want my guests here in America to have the best possible experience eating them. I step up my Summer grilling game by using sourdough bread, sun dried tomato butter (regular butter is perfectly fine), heirloom tomatoes, red onion and my favorite cheddar. I always put a little extra cheese now, and buy the best possible while stilll being economical at the same time. When I'm making Braaibroodtjies I look for an aged cheddar that will stand up to the onion and char brought on by the fire, but one that will also melt easily.  I find it's better to buy a good loaf of real cheese and shred, cube, or slice it myself to use in a variety of dishes - My Home Economics teacher would be so proud. 

Tillamook Product Shot 1.JPG

A few notes:
- You can definitely use a griddle pan inside instead, but you will lose the smoke and it will not be authentic. 
- I prefer extra sharp cheddar, but any cheese will do. Gouda is amazing, Raclette as well.
- The chutney we prefer in South Africa is called Mrs Balls Peach Chutney and you can buy it on Amazon and recently it has become available at most grocery stores with an International section. If you are unable to find this version, any sweet and sour chutney can stand in. Sometimes, a bit of smooth apricot jam mixed with white wine vinegar is a good alternative as well.
- This isn't one of those recipes where everything is measured precisely. It's about the joy of eating a toasty melted cheese sandwich fireside. Customize it to your liking and have fun!

Ingredients:
8 slices sourdough bread
sun dried tomato butter (recipe follows) OR your favorite butter (garlic butter is amazing here)
12 slices extra sharp cheddar, gouda or cheese of your choice
2 large heirloom tomatoes, thinly sliced
1/2 red onion, thinly sliced
Optional: 1/4 cup peach chutney, or any sweet and sour chutney

For Sun Dried Tomato Butter, combine:
4 tbsp. unsalted butter, softened
1 tsp. sun dried tomato paste
1 tsp. cracked black pepper
1/2 tsp. sweet smoked paprika

Special Equipment: Folding grilling basket - Here is one on Amazon, but you might be able to find it at the camping section of most stores.

Method:
1. Spread each slice of bread with sun dried tomato butter. Place 4 slices, buttered side down, on a work surface or directly on to a grill basket (see example below). Top with a thin layer of chutney and then cheese, onion and tomato slices. Place remaining bread slices on top, butter side up. 

2. Grill for 3-4 minutes over a medium heat source until the bread is slightly charred around the edges and the cheese is melted.  I sometimes like to place them on my covered smoker for longer as well, 8 minutes at 275F. Remove from the grill and slice, serving 1/2 sandwich to each guest as a side.

Serves 8.

Braaibroodtjies in a rooster (South African wire grill basket used to contain food while being flipped over the fire.)

Braaibroodtjies in a rooster (South African wire grill basket used to contain food while being flipped over the fire.)

Salt & Vinegar Kettle Chip Crusted Chicken

On Friday's after her job as a bookkeeper at a local store, my mother would always arrive home with an edible treat for us girls. Sometimes that treat was ingredients to make home burgers, other times a big bag of potato chips that would last us the weekend. Friday's are for treats and this salt and vinegar kettle chip crusted chicken recipe was created with my mother in mind. Transform your basic chicken breast into an irrisistable crunchy delight with very little time and effort, just the way Summer food should be. 

Salt and vinegar kettle chip crusted chicken with green salad and lemon yogurt dijon dressing.

Salt and vinegar kettle chip crusted chicken with green salad and lemon yogurt dijon dressing.

Before we start with the recipe I'd like to talk about the equipment that I use. Why? Because your equipment is essential to the outcome of the dish. When I talk about cooking on Instagram, I always recommend using a good non-stick skillet. This kettle chip crusted chicken, eggs, any time I sear chicken or fish and make a quick sauce...I use my Zwilling Forté non-stick skillet or my Ballarini Como frying pan. The only other one I've found to be a true non-stick (and loved by so many of my foodie friends as well) is the T-Fal Professional Total Thermo-Spot frying pan. There is something about having a piece of quality equipment in your arsenal that you can rely on to perform every single time. When we first got married I didn't have any good kitchen tools and decided to treat myself to one thing every month when I could afford it. It has made such a huge difference.

A few notes on this recipe:

* I didn't use anything to adhere the crumbed chips to the chicken. I found that grinding the kettle chips finely enough by using a food processor was enough, but if this has you worried I suggest the optional step of brushing some seasoned garlic mayonnaise onto each side of the chicken before crusting with chips. I will include my favorite seasoned mayonnaise below.

* You can absolutely bake this chicken instead of shallow frying. Place the crumbed chicken on a wire rack in a baking sheet and cook at 350F for 8-10 minutes (Internal temp 165F). 

* This salt and vinegar kettle chip crusted chicken makes a great chicken sandwich! It's also great chopped into your favorite Summer salad or topped with fresh tomato salad. 

Ingredients:
Serves 4

2 large chicken breasts
2 teaspoons garlic salt
2 teaspoons cracked black pepper
4 cups salt & vinegar kettle chips
1/2 cup olive oil for frying

Optional mayonnaise glue:
4 tablespoons good quality mayonnaise like my favorite Sir Kensingtons Avocado Oil
1 teaspoon fresh garlic paste
1 tablespoon fresh lemon zest (Or less if you are worried about the lemon overpowering the chips)
garlic salt and pepper to taste

Method:

Place boneless, skinless chicken breast (tender removed) on a work surface and hold it flat with the palm of your non-knife hand. Slice each chicken breast horizontally into two even pieces. Season each side with garlic salt and black pepper, or combine optional mayonnaise ingredients and brush onto all sides of chicken using a pastry brush, then set aside and wash hands. 

Place salt and vinegar kettle chips into the bowl of a food processor and pulse, 8-10 times until chips resemble course bread crumbs. Pour chip crumbs into a large plate and heat a large non-stick skillet with olive oil to medium. Crust each side of the chicken by placing them onto the chip plate and turning until you've picked up most of the chips. Discard any remaining chip crumbs and place chicken into the hot pan. Cook for 2-3 minutes per side or until cooked through and the chip coating is golden. Turn off heat and remove chicken, placing on a paper towel to drain excess oil. 

Best served immediately with your choice of salad greens. Pictured above I have butter lettuce, fancy frilly lettuce (I forget the name), and raddichio with capers and cucumber.

For the salad dressing, combine equal parts plain greek yogurt and dijon mustard with chopped chives and enough fresh lemon juice as you can stand. Add some crushed garlic to taste. 

Peri-Peri Fries with Greek Lemon Oregano Grilled Chicken

On Friday's in South Africa, my sisters and I would stand in line at a very popular braai spot waiting on flame grilled chicken and seasoned slap chips (a version of fries). We watched as cooks flipped grill baskets filled with perfectly seasoned Greek-style chicken over an open flame, basting with marinade as they went along. The word braai is Afrikaans for "barbecue" or "roast" and is a social custom in South Africa. We celebrate National Braai Day every September 24th and come together as a diverse nation to enjoy cooking over an open fire with friends and family. 

The restaurant that I'm referring to was less of a sit-down establishment and more of a hole in the wall located on a bustling street corner close to public transportation. This made it an ideal place to pick up some takeaway (street food) for dinner after work. Why on a Friday? Usually, Friday was pay day which meant people had a little extra to spend. We waited patiently as the hugely popular chicken quarters and flatties (butterflied whole) in styrofoam containers flew from the counter into eager hands of hungry people in line. I remember the smell of oregano distinctly , and this is my version of that street food made in partnership with Pompeian. We love this chicken for Summer grilling with friends!

Pompeian - Street Food 2.JPG

Pompeian has been keeping me stocked with their range of olive oils and vinegars for the last few years, and I love using their robust olive oil for marinades.  To lighten things up for Summer, their organic extra virgin olive oil spray is perfect to spritz over salads like the one accompanying my chicken.  A beautiful light flavor and very handy to have on hand.

Ingredients

Lemon Oregano Chicken:
1/4 cup Pompeian Robust Extra Virgin Olive Oil.
2-3 teaspoons kosher salt
2 teaspoons ground black pepper
2 tablespoons dried Greek oregano
Zest and juice and 1 lemon
4 cloves garlic, crushed and minced
6-8 chicken thighs (or any dark meat)
1 lemon, halved

Peri-peri Fries:
6-8 medium starchy potatoes, scrubbed
Pompeian Organic Extra Virgin Olive Oil Spray
2 teaspoons kosher salt
2 teaspoons garlic powder
1 teaspoon peri peri chili powder
1 teaspoon dried oregano
Optional to serve: Shredded lettuce, cubed feta, diced tomato, diced cucumber, pickled red onion and lemon wedges.

Method:
Whisk olive oil, salt, pepper, oregano, lemon zest, lemon juice and garlic in a shallow dish and add chicken pieces. Use your hands to massage the marinade into the chicken, cover and place in the refrigerator overnight. 

Preheat your covered grill to 350F.

Prepare potatoes by slicing them into wedges and adding to a cast iron skillet or baking sheet. Spray with olive oil and add spices. Toss to coat and place on the grill with the chicken and halved lemons. Cook chicken and potatoes for 15-20 minutes or until the internal temperature of the chicken registers 160F. Remove from heat and place in a bowl, squeeze grilled lemon juices over and cover until ready to serve. 

Serves 6-8

Seasoned Potatoes.JPG

This recipe is sponsored by Pompeian. Thank you for supporting the brands that support The Daley Plate. 

Honey Garlic Gochujang Chicken with Cabbage

Gochujang is one of those condiments that will forever have a place in my fridge. I first experienced that earthy spice in 2005 as part of a traditional South Korean dish called "Dalkgalbi" - Chicken and cabbage cooked on a hot plate with rice cake and a fiery mix containing mostly garlic and gochujang.  Since it was during my first year in South Korea, my untrained palate rejected the meal and that in turn offended my hosts. Ever wish you could go back in time and redo a certain event? Ever write a blog post at two in the morning and suddenly recall all the cultural mishaps you've had during the last 10 years? No? Moving on.

Succulence. 

Succulence. 

Dalkgalbi grew on me and later became my absolute favorite thing to eat during that stint in South Korea. It was the ultimate dinner to enjoy with friends after a night out, soju in hand (a Korean spirit made from rice or sweet potatoes). The combination of chicken, gochujang and garlic with cabbage stuck with me and inspired this healthy recipe. Earthy gochujang, honey and what seems like a ridiculous amount of garlic come together to form a beautifully sweet spicy sauce. In my opnion, white meat cuts like chicken breast pairs very well with punchy sauces to amp up the flavor levels. I usually purchase whole chickens and then prep them myself, using dark meat for things like stew or roasting, and white meat (breasts) for quicker preparations. The trick with white meat is to season it very well and allow it to sit in the fridge uncovered overnight. This method will ensure that the meat is seasoned all the way through, keep it juicy and dry out the skin so that you can achieve that perfect crispy sear.

Ingredients:

2 chicken breasts, skin on
2 teaspoons salt
1 teaspoon ground pepper
1 teaspoon garlic powder
1 teaspoon onion powder
2 tablespoons grapeseed oil
6 cloves garlic, finely diced
1 tablespoon gochujang
4 tablespoons honey
1 tablespoon sesame seeds

Method:

Preheat oven to 350F/180C. 

Place chicken on a plate and season on both sides with salt, pepper, garlic and onion powder. Place on the lowest shelf in your fridge, uncovered for at least 6 hours. Remove from fridge and bring a skillet up to medium-high heat. Add grapeseed oil and place chicken in pan skin side down first. Do not move the chicken at all for at least 3-5 minutes so that you get a crispy golden skin, after which you will flip it over and cook for an additional 3 minutes, then transfer to an oven-proof dish and into the oven for 8-10 minutes or until the internal temperature reaches 165F.  

While the chicken is in the oven, prepare your sauce by adding the minced garlic to the pan in which the chicken cooked. You should still have some of the pan juices and oil in there, which will provide delicious flavor. Sauté garlic for 1-2 minutes only - You don't want it to soften too much. Add gochujang paste and honey, stirring until combined. Simmer for 5 minutes and remove chicken from oven. Place chicken and any juices right back into the pan with the gochujang sauce, flip to coat and serve with cabbage (Recipe follows)

Basic Sauteéd Cabbage

Homegrown cabbage - Not by me, by my local organic farmer. 

Homegrown cabbage - Not by me, by my local organic farmer. 

I am super into cabbage, old-fashioned as it may be. Though cabbage really benefits from cooking for longer periods of time, my preferred way to enjoy it is simply sautéed to preserve it's integrity. Use any kind of cabbage or cruciferous vegetable of your choice. 

Ingredients:

1 tablespoon neutral oil
2 tablespoons butter
1 teaspoon salt
1 teaspoon freshly ground black pepper (cabbage loves black pepper!)
8 cups roughly chopped cabbage
Optional: 1 pinch nutmeg powder (brings out the flavor)

Method:

Heat a large pan to medium then add oil, butter, salt and pepper. Swirl to combine and add chopped cabbage. Use tongs to move cabbage around in the pan, coating it with the butter mixture then leave it be. Allow the cabbage at the bottom of the pan to toast a little (golden edges, not dark brown) - This will make all the difference in flavor. Stir, add a splash (2 tablespoons) water, then place a lid on the pan and cook until the toughest parts are less chewy (5 minutes). 

final.JPG

Smoked Sausage Potato Soup

This soup is a spin on the Portuguese Caldo Verde, but with the addition of saffron and smoked paprika instead. The recipe was a happy experiment and one that I've made quite a few times since, even though I have a slight aversion to cooking the same meal twice. The appeal of blistered potatoes in a deeply flavorful broth just can't be denied. 
I use smoked andouille sausage but please feel free to substitute chorizo or any other smoked sausage. Saffron is optional but it gives the potatoes a lovely golden glow and the broth a wonderful aroma. I was fortunate to receive quite a bit from friend recently and well, the rest is history.

Sausage Soup 2.JPG

Ingredients:

2tbsp extra-virgin olive oil
1lb smoked sausage, sliced (chorizo, andouille etc.)
1 medium yellow onion, finely diced
4 cloves garlic, minced
2tsp smoked paprika
1tsp red pepper flakes
6 medium potatoes, peeled + diced
8 cups chicken stock (Buy it or make it - The stronger in flavor the better)
Pinch of saffron (totally optional)
4 cups kale, spinach or collards

Method:

Heat olive oil in a large pot over medium heat. Add sausage and brown (3-5 minutes). The sausage will release some flavored oil during that process. Add onion, garlic, paprika + red pepper to the pot and sauté for 5 minutes until fragrant.

Add potatoes, stock & saffron. Lower heat and simmer until potatoes are very tender. Use the back of a fork to smash some of the potatoes against the side of the pot - This will thicken the soup & provide a creamier texture.

Add greens and simmer for 5 minutes more then serve.

I like to set some of the browned sausage aside in the beginning and add to the soup afterwards for crispy texture. I do not add extra salt as the stock and sausage is quite salty on their own, but please season to your taste afterwards.
Alternatively, sauté in the Instant Pot then add everything else & cook on high pressure for 8 minutes. Don’t skip mashing of some of the potatoes.

Sausage Soup.JPG